.avif)
.avif)
Discover the latest updates for Retable, designed to elevate your experience to new heights! 🚀 Thanks to your insightful feedback and our innovative spirit, we've introduced some amazing new features. 🤩 Let's dive in and explore them together! 🌟
Table of contents
- Duration column type
- Aligning cell content to the left/right and center
- Table sync
- New filters for calendar column
- Friendly date format
- URL creation with formula column
- Real-time update for Insert/Update/Delete row actions via API
Duration column type
Retable's duration column type enhances your ability to manage and track time easily. Our duration column type is a specialized number field that automatically formats numbers as durations. Whether you're tracking project timelines, logging hours, or managing deadlines, this feature ensures your data is clear and easy to interpret.
Let's see how it works!
- Add a new column and select the "duration" type
- Select your duration format from the "Format" field on the Customize column screen. For example; If you choose the hh.mm format, the numbers you add to this column will be displayed in hour and minute format. (For ex; 11.23)
- Save your column
- Type any numbers in your column and you'll see that Retable will automatically convert it to duration directly as in the format you choose.
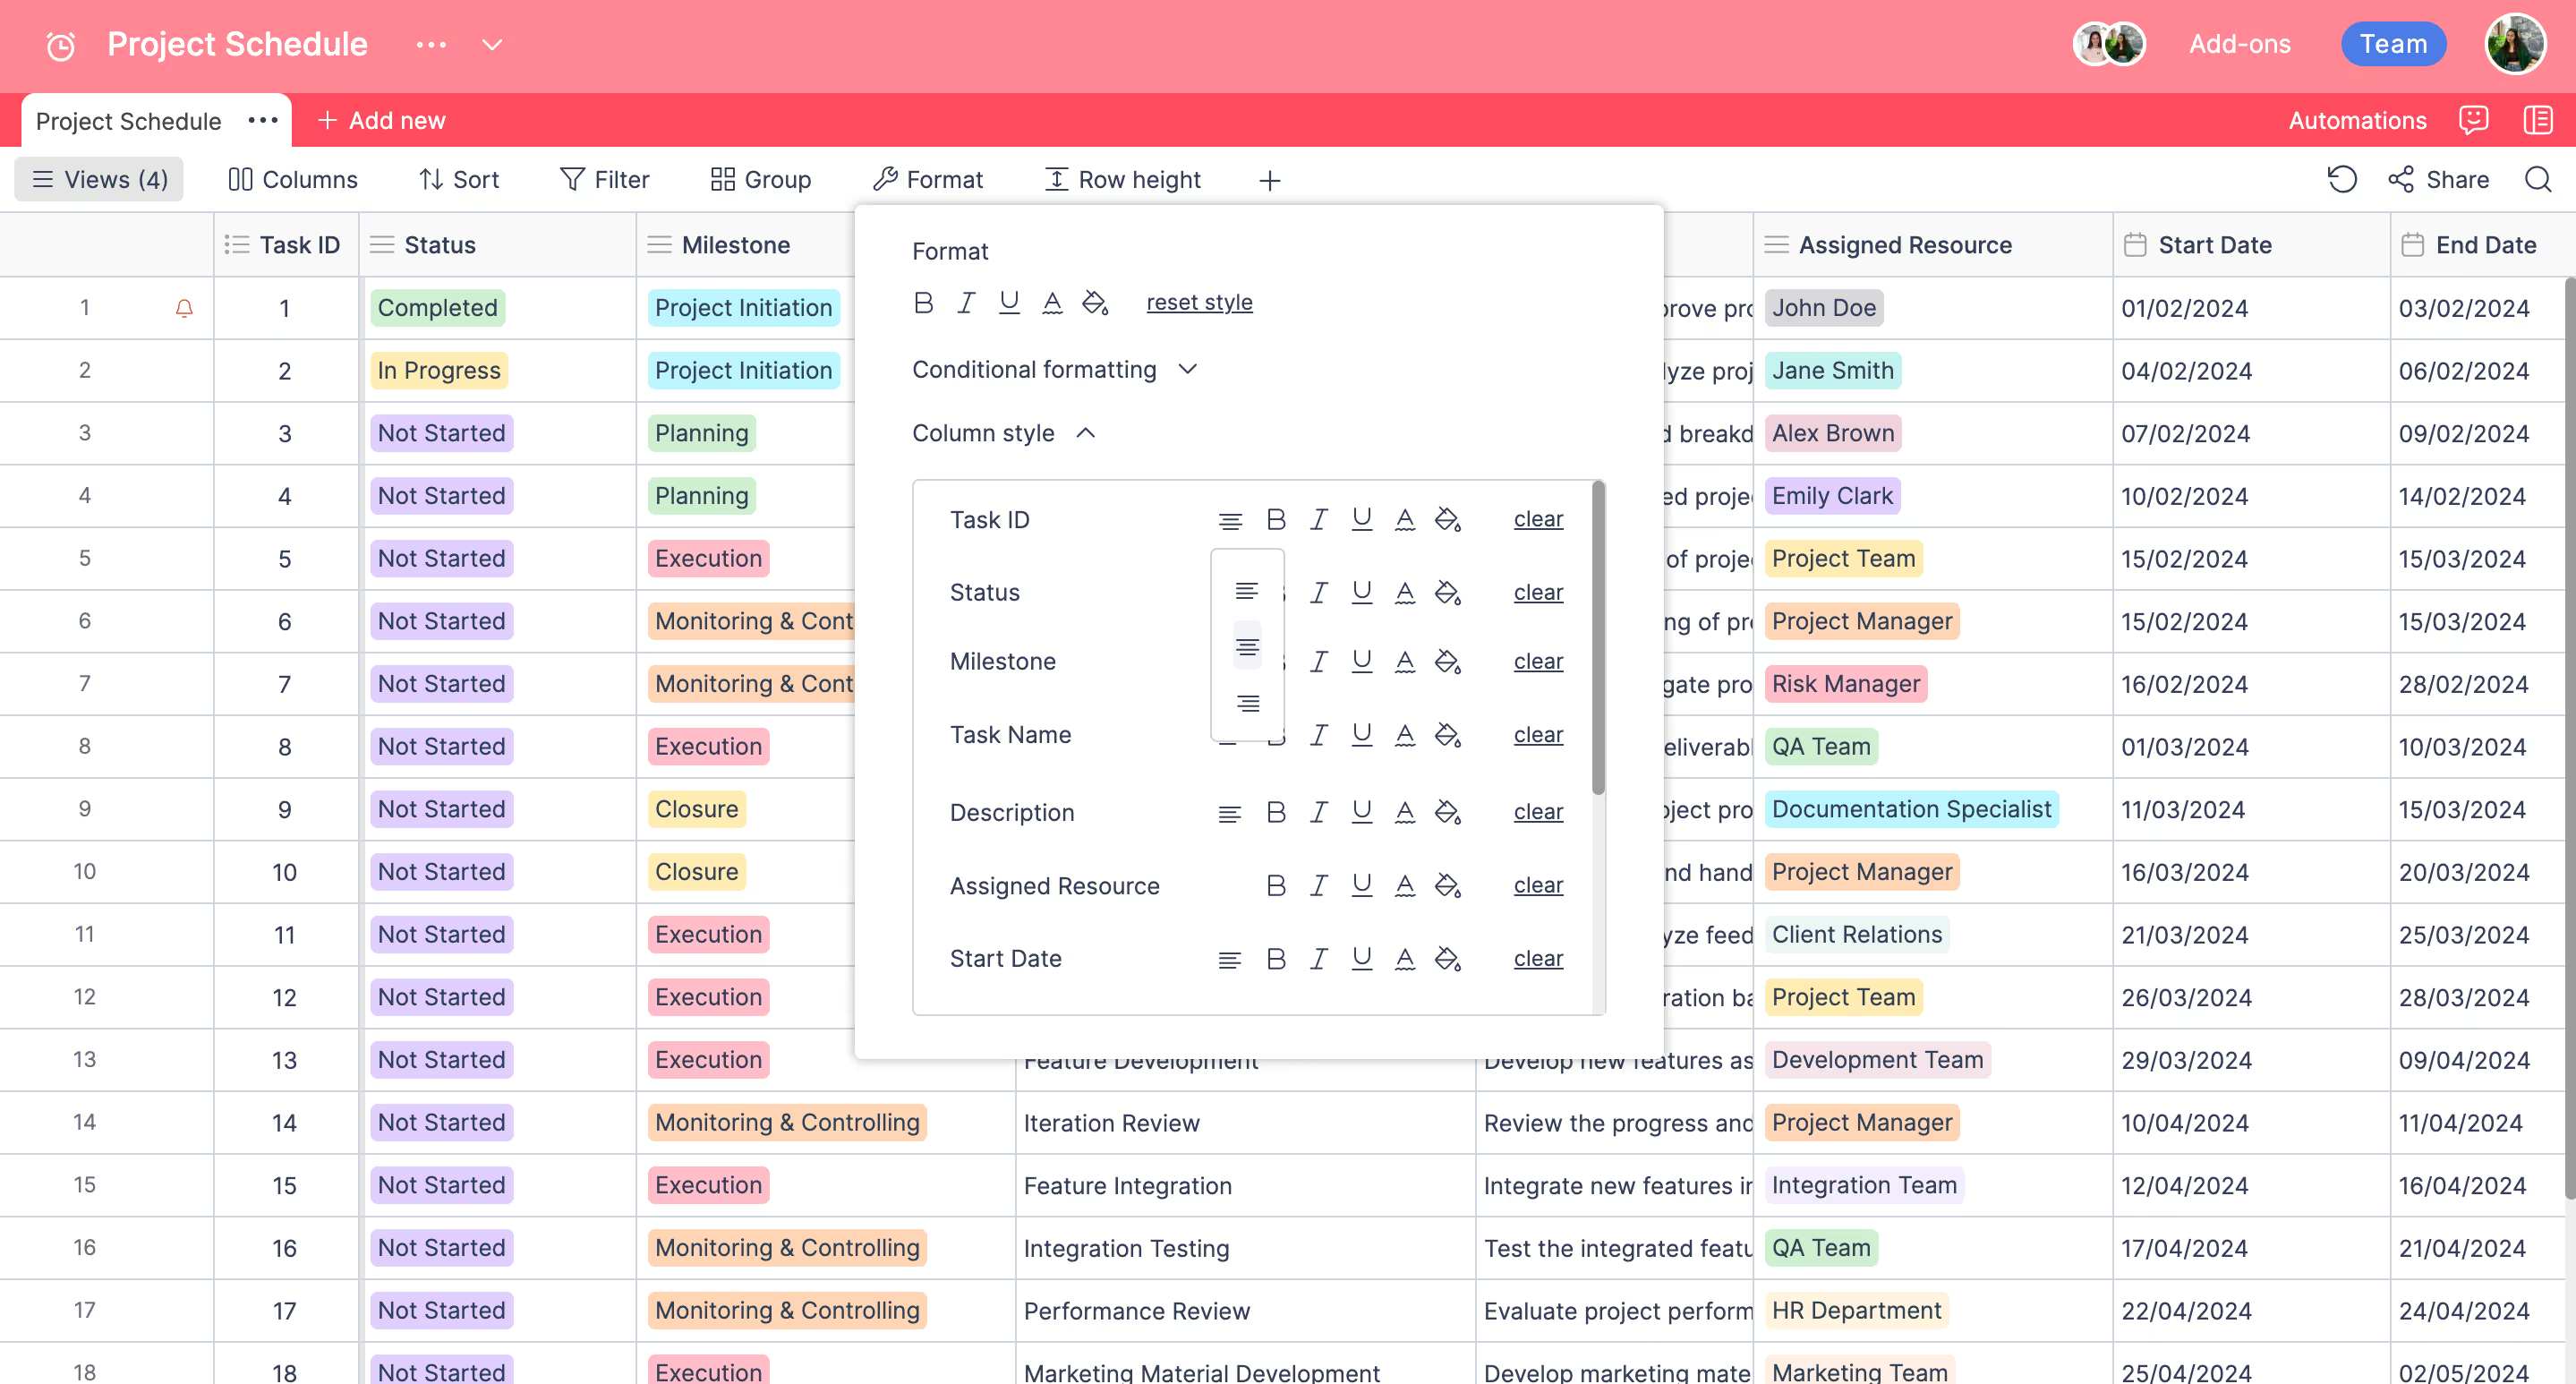
Aligning cell content to the left/right and center
Retable's new alignment feature helps you align the contents of some of your column types left, right and center.
Supported column types for this alignment are as follows;
- Text
- Number
- Calendar
- Phone number
- Percent
- Currency
- Duration
- Created time
- Last modified time
- Formula
- Rollup
- Autonumber
- Unique identifier
Let's see how it works;
- Click the "Format" button from your toolbar
- Navigate to the "Column style"
- In this area, all columns in your table will be listed, and you will see the alignment icon to which you can apply alignment. You can easily align your column left, right and center by clicking on the alignment icon.
Table sync
This feature allows tables within the same workspace, whether in different projects or in the same project, to be synchronized with each other.
To sync tables:
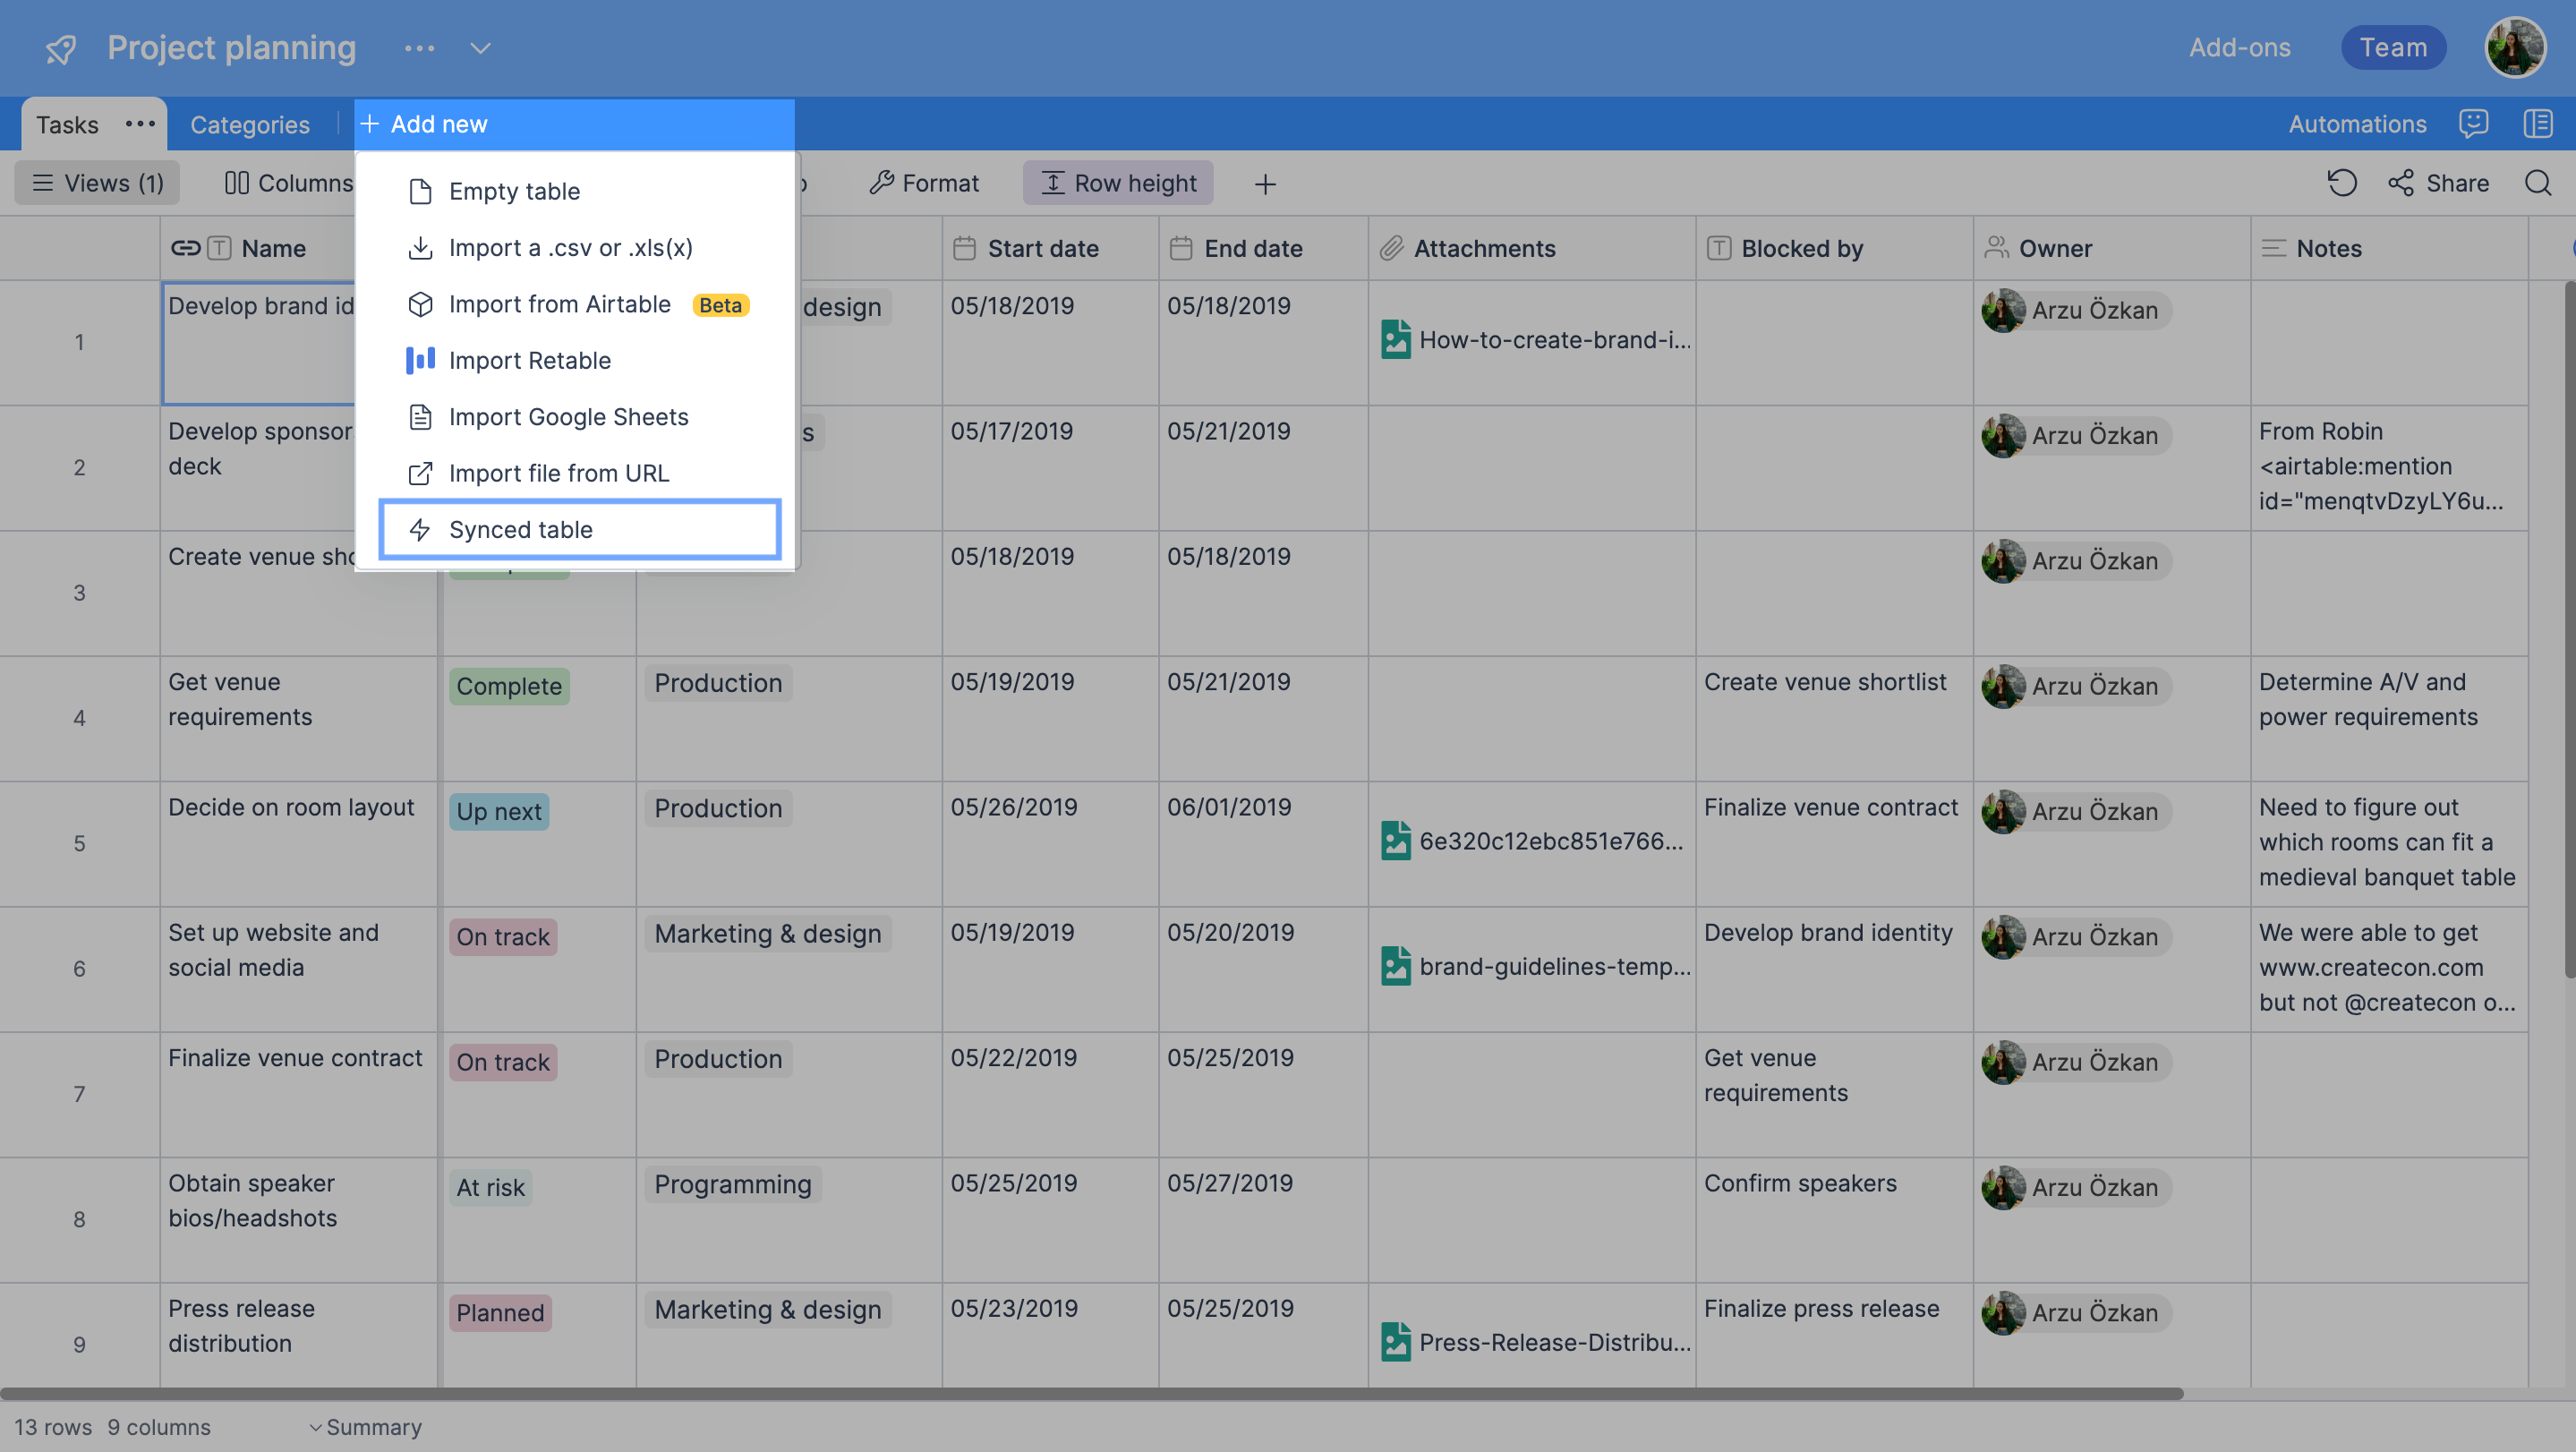
- In the "tables" section of your project, click on "add new."
- From the menu that opens, select "Synced table."
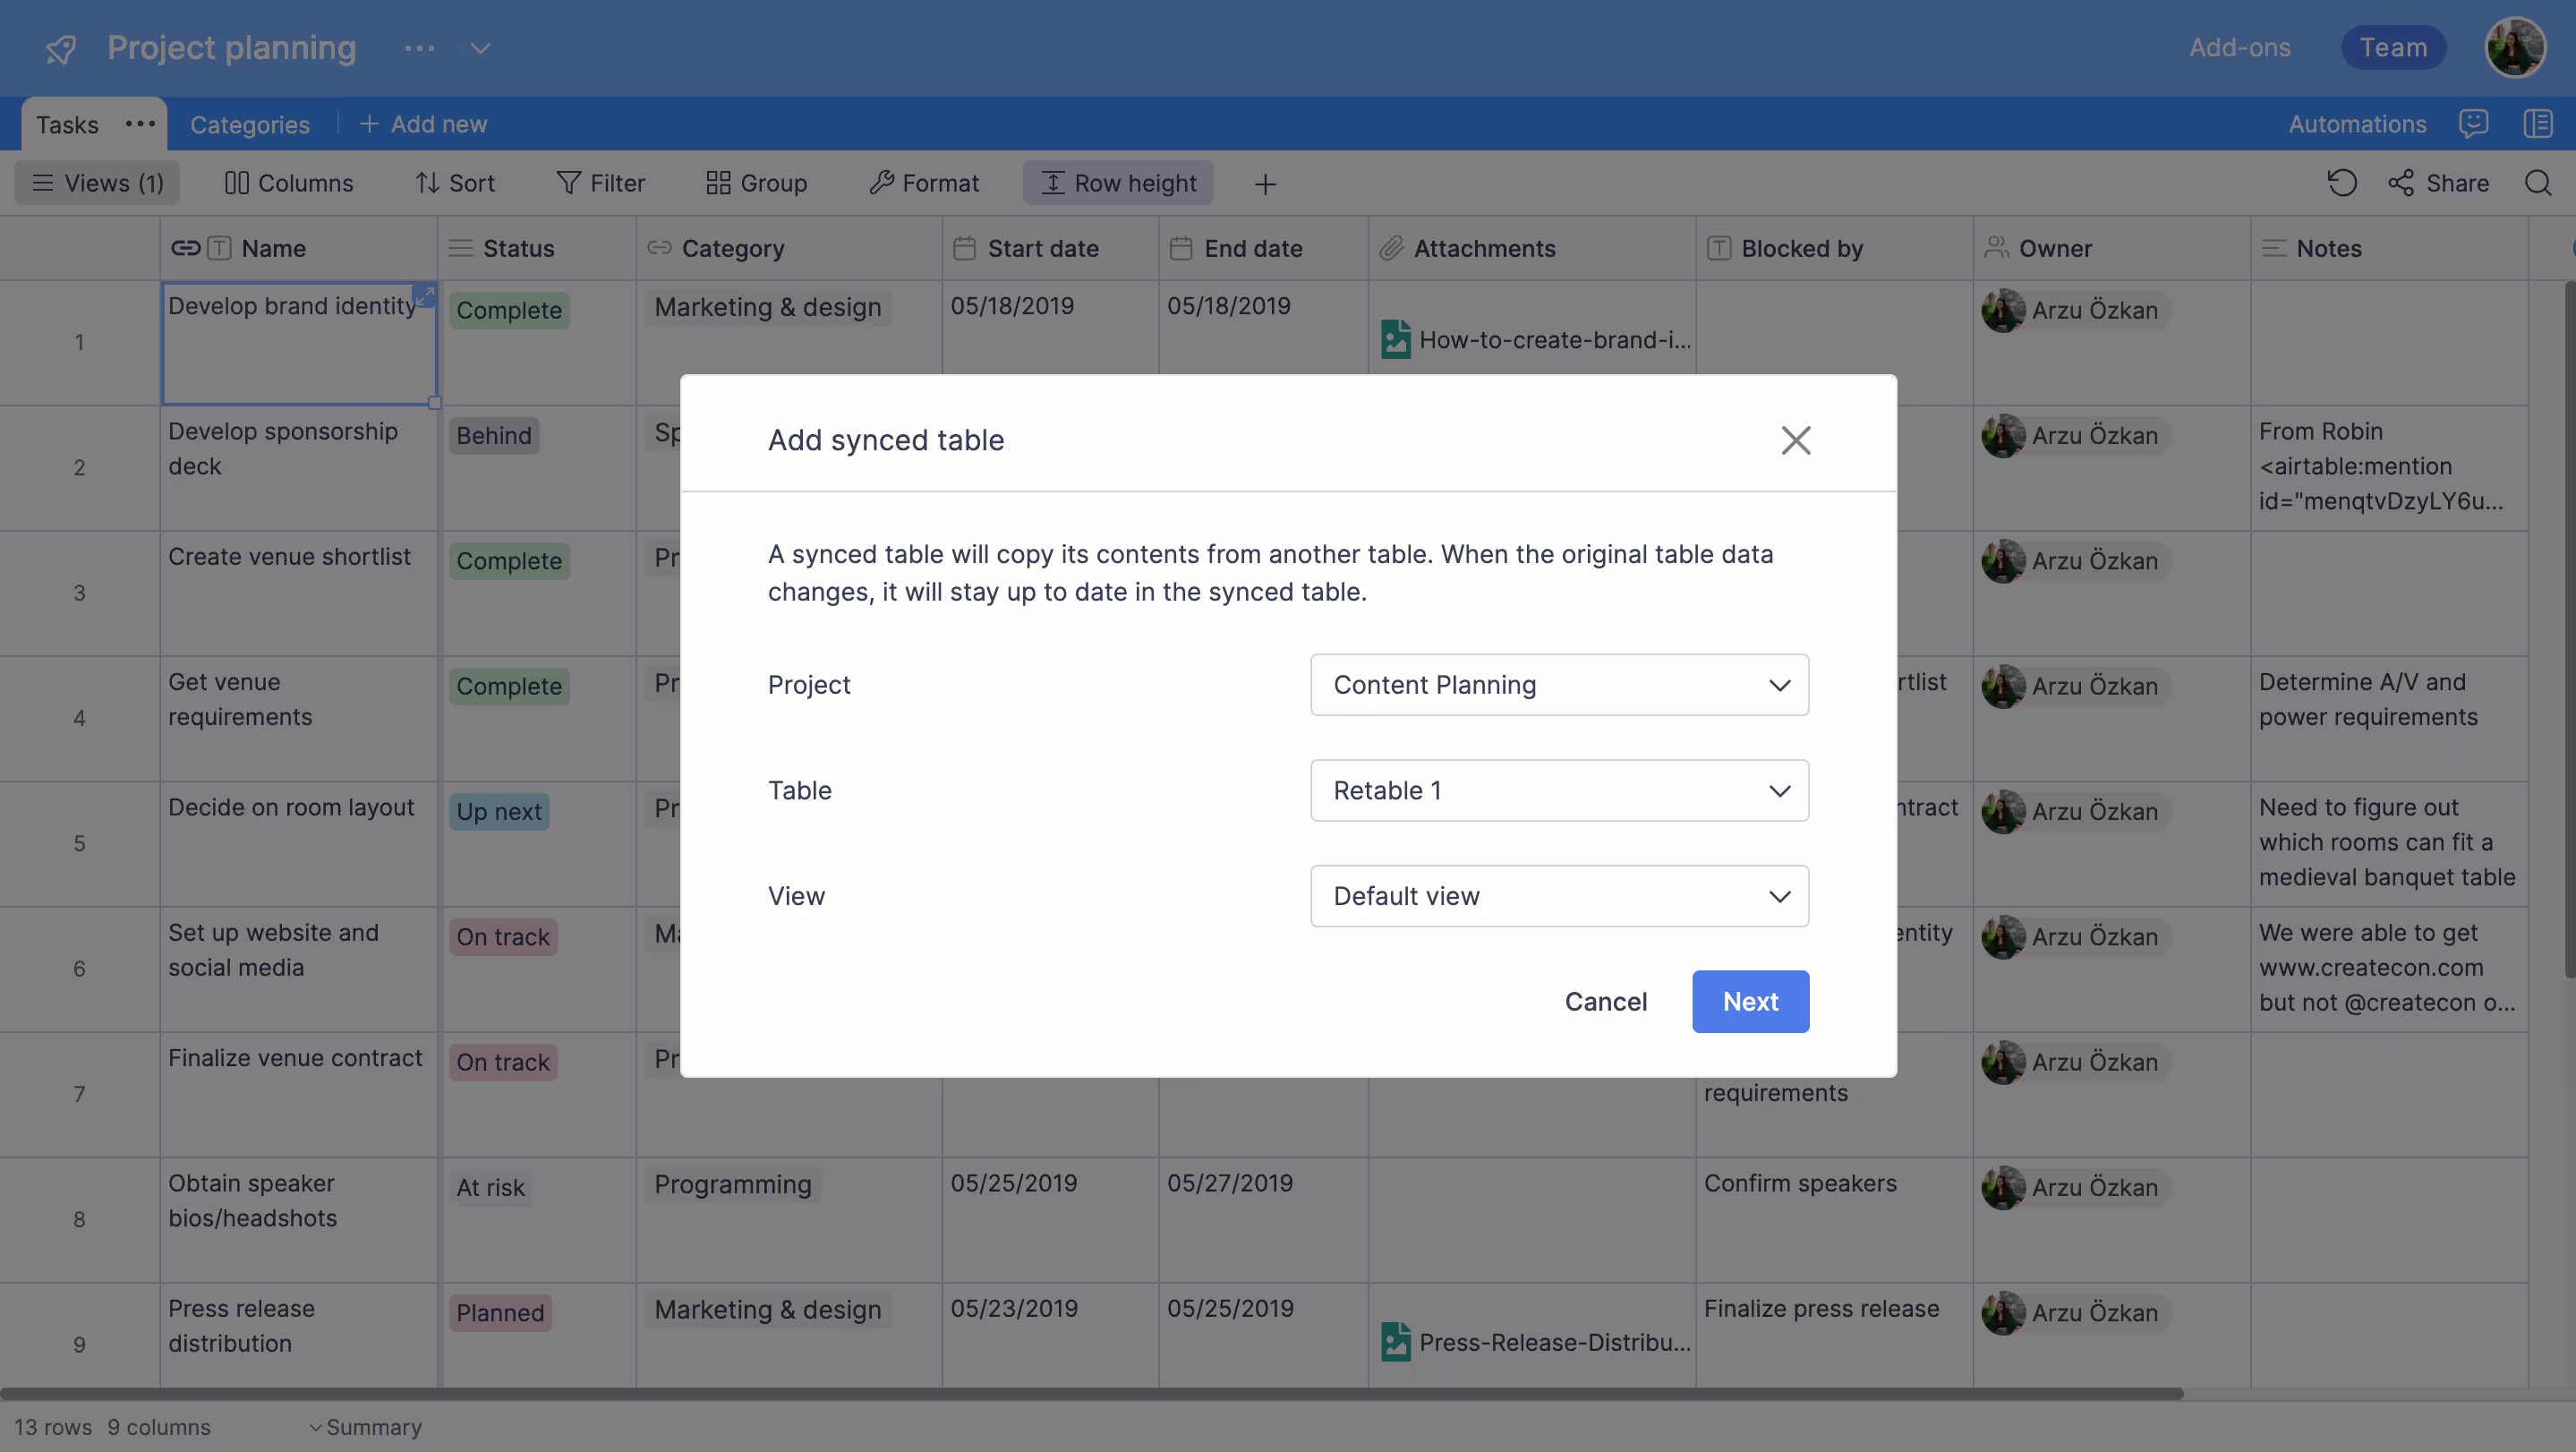
- Choose the project where the table you want to sync is located.
- Select the table you want to sync.
- Select the view you want to sync.
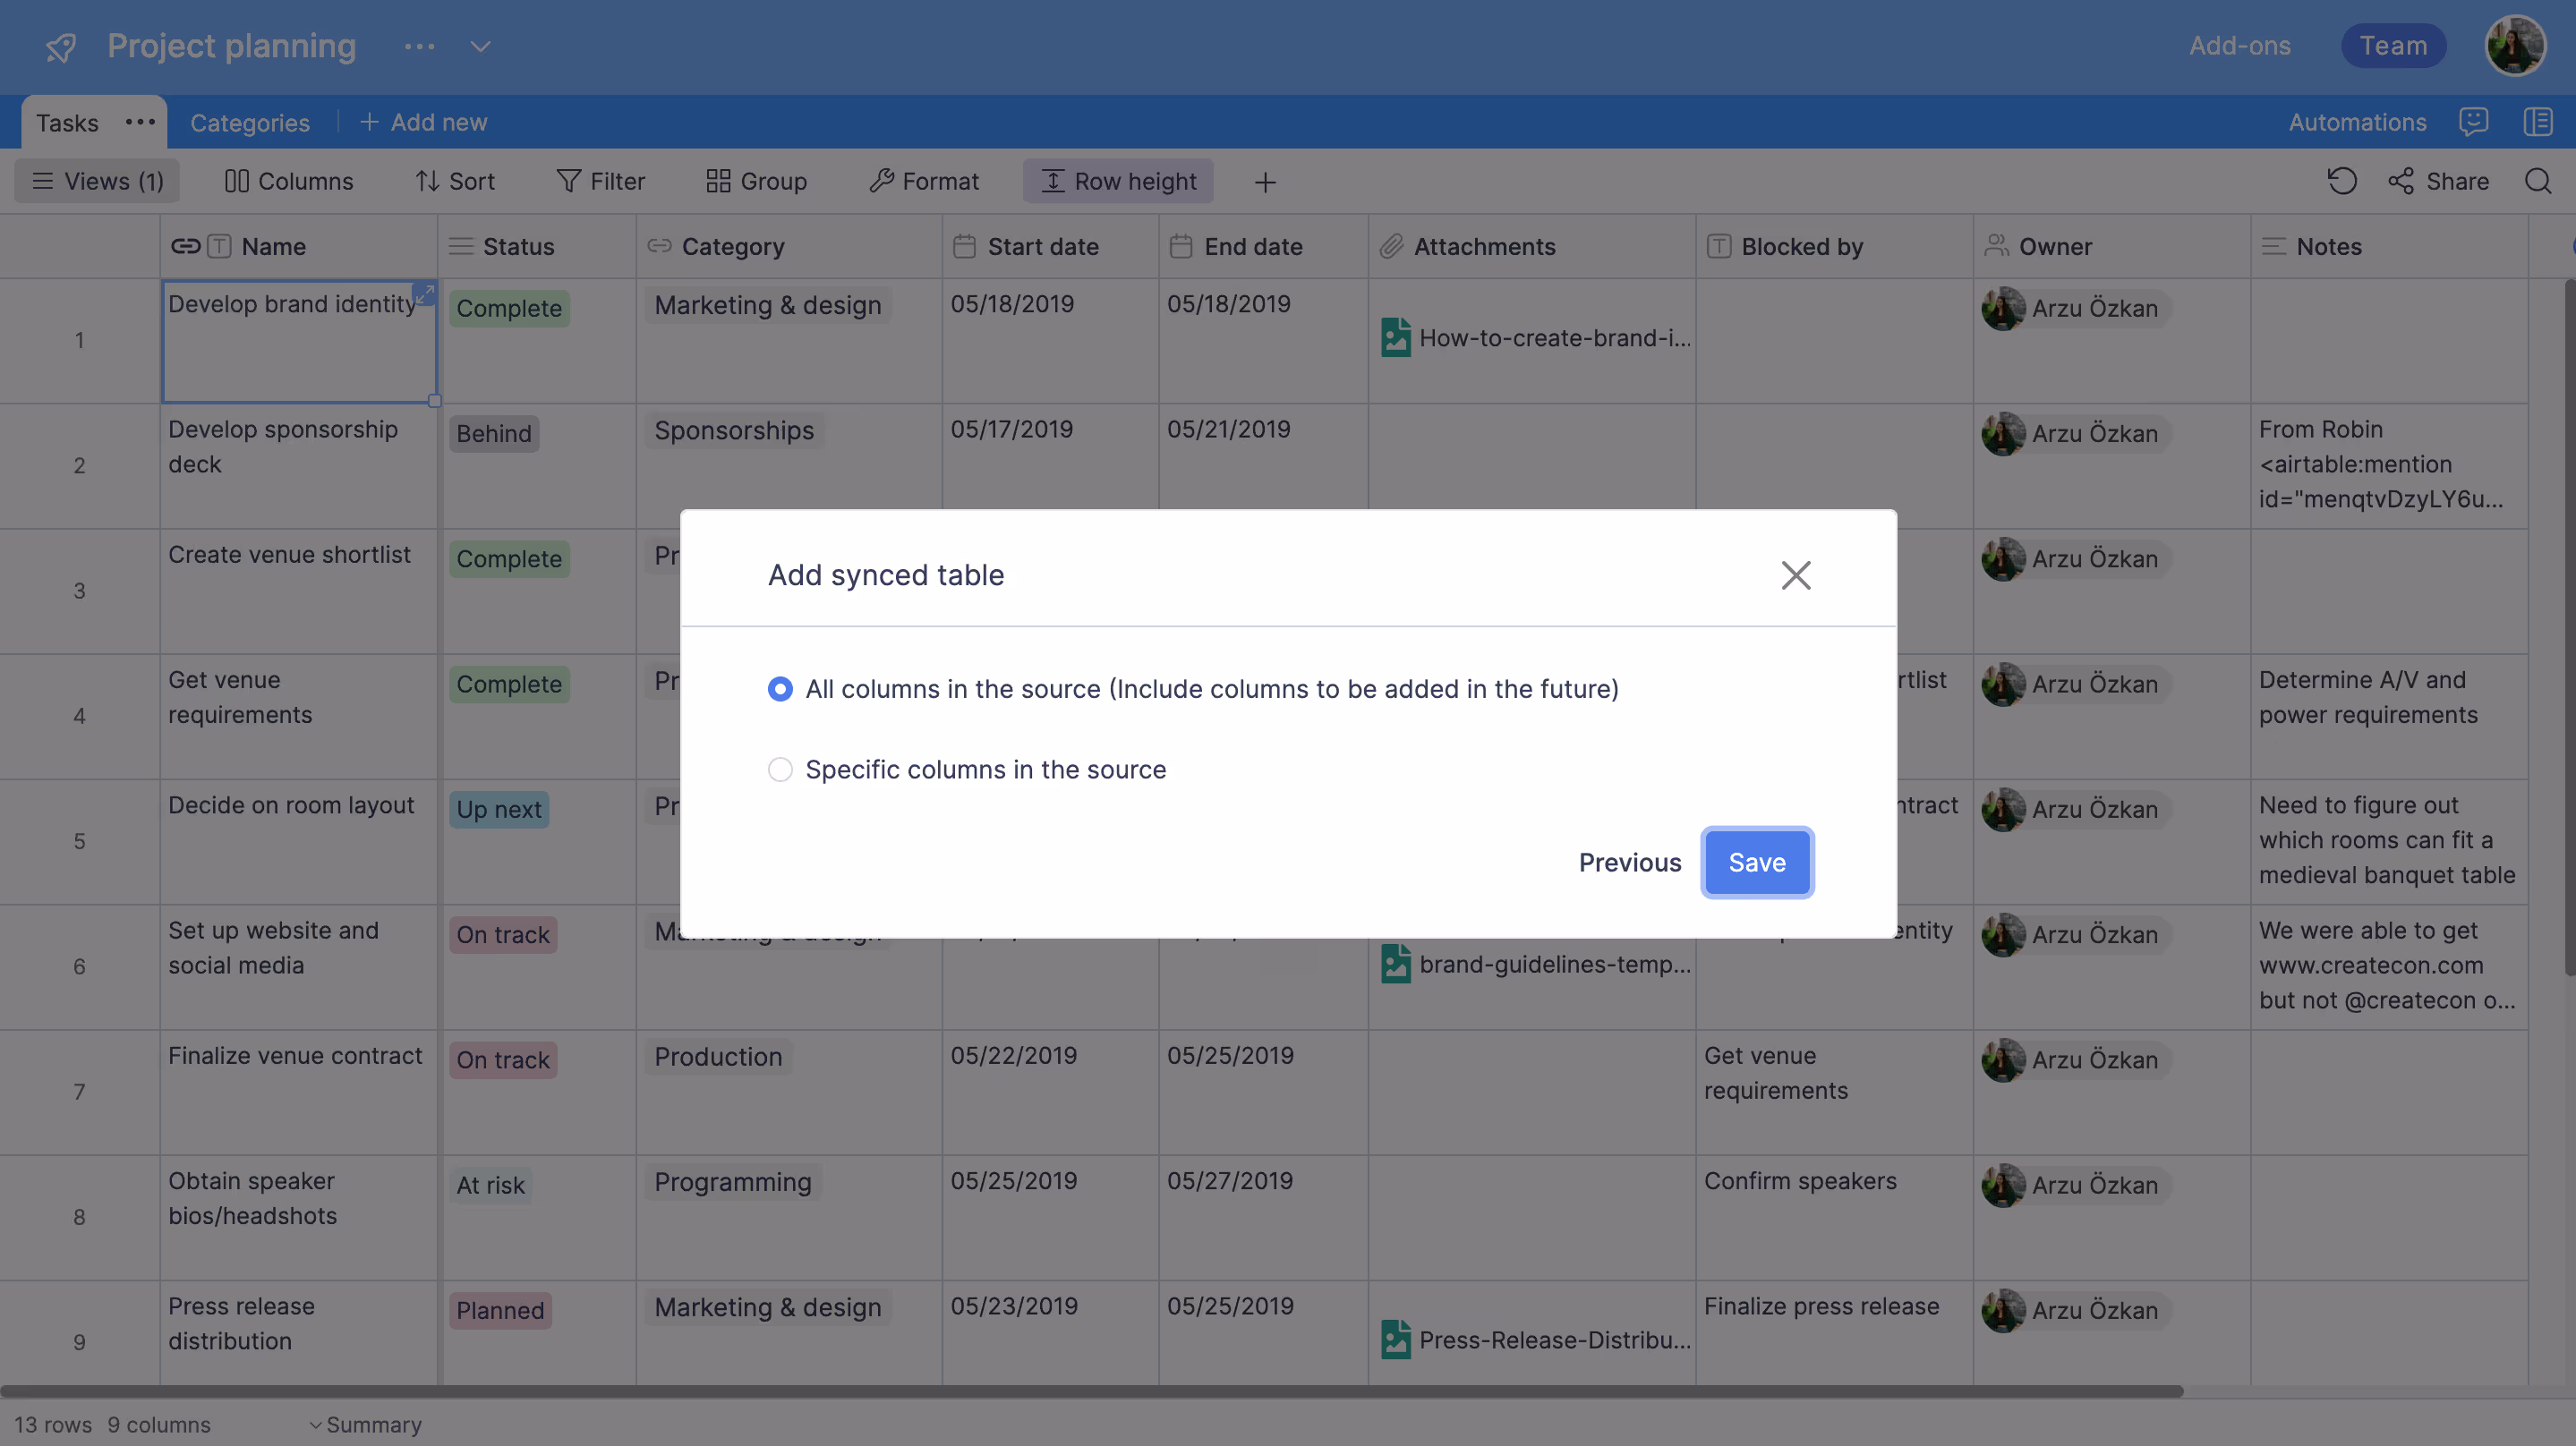
- After clicking the "Next" button, you can choose either "All columns in the source (Include columns to be added in the future)" or "Specific columns in the source," depending on your needs.
If you choose "all columns in the source (Include columns to be added in the future)," all existing columns in the table you want to sync, as well as any columns you add later, will automatically be synchronized.
If you choose "Specific columns in the source," a list of columns from the table you want to sync will appear, and you can select the columns you wish to sync.
Remember, in both options, every new data added to the synced columns will also be synchronized to your current table.
- After making your choice, click the "Save" button.
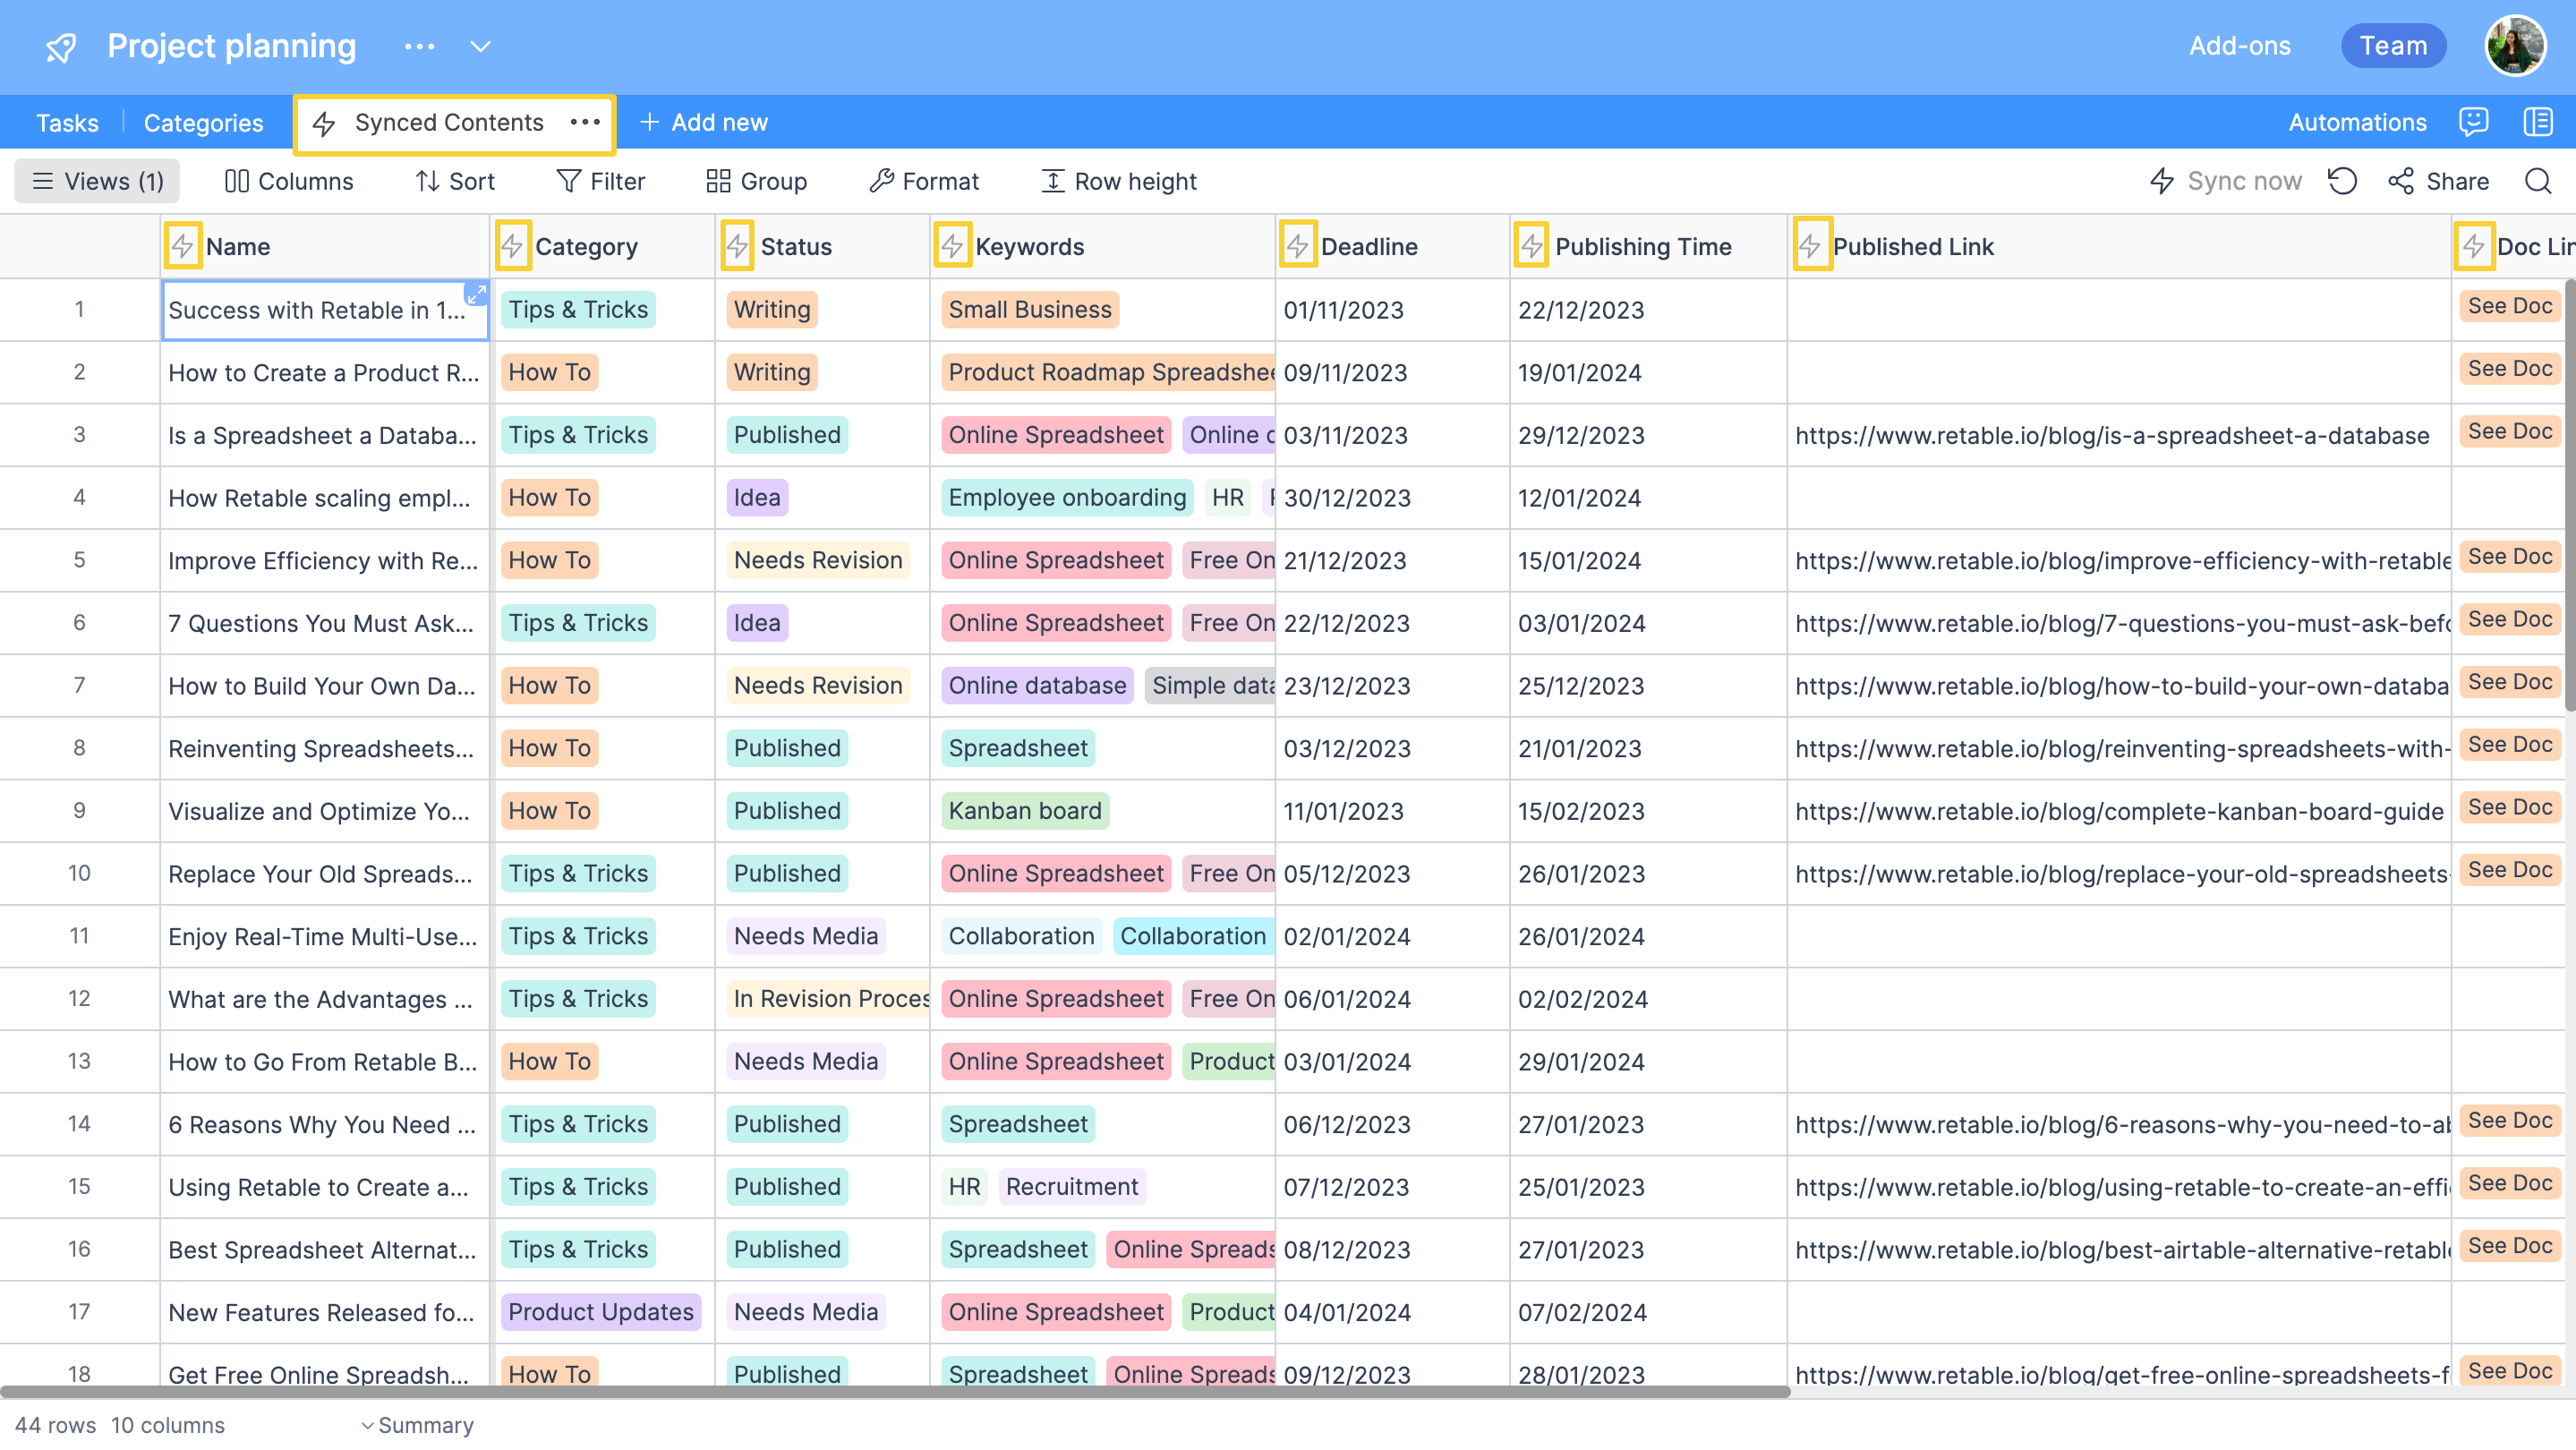
The table you add as a synced table will be created as a new table within your project and will reflect any changes made to the source table.
You cannot make data changes to a table added to your project as a synced table; you can only modify its data from the source table. Essentially, this feature works like a lookup and shows you the data from your reference synced table.
In summary, a synced table will copy its contents from another table. When the original table data changes, it will stay up to date in the synced table.
New filters for calendar column
With this new feature in Retable, you can apply more advanced filters to your calendar columns. Here are the new filtering options added for calendar columns:

- Yesterday: Filters records entered as yesterday in the calendar column, based on the current date.
- Today: Filters records entered as today in the calendar column, based on the current date.
- Tomorrow: Filters records entered as tomorrow in the calendar column, based on the current date.
- Last week: Filters records entered as last week in the calendar column, based on the current date.
- This week: Filters records entered as this week in the calendar column, based on the current date.
- Next week: Filters records entered as next week in the calendar column, based on the current date.
- Last month: Filters records entered as last month in the calendar column, based on the current date.
- This month: Filters records entered as this month in the calendar column, based on the current date.
- Next month: Filters records entered as next month in the calendar column, based on the current date.
- This quarter: Filters records entered as this quarter in the calendar column, based on the current date.
Friendly date format
We have added the "Friendly date" format as another date format option to our calendar column. The friendly date format displays dates as "May 06, 2024."
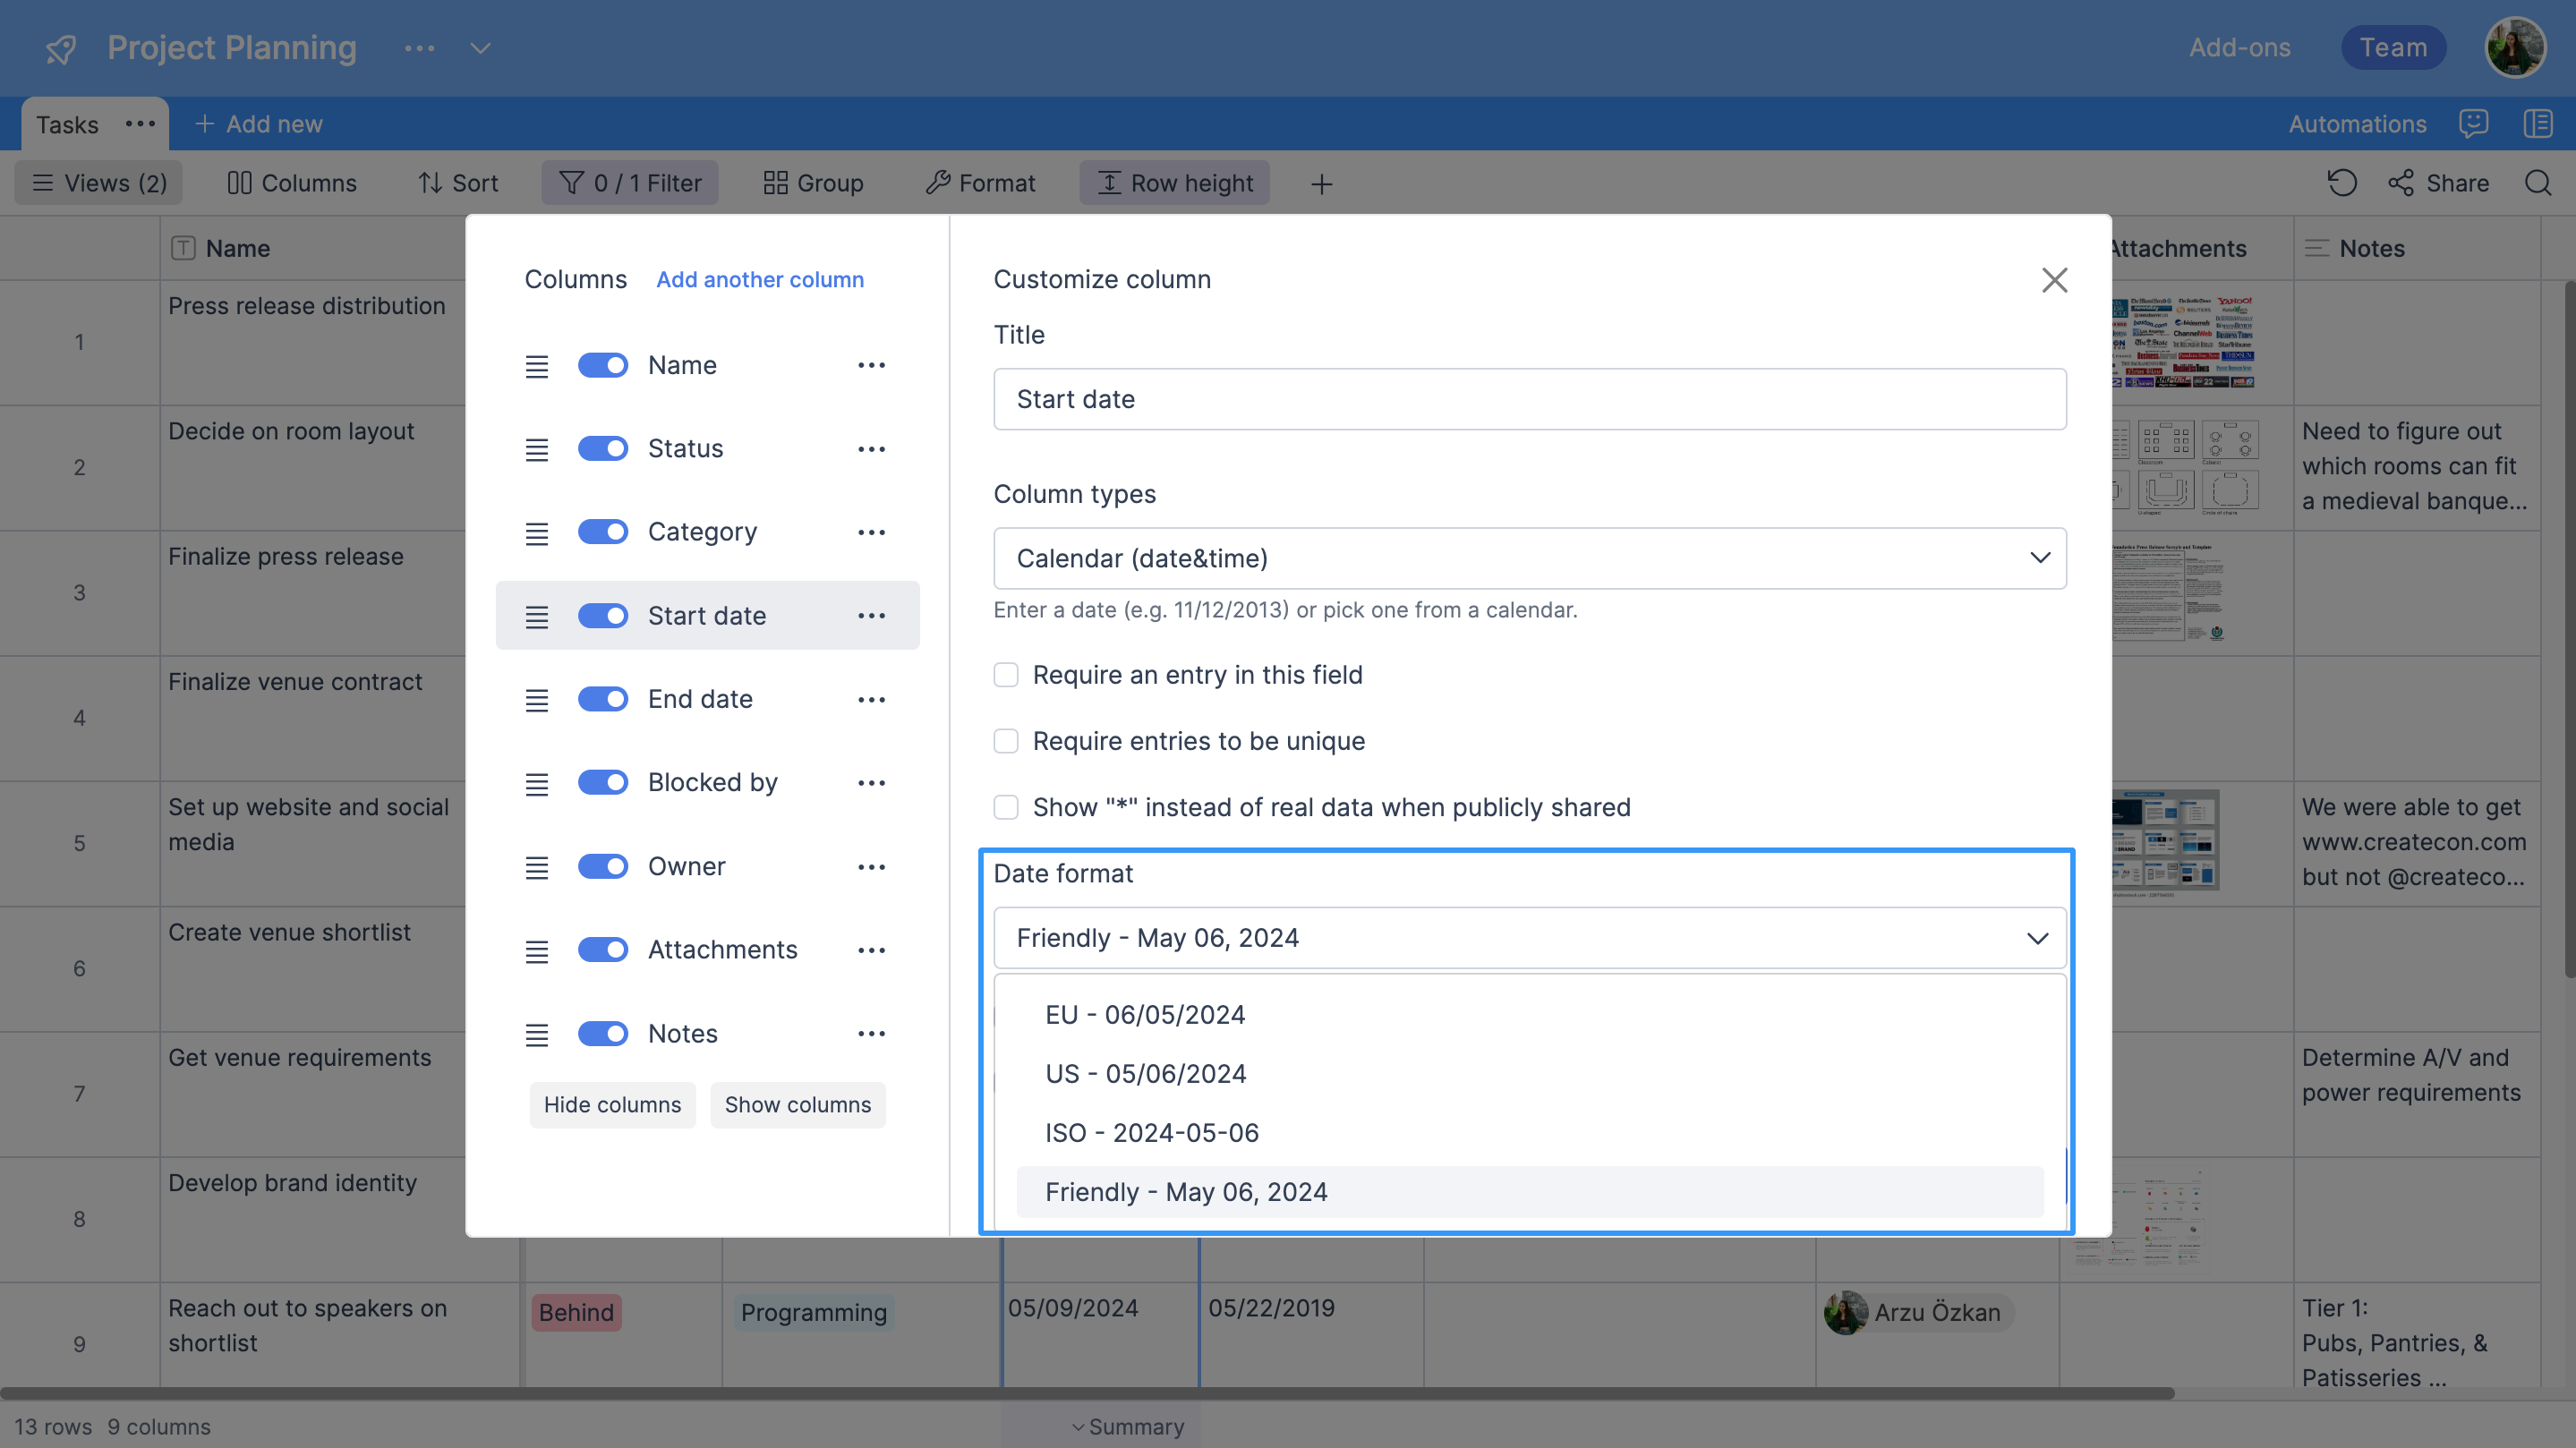
You can easily set your date format to "Friendly" from the customize column area of your calendar column, allowing you to view all date entries in this format.
URL creation with formula column
Thanks to this new feature, you can use the CONCATENATE formula in the formula column to combine data from multiple columns to create a URL, and you can generate these URLs as clickable links within the formula column.
.gif)
Real-time update for Insert/Update/Delete row actions via API
Previously, when you sent any data to your Retable tables via the API, you had to refresh your table for this data to be reflected in your Retable tables. With this development, the data sent via the API in insert/update/delete row operations is now instantly reflected in your Retable tables.
If you're curious about the previous product updates check them out below! 👇🏻
more
Related Resources
.png)

.avif)
Create your smart data management solution
Plan, track, and analyse with your ease. Transform your data with an all-in-one platform, collaborate with your teammates.
Try for free!