Unveil the latest updates for Retable, crafted to elevate your experience to new heights! 🚀 Thanks to your invaluable feedback and our innovative drive, we've introduced some fantastic new features. 🤩 Let's dive in and explore them together! 🌟
Table of contents
- URL access protection addon
- Strikethrough option for the rich-text editor
- Auto-formatting when converting the text column to the calendar column
- Using column names in API connections
- "Find Pin" button for the geolocation column
- Adding a pin to the geolocation column via right-click
- Zoom-in with the double left-click on the map view
- "Disable the clustering" feature for the map view
- More visible column IDs
- Public API - Arrangement of column orders
- Public API - Updating cells with null values
URL access protection addon
We're thrilled to introduce the most secure way to manage your data access. 🚀
With Retable's URL access protection addon, you can add a secure password-protection mechanism to your projects, views and forms.
.avif)
The URL access protection addon helps you to easily set passwords for your public projects, views and forms. This way, only people who have your password can access your publicly shared data and forms.
Once applied, this addon will be available for the project you're in. You can move your addon to different projects and workspaces as you wish.
.gif)
Follow these steps to protect your views or projects with a password 👇🏻
- In your dashboard, click on "Addon" from the menu on the left side.
- From the addon management screen that appears, select the "URL access protection" addon.
- Choose the workspace and project where you want to apply the addon (you can move it to another project later if needed).
- Complete the payment steps.
- Go to the project where you chose to apply the addon.
- Select the view or form you want to share as password-protected. If desired, you can share the entire project as password-protected.
- If you want to share a view or form as password-protected, click the "Share" button at the top right of the view.
- Activate the "Create link to view" toggle.
- Then, activate the "Restrict by password" toggle.
- In the password pop-up that appears, set a password. This password should not be the same as your Retable account password and must be at least 4 characters long.
- Save your password.
- You are now ready to share your public link! Anyone with the public link will need to enter the password you set to access the data in the view or form.
You can follow the same steps to share your entire project as password-protected. Simply go to the "Sharing settings" menu in your project's settings. In the "Project link" tab, you can create a public link for your project and add a password.
Strikethrough option for the rich-text editor
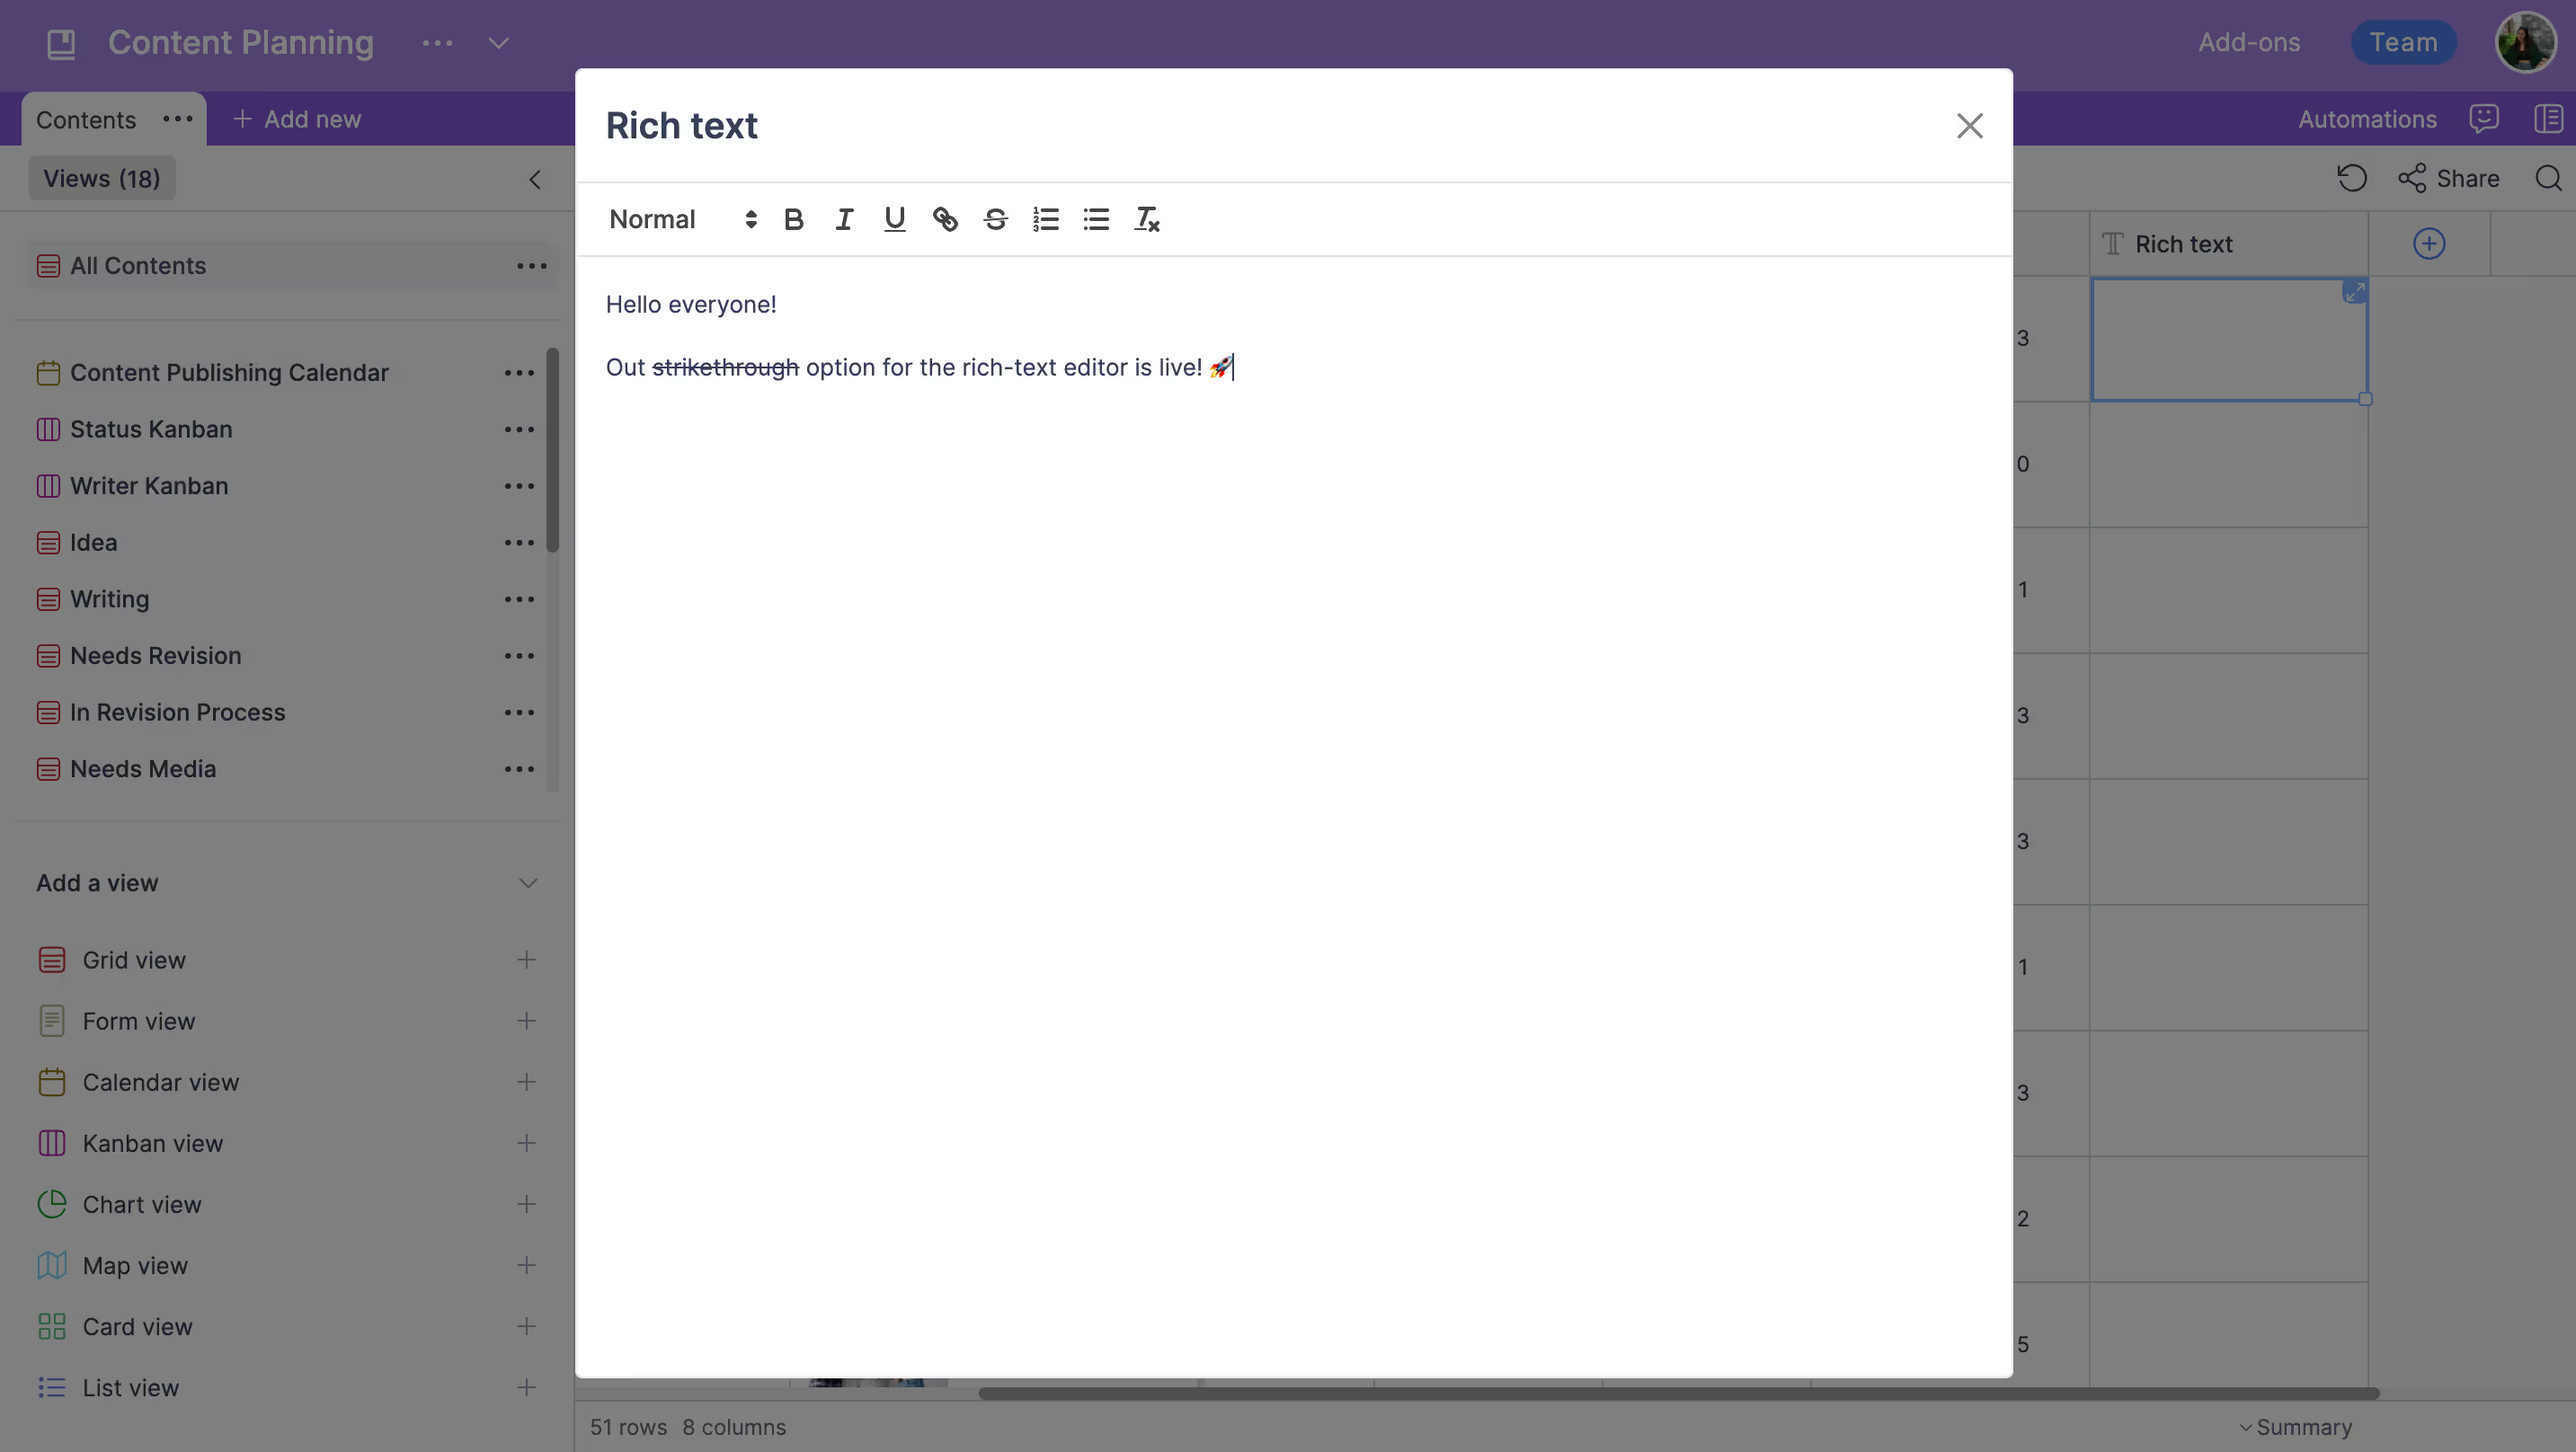
The strikethrough option is now available in your rich-text editors, allowing you to easily mark text as outdated or completed.
Auto-formatting when converting the text column to the calendar column
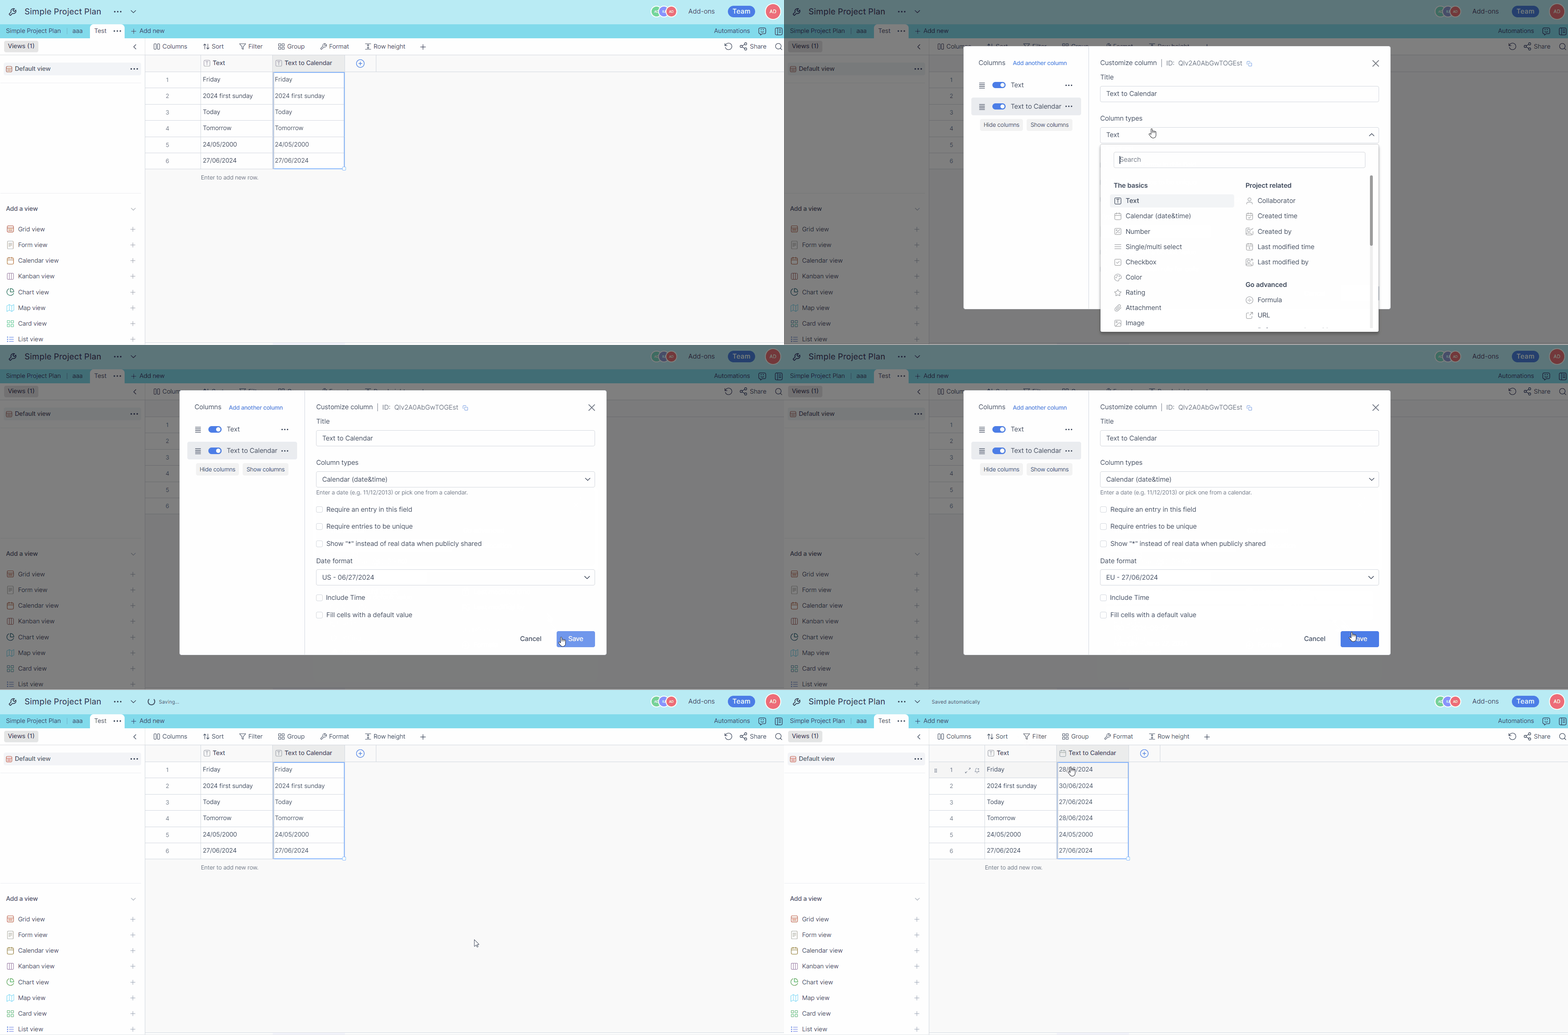
Now, when you convert your text data to a calendar column, Retable will automatically adjust these values to match your calendar format! To try out this new feature, simply convert a text column containing date entries in text format to a calendar column.
Using column names in API connections
You can now use column names instead of column IDs in your API connections for improved clarity and ease of use.
"Find Pin" button for the geolocation column
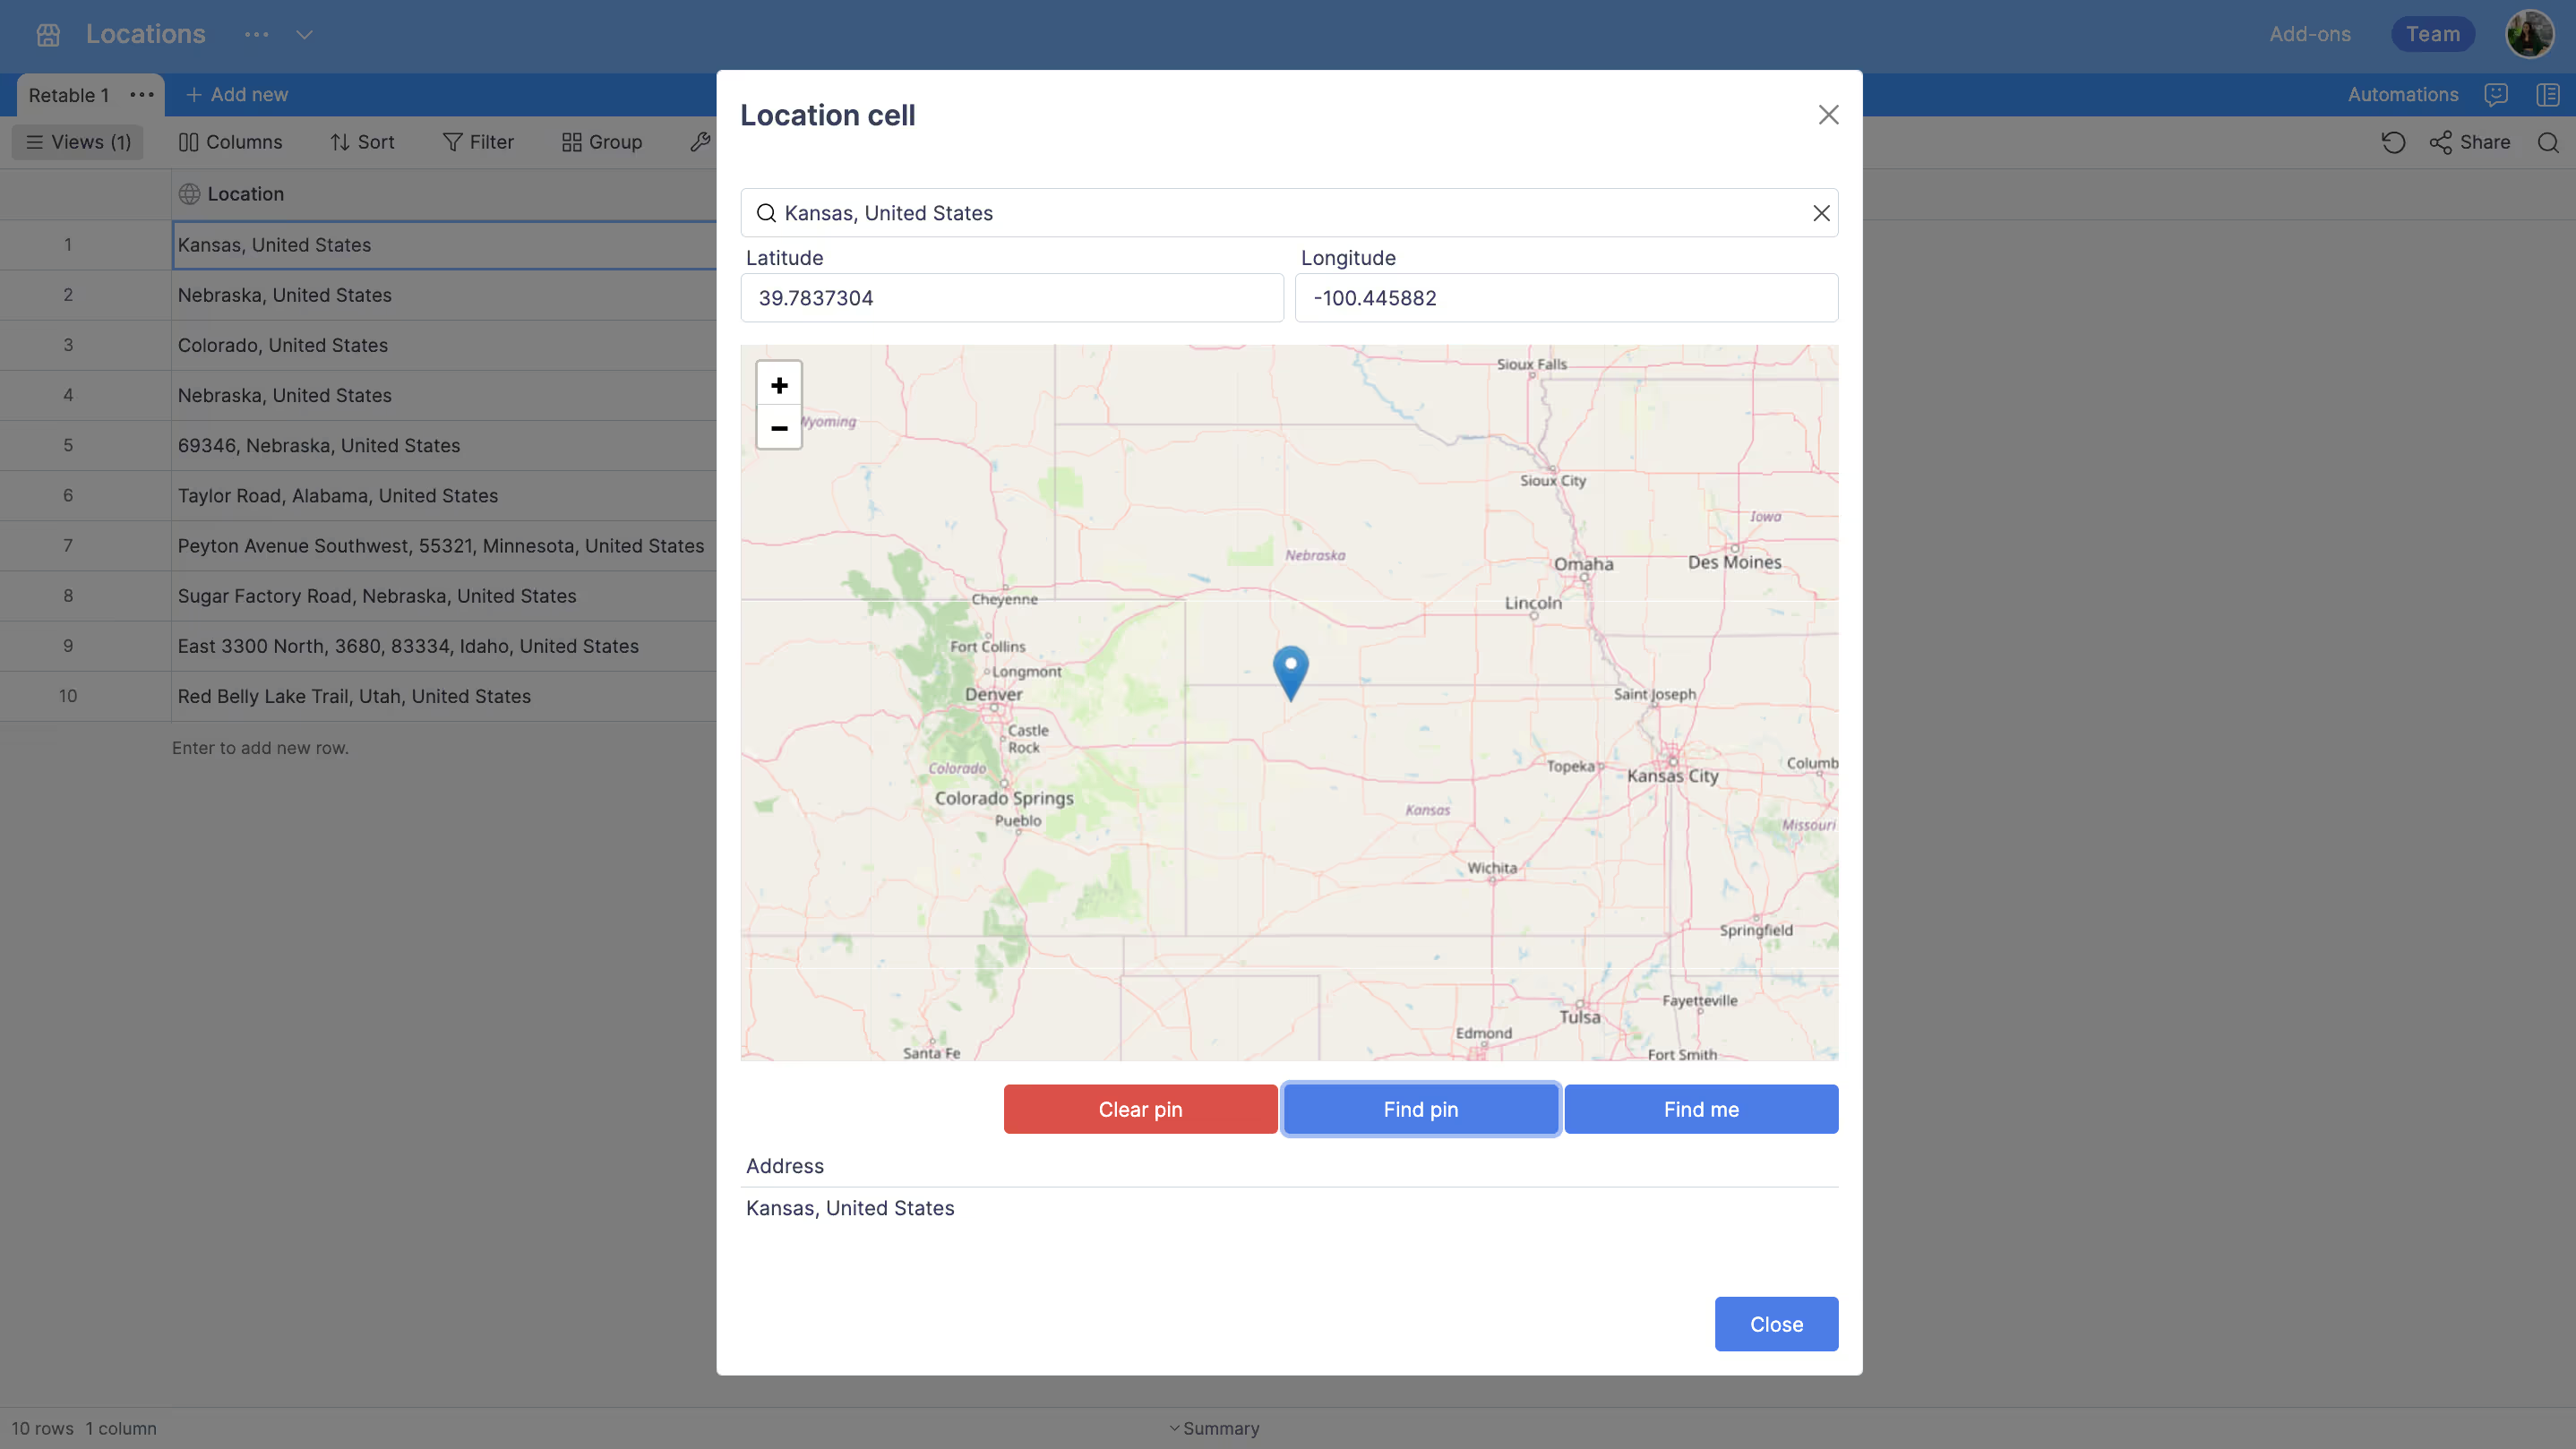
With the added "Find Pin" button in the Geolocation column, locating your pin on the map is now effortless, no matter how much you navigate around.
Adding a pin to the geolocation column via right-click
You can now easily add a pin to your Geolocation column by simply right-clicking on the map. Previously, this action required a left-click. This enhancement streamlines the process of marking specific locations, making it quicker and more intuitive to manage your geospatial data.
Zoom-in with the double left-click on the map view
You can now zoom in on the map view by simply double left-clicking. This intuitive feature allows for easier navigation and detailed exploration of specific areas on your map, enhancing your overall geospatial data management experience.
"Disable the clustering" feature for the map view
The new "Disable the Clustering" feature allows you to view individual pins on the map without automatic clustering. This provides a clearer and more precise representation of your data points, making it easier to analyze specific locations.
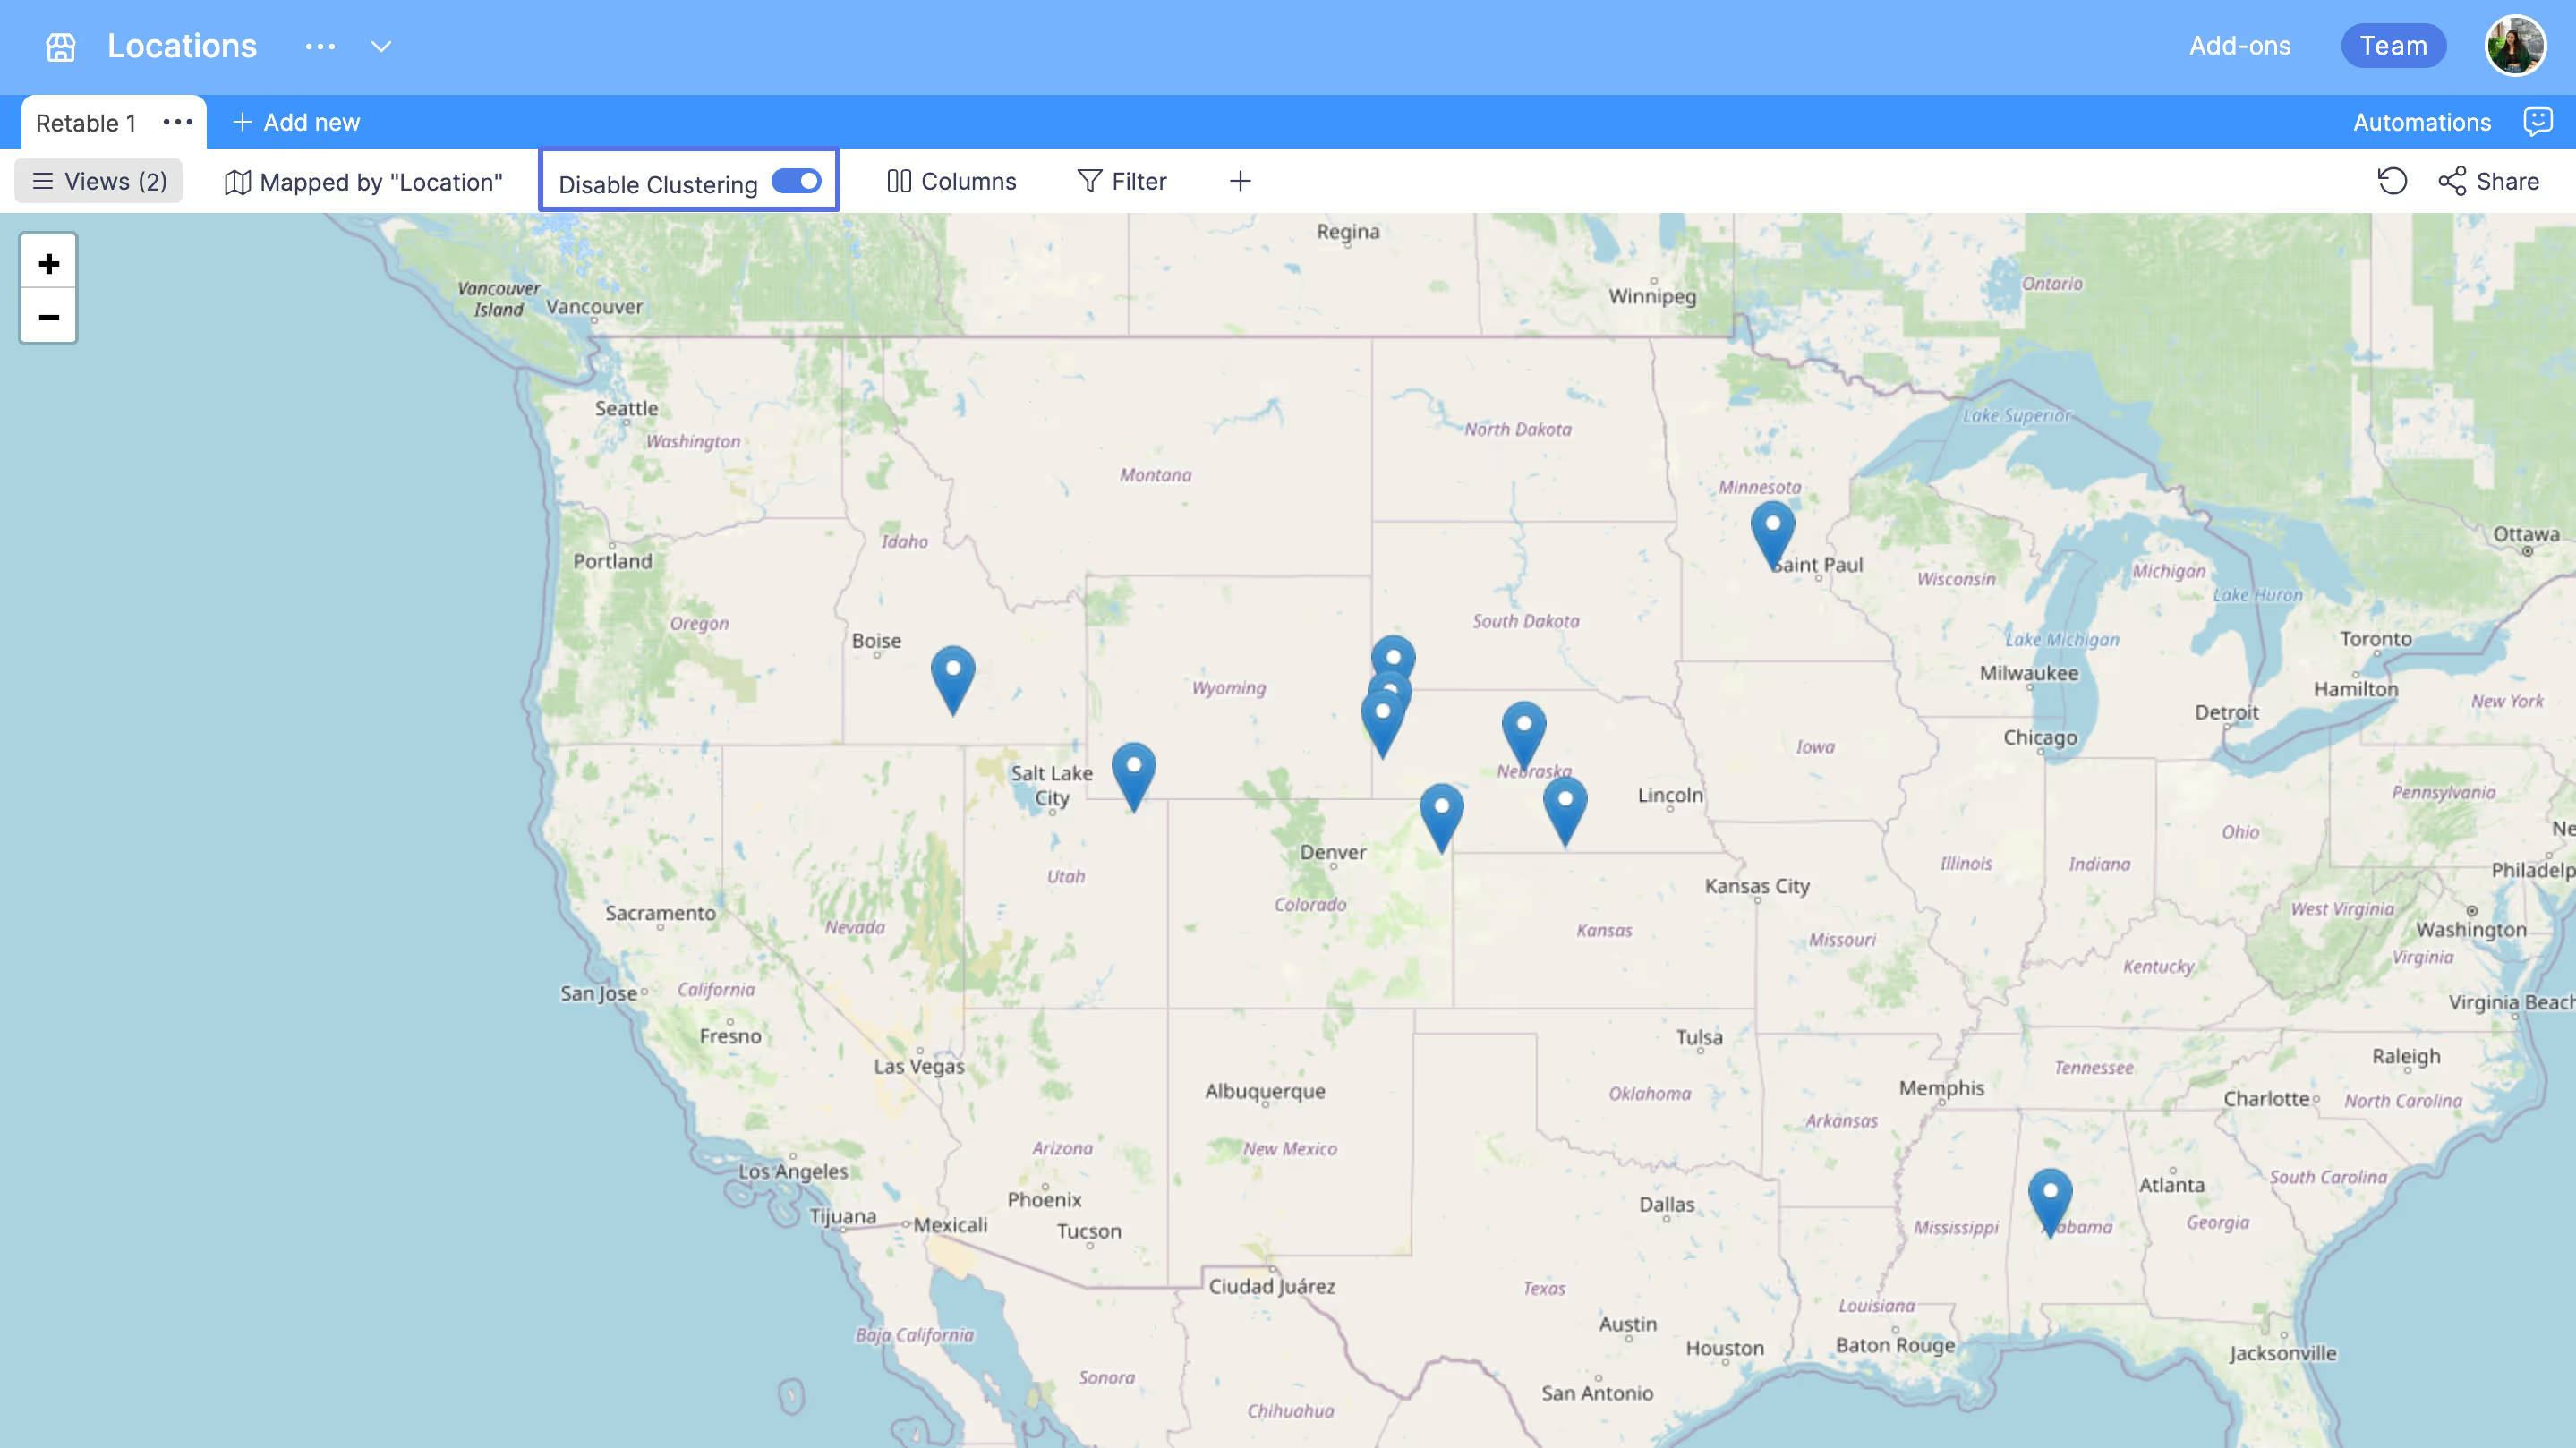
To disable the auto-clustering feature, you can activate the "Disable clustering" toggle in the toolbar of your map view.
More visible column IDs
Column IDs are now available in the customize column area. You can easily view and copy the IDs of your columns from the customize column screen. Simply right-click to your column and select the "customize column" option. At the top of the customize column window, you'll see your column ID.
.avif)
Public API - Arrangement of column orders
The column orders in the public API will now match the column order in your grid view, instead of appearing randomly as they did before.
Public API - Updating cells with null values
Previously, it was not possible to insert or update cells with null values using the API. Now, you can enter null values, and these will be displayed as null in your data.
.avif)
If you're curious about the previous product updates check them out below! 👇🏻
more
Related Resources
Create your smart data management solution
Plan, track, and analyse with your ease. Transform your data with an all-in-one platform, collaborate with your teammates.
Try for free!
.avif)
.avif)
.png)

.avif)