What's new in Retable - February 2024
Greetings! We're excited to unveil the newest additions to Retable's feature lineup for February 2024. Get ready to immerse yourself in our latest and greatest improvements. Let's embark on a journey through these amazing updates together. We're keen to hear what you think!
The newest batch of Retable updates is here, targeting the enhancement and enrichment of your experience. We've taken your cherished feedback and blended it with our imaginative spirit to forge exceptional features. We're committed to ensuring your voyage with us is smooth sailing. Excited to discover these updates with us? 🎉✨
Table of contents
- Import base from Airtable to Retable
- Import table from Airtable to Retable
- Hide the toolbar for public views
- Project ID card
- Reducing redirect to URL time
- Print views and export views as PDF/PNG
- Customize the form thank you message
- Adjust the form question orders by drag & drop
- Manage the "enable editing responses" option
- Get Retable column ID
- Naming new tables via pop-up
Import base from Airtable to Retable
We're excited to announce a seamless new way to transfer your data from Airtable to Retable. With our new "Import from Airtable" feature, migrating your Airtable bases into Retable has never been easier. Forget the hassle of third-party integrations; now, you can move your Airtable bases directly into Retable with just a few clicks.
Start enjoying a straightforward Airtable to Retable migration experience by following the simple steps below:
- Access your Airtable personal access token: First, log in to your Airtable account to obtain your personal access token.
- Navigate to Retable: Head over to your Retable dashboard.
- Initiate a new Retable project: Click the "Add project" button located at the top right of the workspace where you wish to import your Airtable base.
- Choose import option: In the pop-up window, select the "Import from Airtable" option.
- Enter your Airtable personal access token: Input your Airtable personal access token on the Retable import screen and click the "Next" button to continue.
- Select your Airtable base: Choose the specific Airtable base you want to import into Retable.
- Finalize Import: After making all your selections, hit the "Import" button. The import duration will vary based on the size of your data. An email notification will be sent upon completion. Please refresh your dashboard to see the updates.
🔗 For a step-by-step guide, visit our quick guide.
Import table from Airtable to Retable
Retable's Airtable table import feature offers you the flexibility to import specific tables from Airtable into Retable, without the need to transfer your entire project. This streamlined process allows you to select only the tables you need, directly from the "Add new table" section within your Retable project.
By following the simple steps below enjoy a more tailored and efficient way to manage your data migration:
- Access your Airtable personal access token: Log into your Airtable account to obtain your personal access token.
- Navigate to Retable dashboard: Go to your project list on the Retable dashboard.
- Start a new or use an existing project: Either create a new project or select one of your existing projects in Retable.
- Add a new table: Within your project, click the "+" button on the tables bar to create a new Retable table.
- Choose import option: Select "Import from Airtable" from the menu. Then, paste your Airtable personal access token on the Retable import screen and click the "Next" to continue.
- Select your base: Choose the Airtable base that has the data you wish to import.
- Choose your table: Select the specific table you want to import from this base.
- Select your table view: Select the view of the table you wish to import.
- Finalize import: Complete your selections and click "Import." The process may take a few minutes, depending on the size of your data.
🔗 For detailed instructions, visit our quick guide.
Hide the toolbar for public views
This new feature enhances the presentation of your Retable tables when shared publicly or embedded on your website. You now have the option to hide the toolbar, offering a cleaner and more focused view of your data. This update not only streamlines the appearance of your tables but also ensures that viewers are not distracted by any actions or branding elements associated with the Retable toolbar. You can share your Retable spreadsheets with confidence, knowing that your audience sees only what you want them to see.

Project ID card
Retable's user-friendly project ID card feature is designed to make your spreadsheet experience smoother. This latest enhancement displays all the essential IDs you need for your current table, including workspace ID, project ID, table ID, and even the total number of rows. It's a game-changer for anyone looking to quickly grab the details necessary for API integrations or simply keeping track of table specifics. Now, connecting your tables to external applications is more straightforward than ever, thanks to this convenient information field.
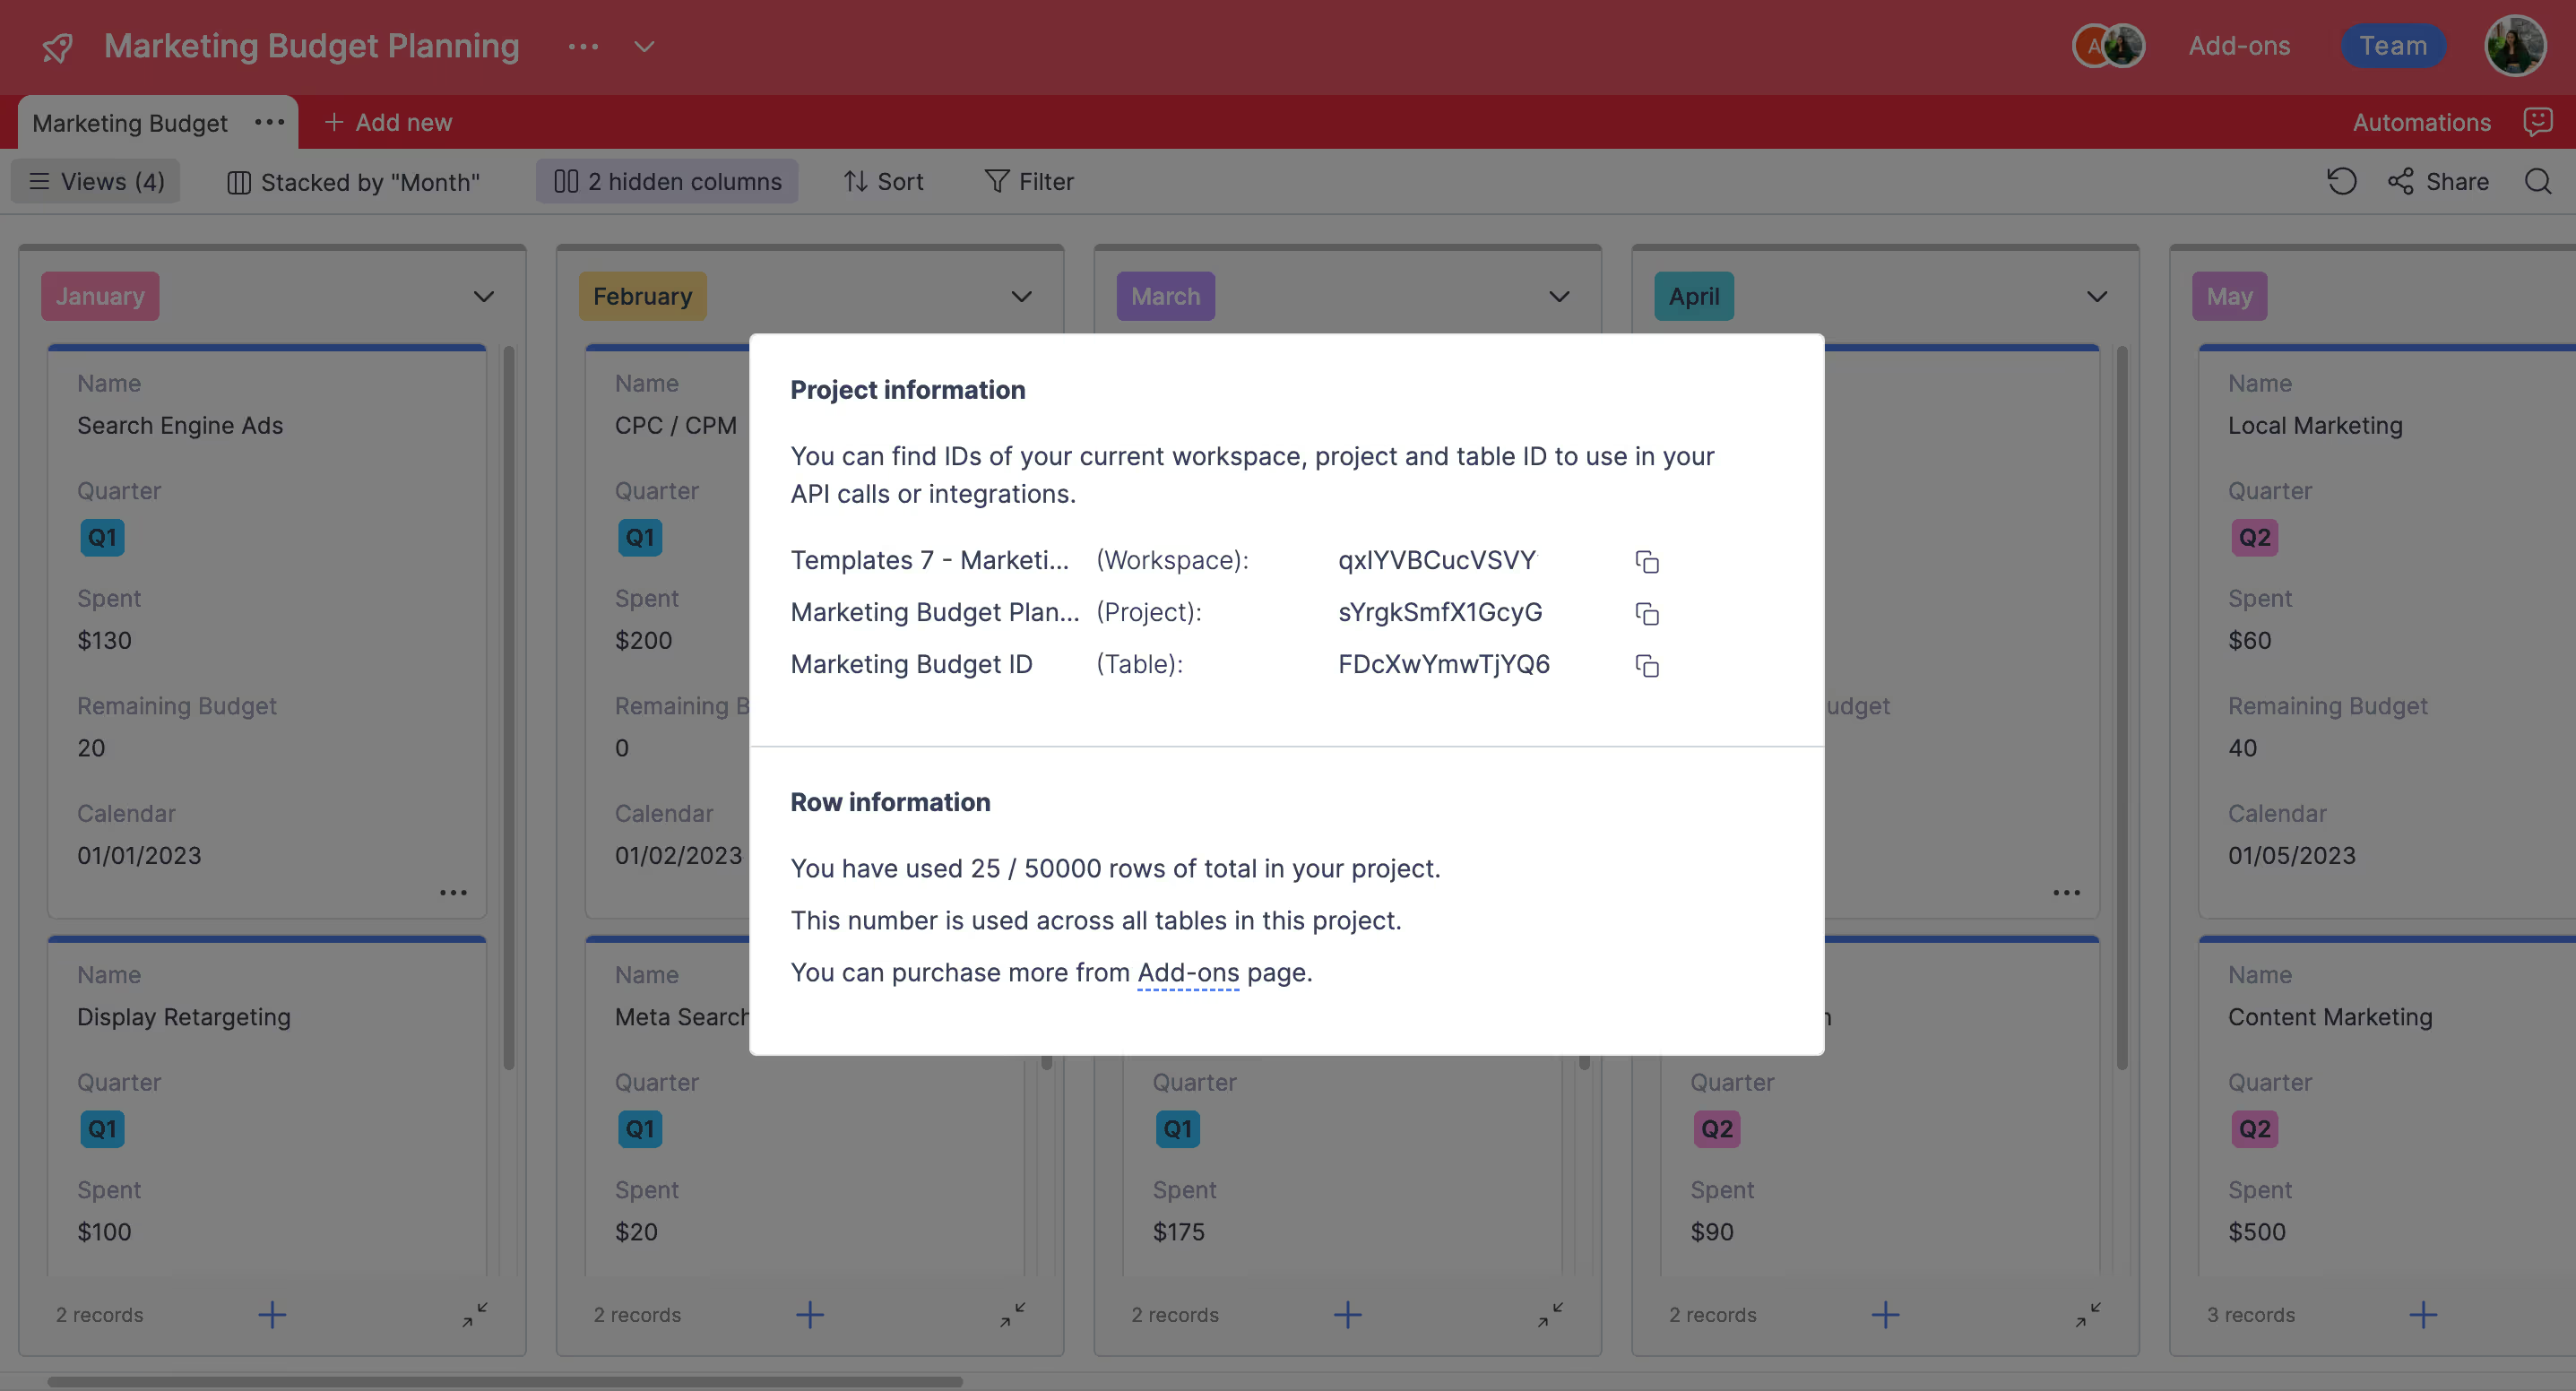
To view your Retable project ID card, simply follow these steps:
- Click the three dots next to your Retable project name.
- From the dropdown menu that appears, choose the "Information" option.
- You will now be able to easily access your project ID card.
Reducing redirect to URL time
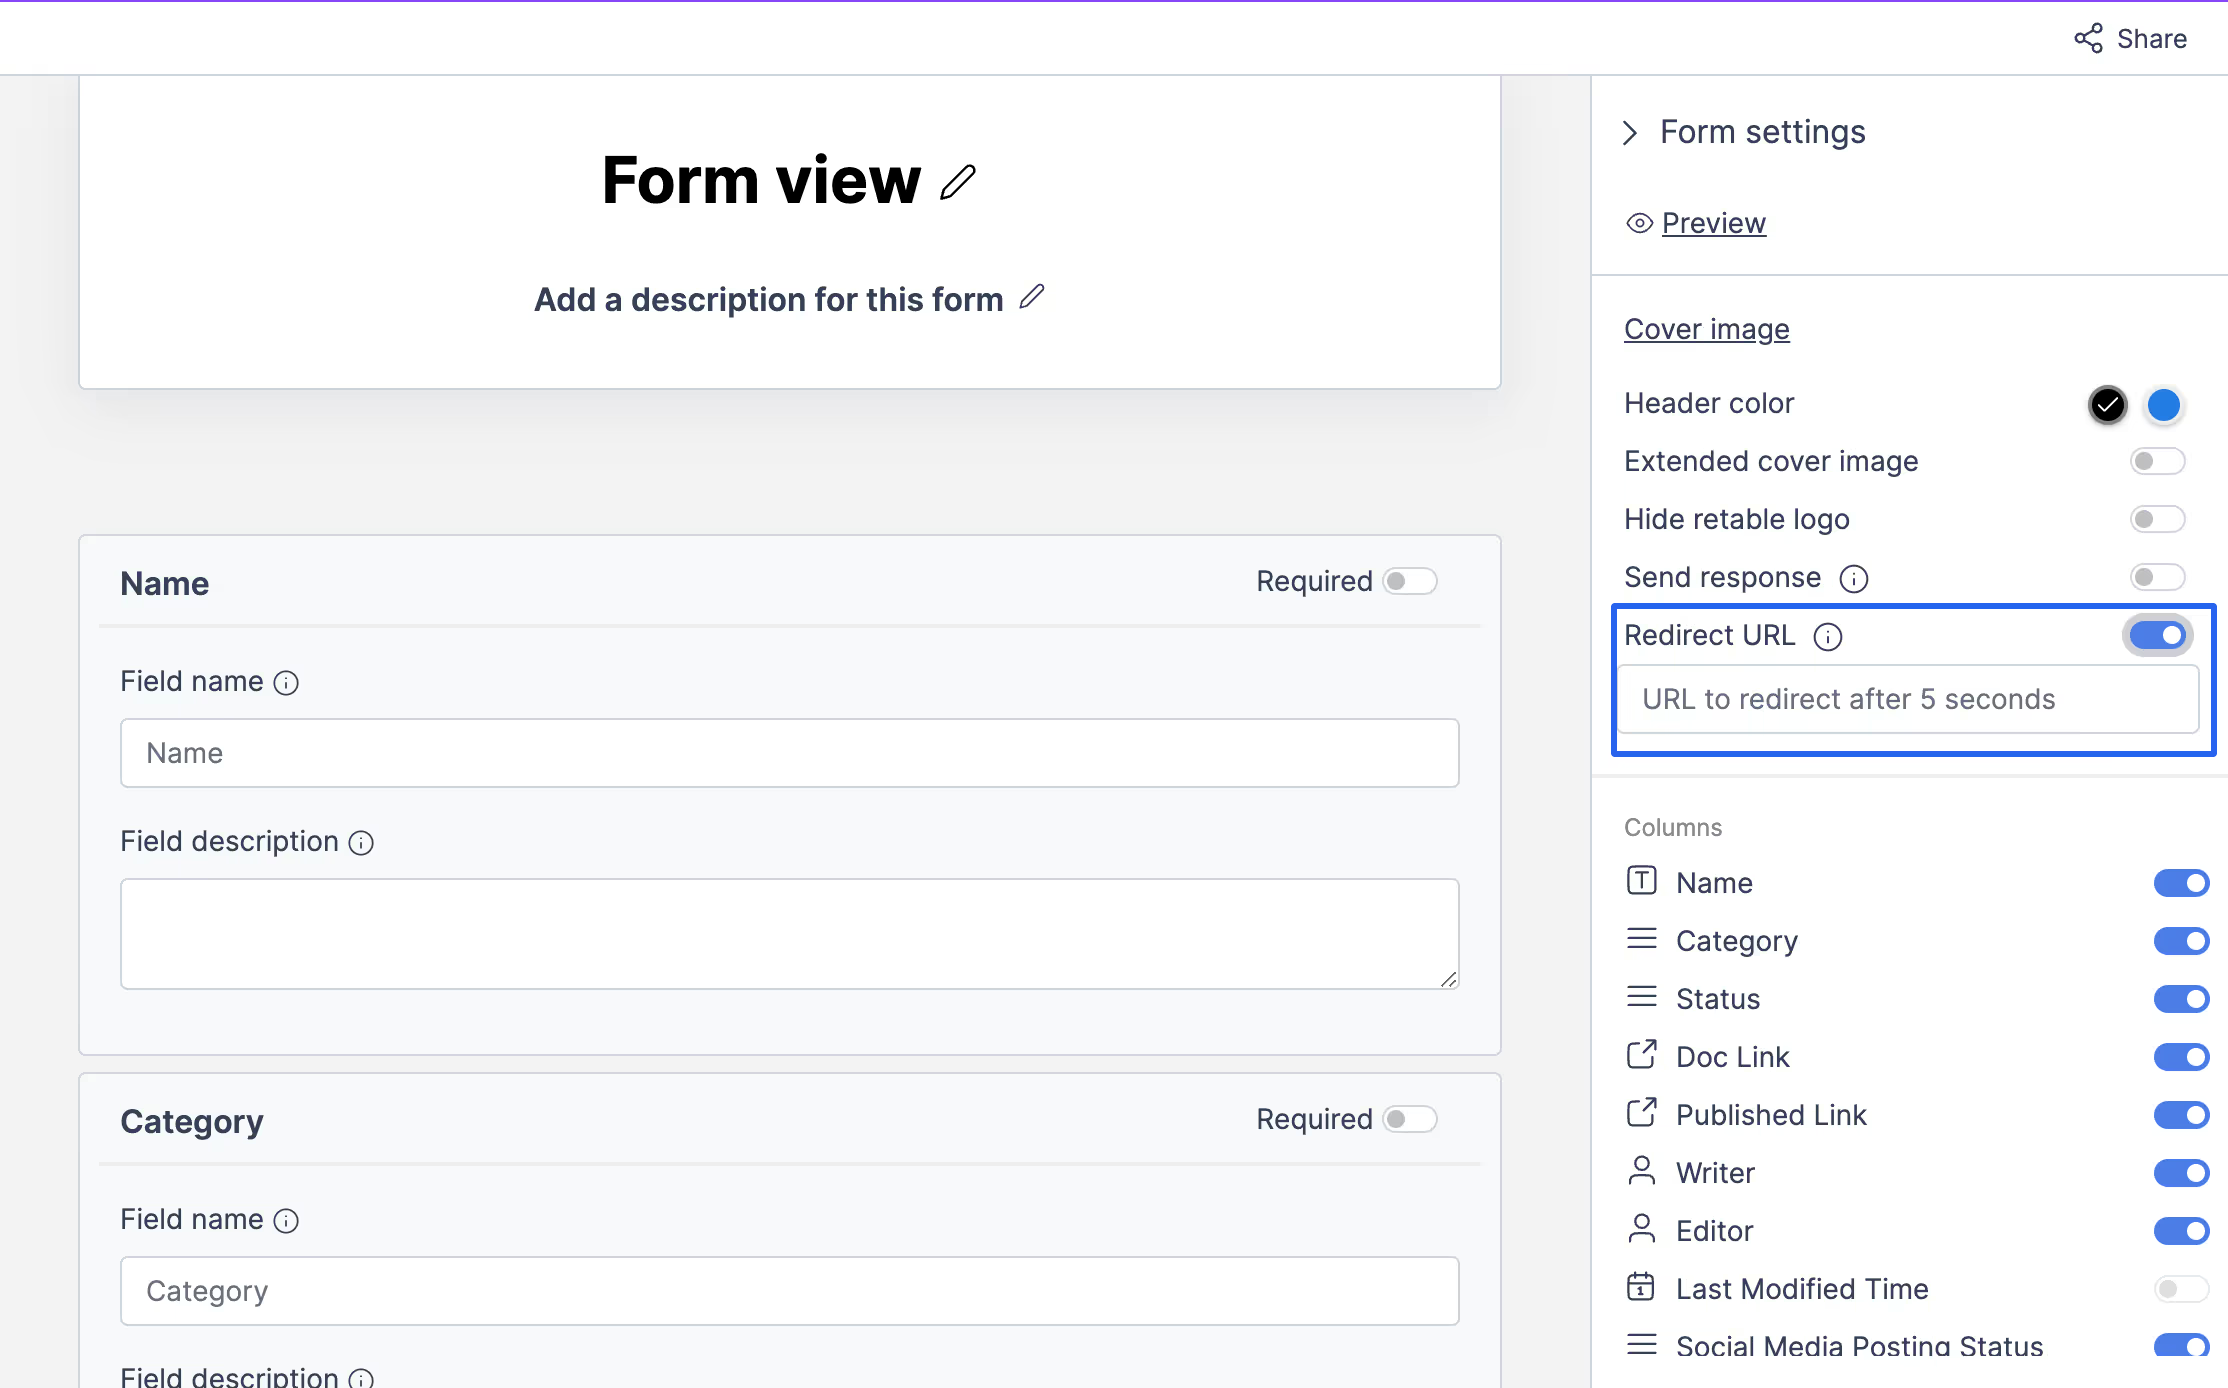
We've now shortened the redirection time for URLs on the form view's thank you page to just 5 seconds. This means that after users submit a form on Retable, they will be automatically redirected to your specified URL in only 5 seconds, making the process smoother and more efficient for everyone involved.
Print views and export views as PDF/PNG
You can now print or export your Retable views as PDF/PNG easily. Follow the steps below to learn how it works! 👇🏻

- Open the "views" menu from the left sidebar
- Click the 3 dots near your view name
- Click the "Print view" option
- Make your adjustments and click print
- You can export your view as PDF from the print window that opens after pressing the Print button, or you can print it by selecting a printer.
Customize the form thank you message
You can now customize the message on the thank you page that people who submit your form see after submitting the form. Follow the steps below to learn how it works! 👇🏻
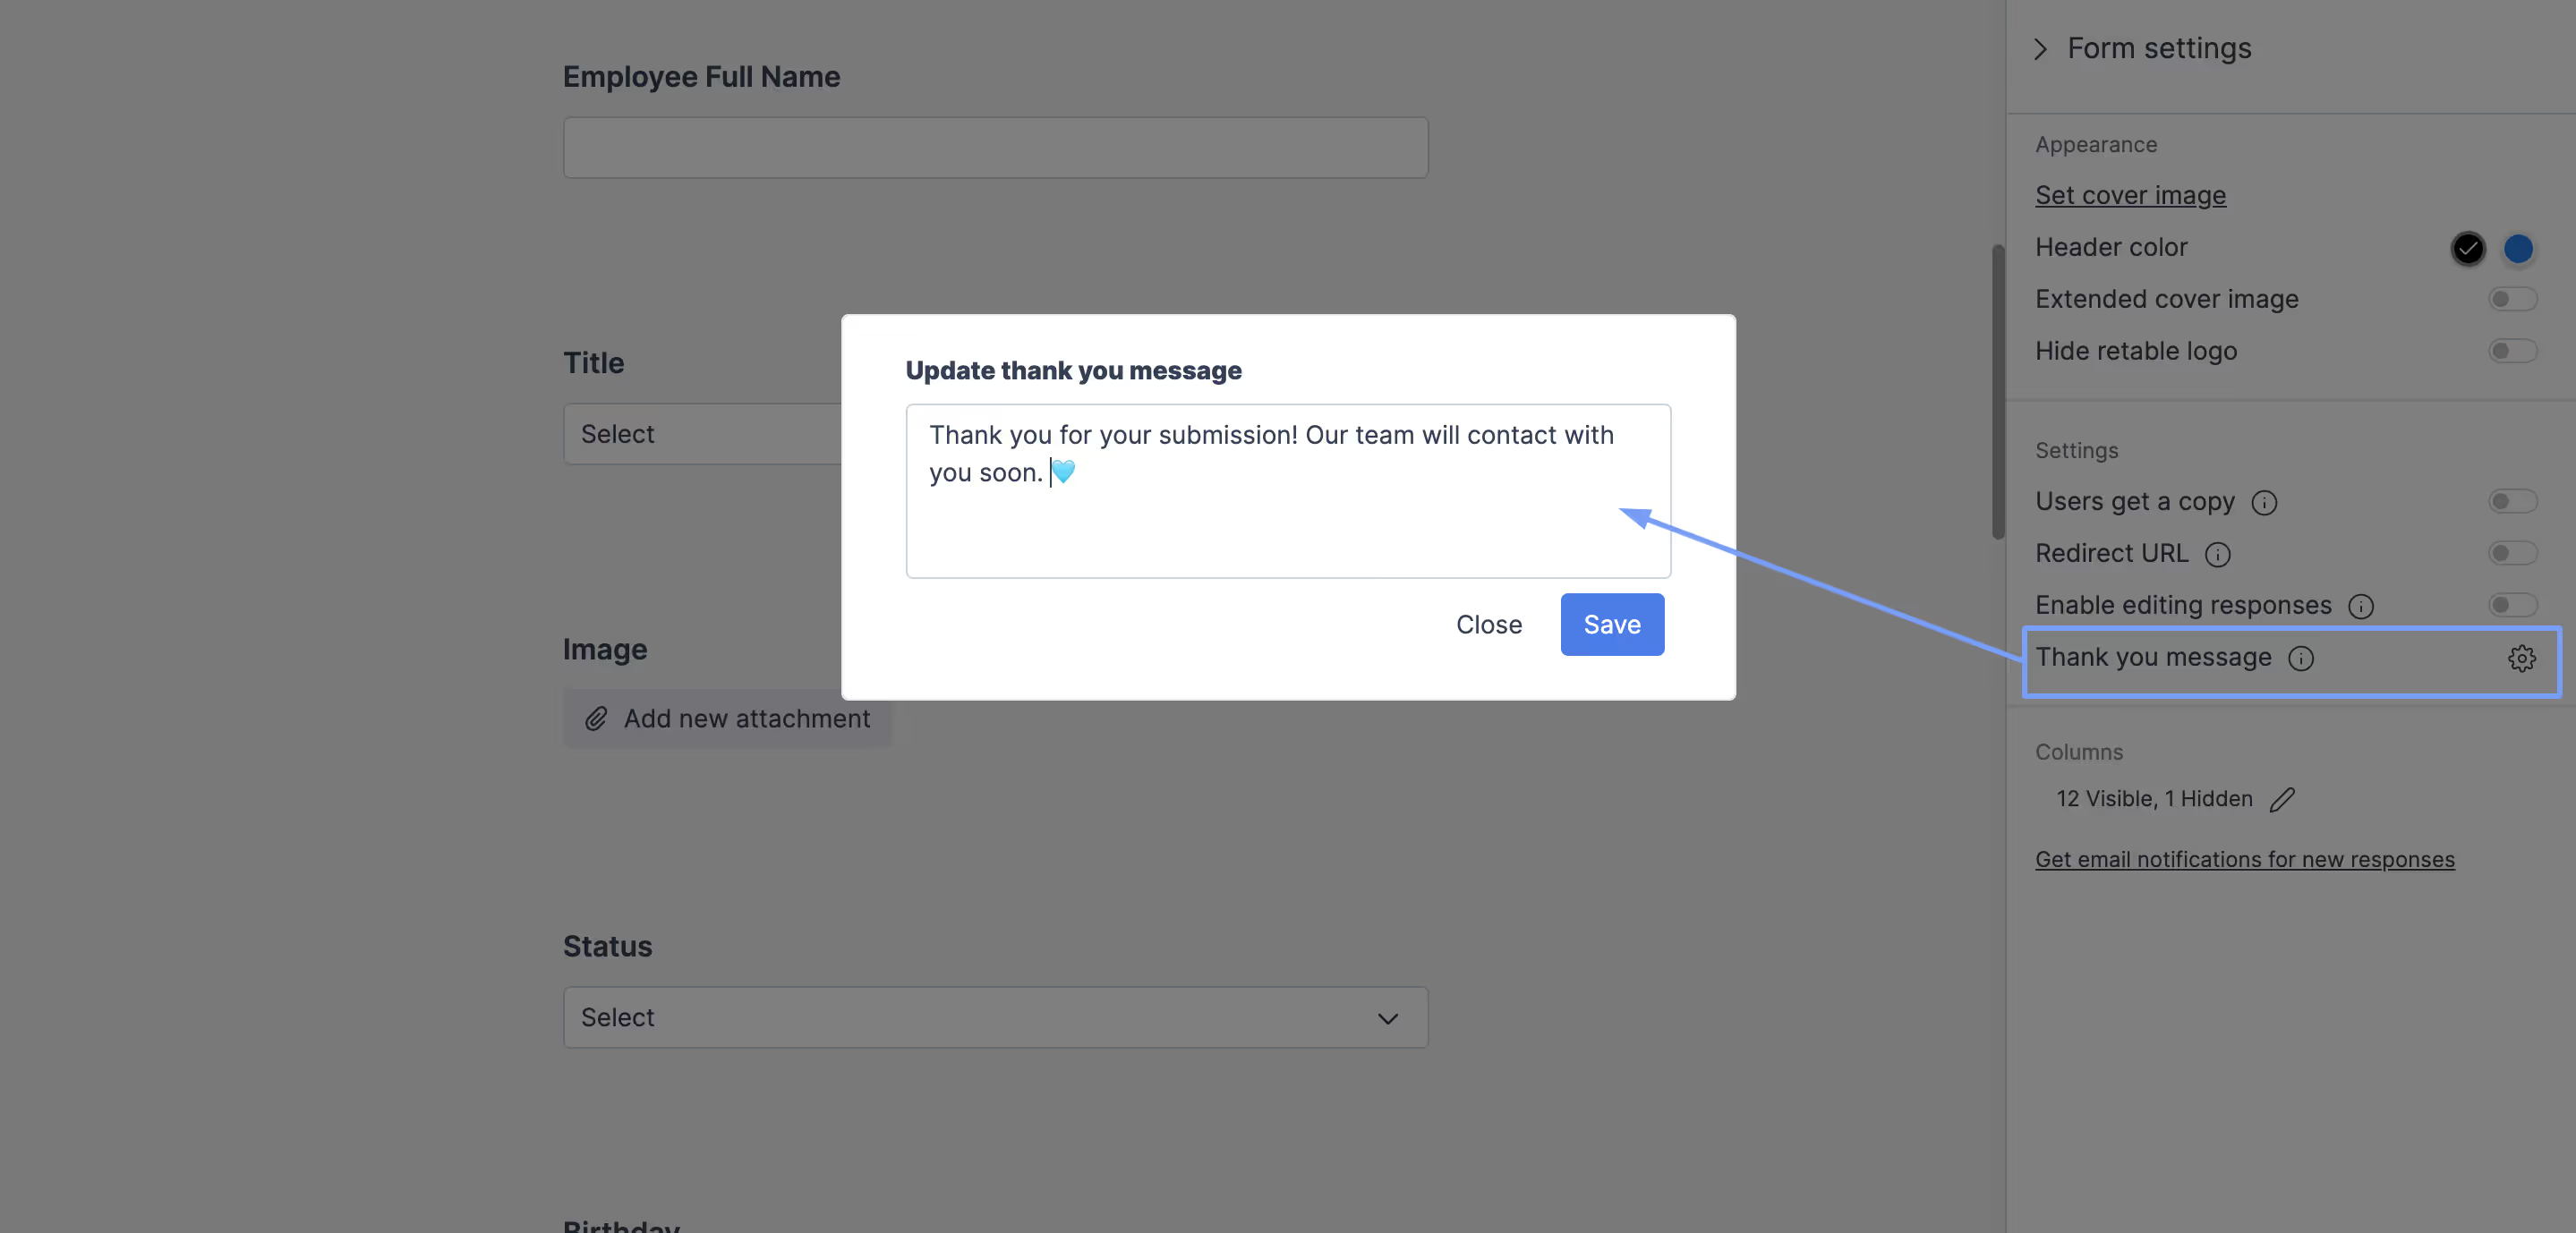
- Open your Retable form view
- Navigate the settings panel from the right sidebar
- Click the settings icon near the "Thank you message" item
- Write your custom thank you message and save it!
Adjust the form question orders by drag & drop
You can now easily adjust the orders of your questions in your form view by drag & drop. Follow the steps below to learn how it works! 👇🏻
.gif)
- Open your Retable form view
- Navigate the form question that you want to adjust
- Click the dragging icon and change the order
- Then you can drop it
Manage the "enable editing responses" option
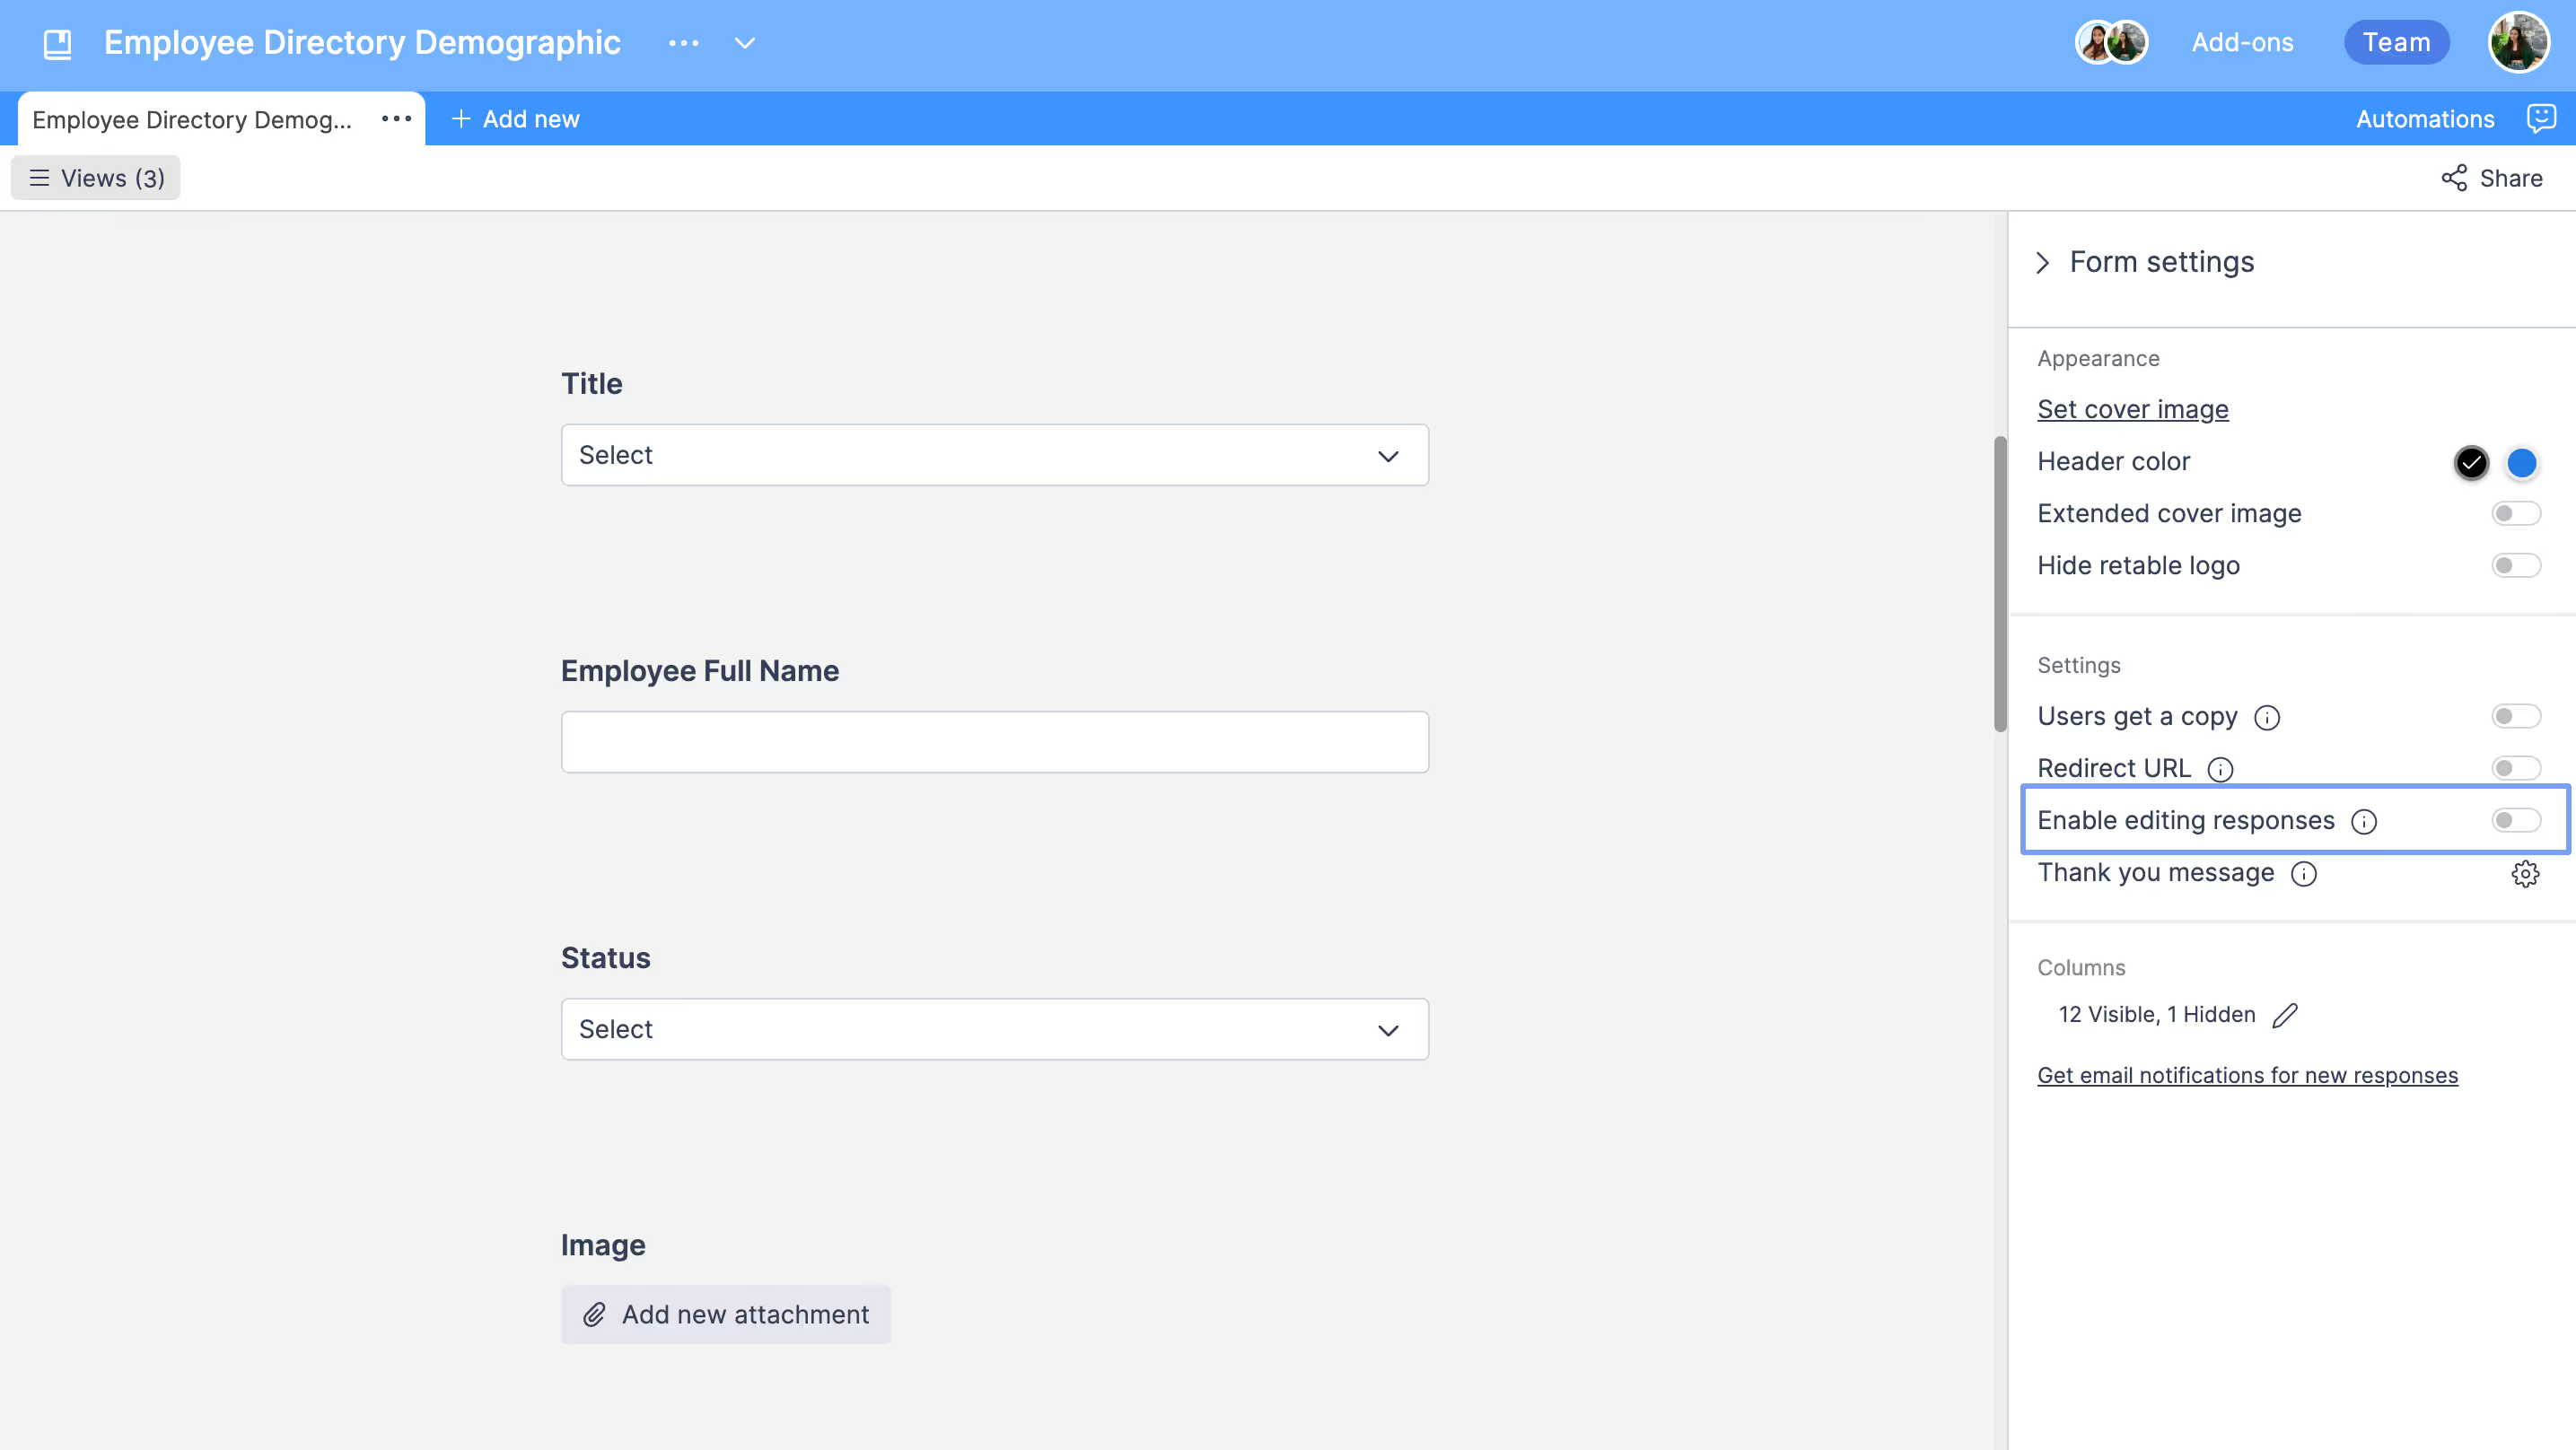
You can now determine whether people who fill out your form have the ability to edit their form responses. If you activate the "enable editing responses" option in your form settings, users who respond to your form will be able to edit their responses later. If you inactivate this option, they cannot edit their form responses after submitting the form.
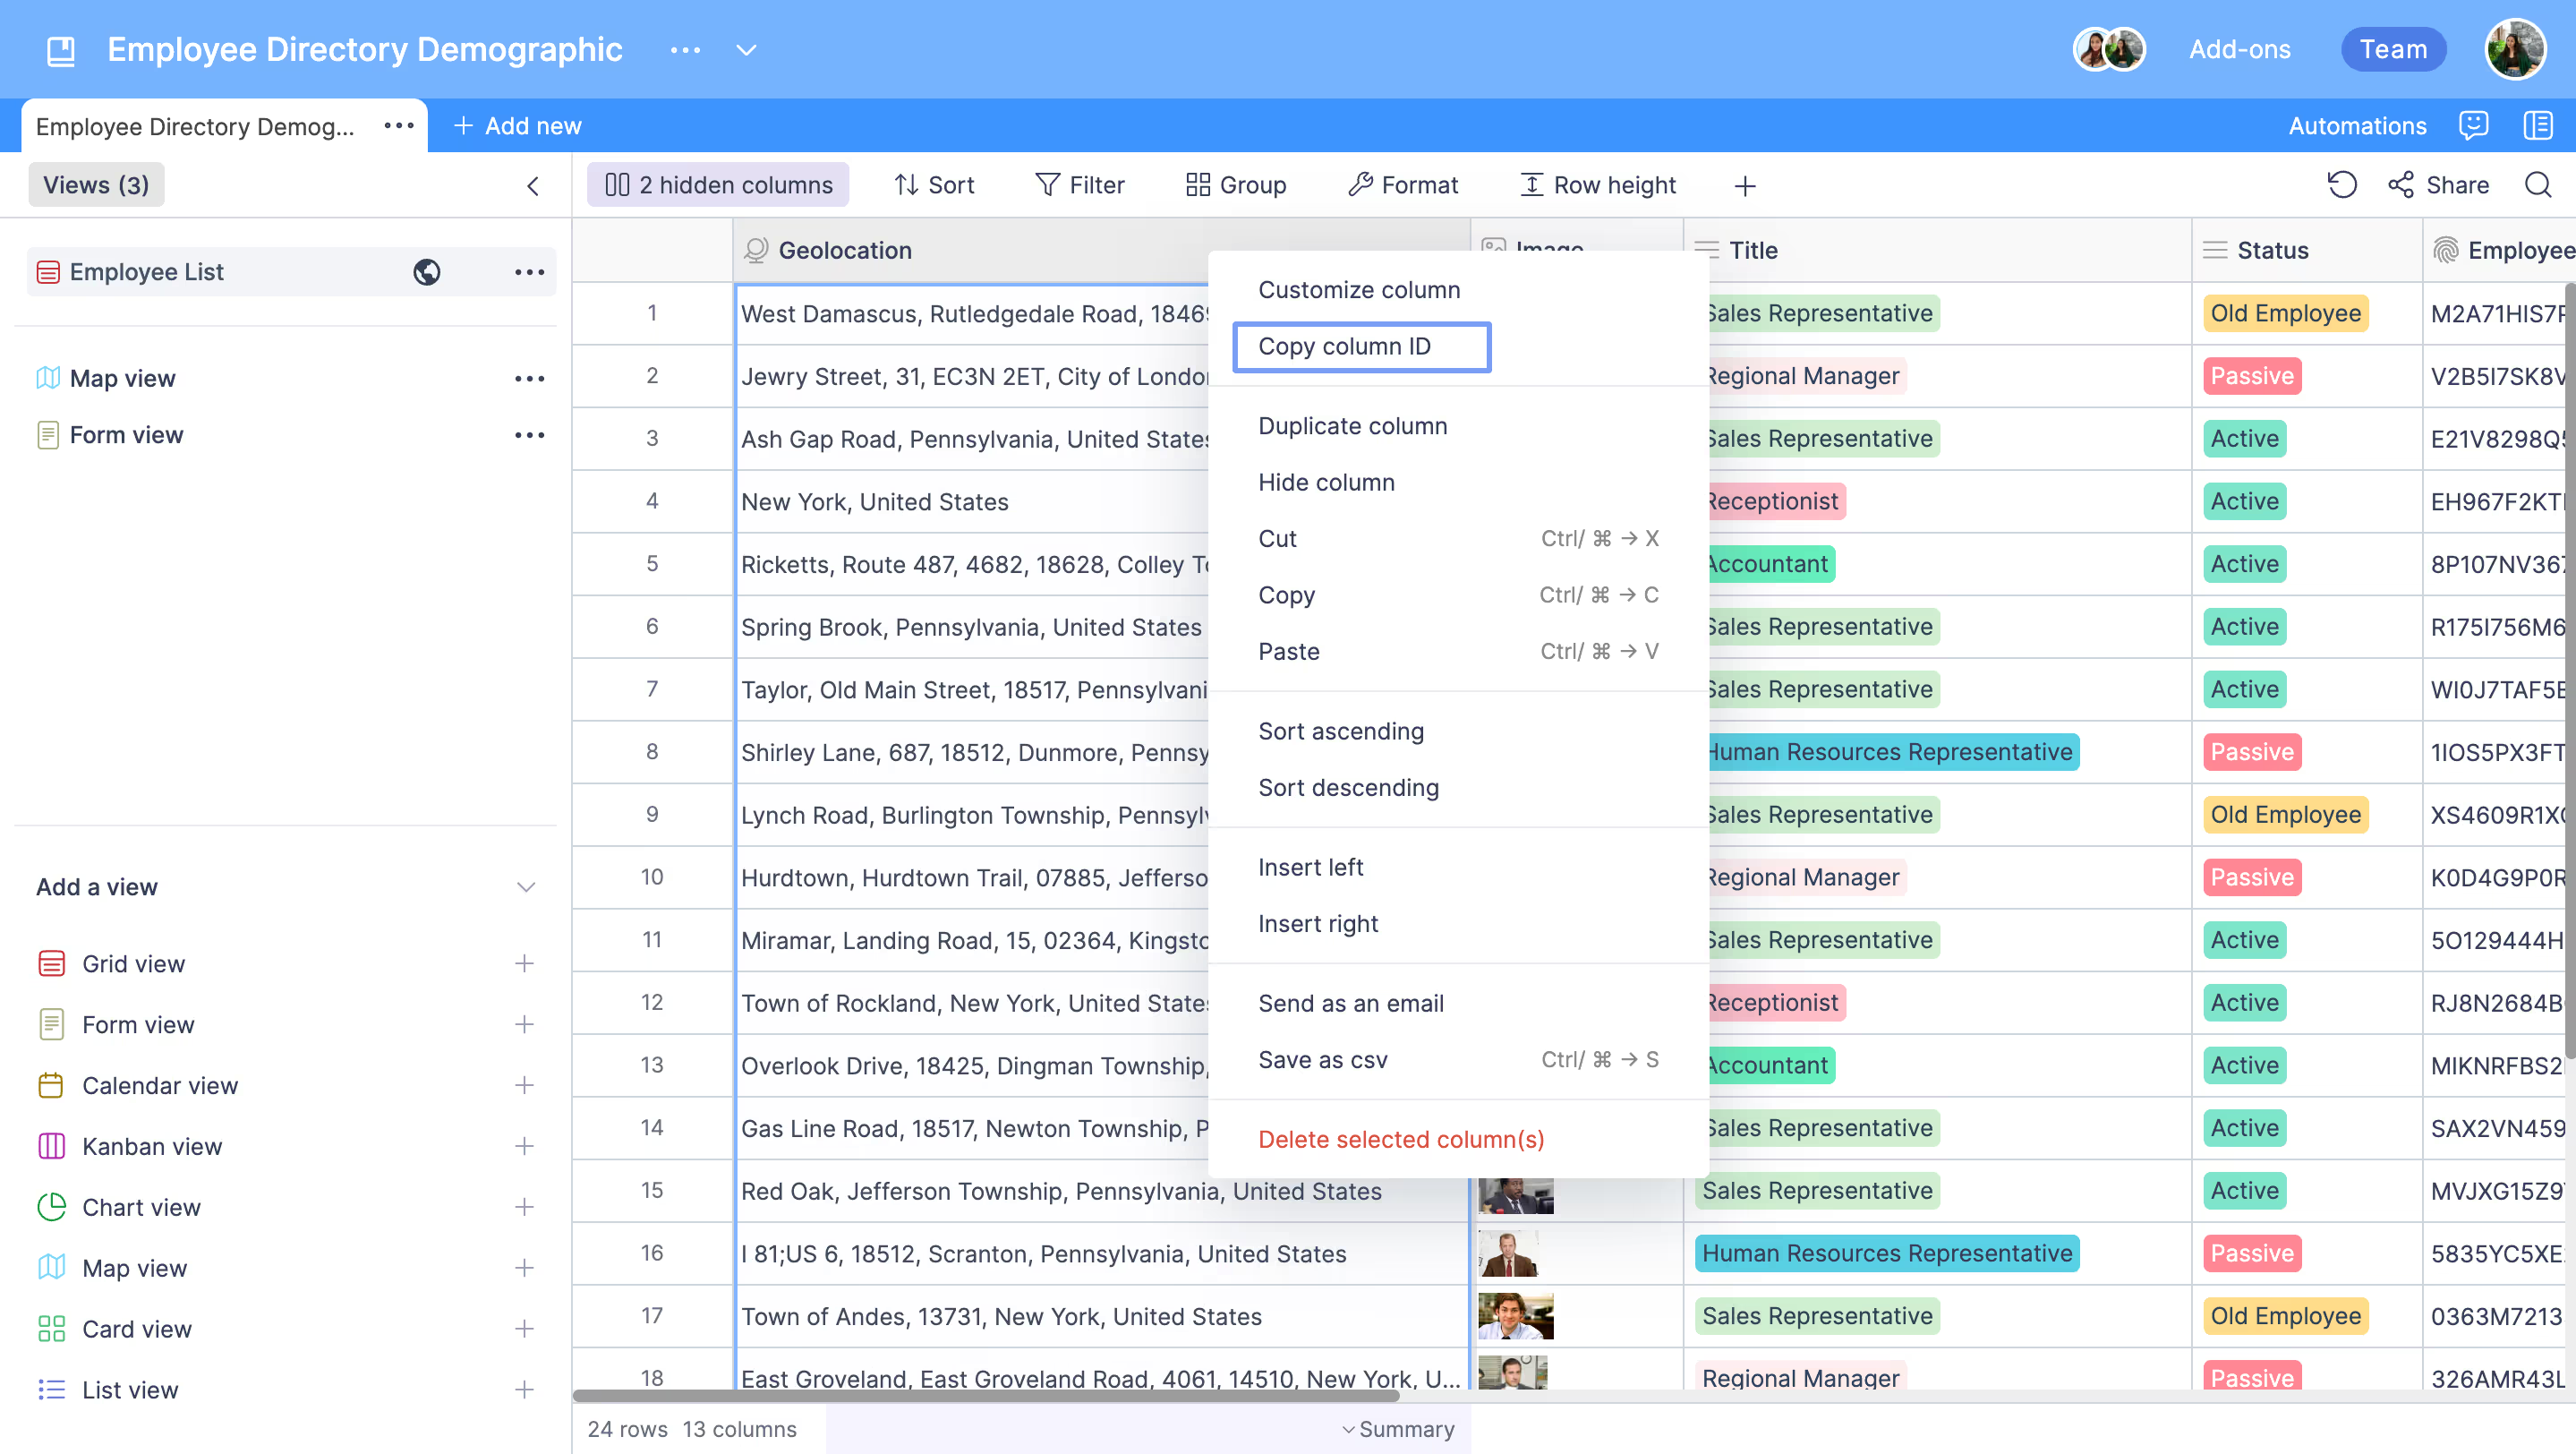
Get Retable column ID
You can now easily get the ID of the column you want with the "Copy column ID" option we added to the column-right menu. So, if you need your Column ID for your API connections or integrations you can access this information quickly.
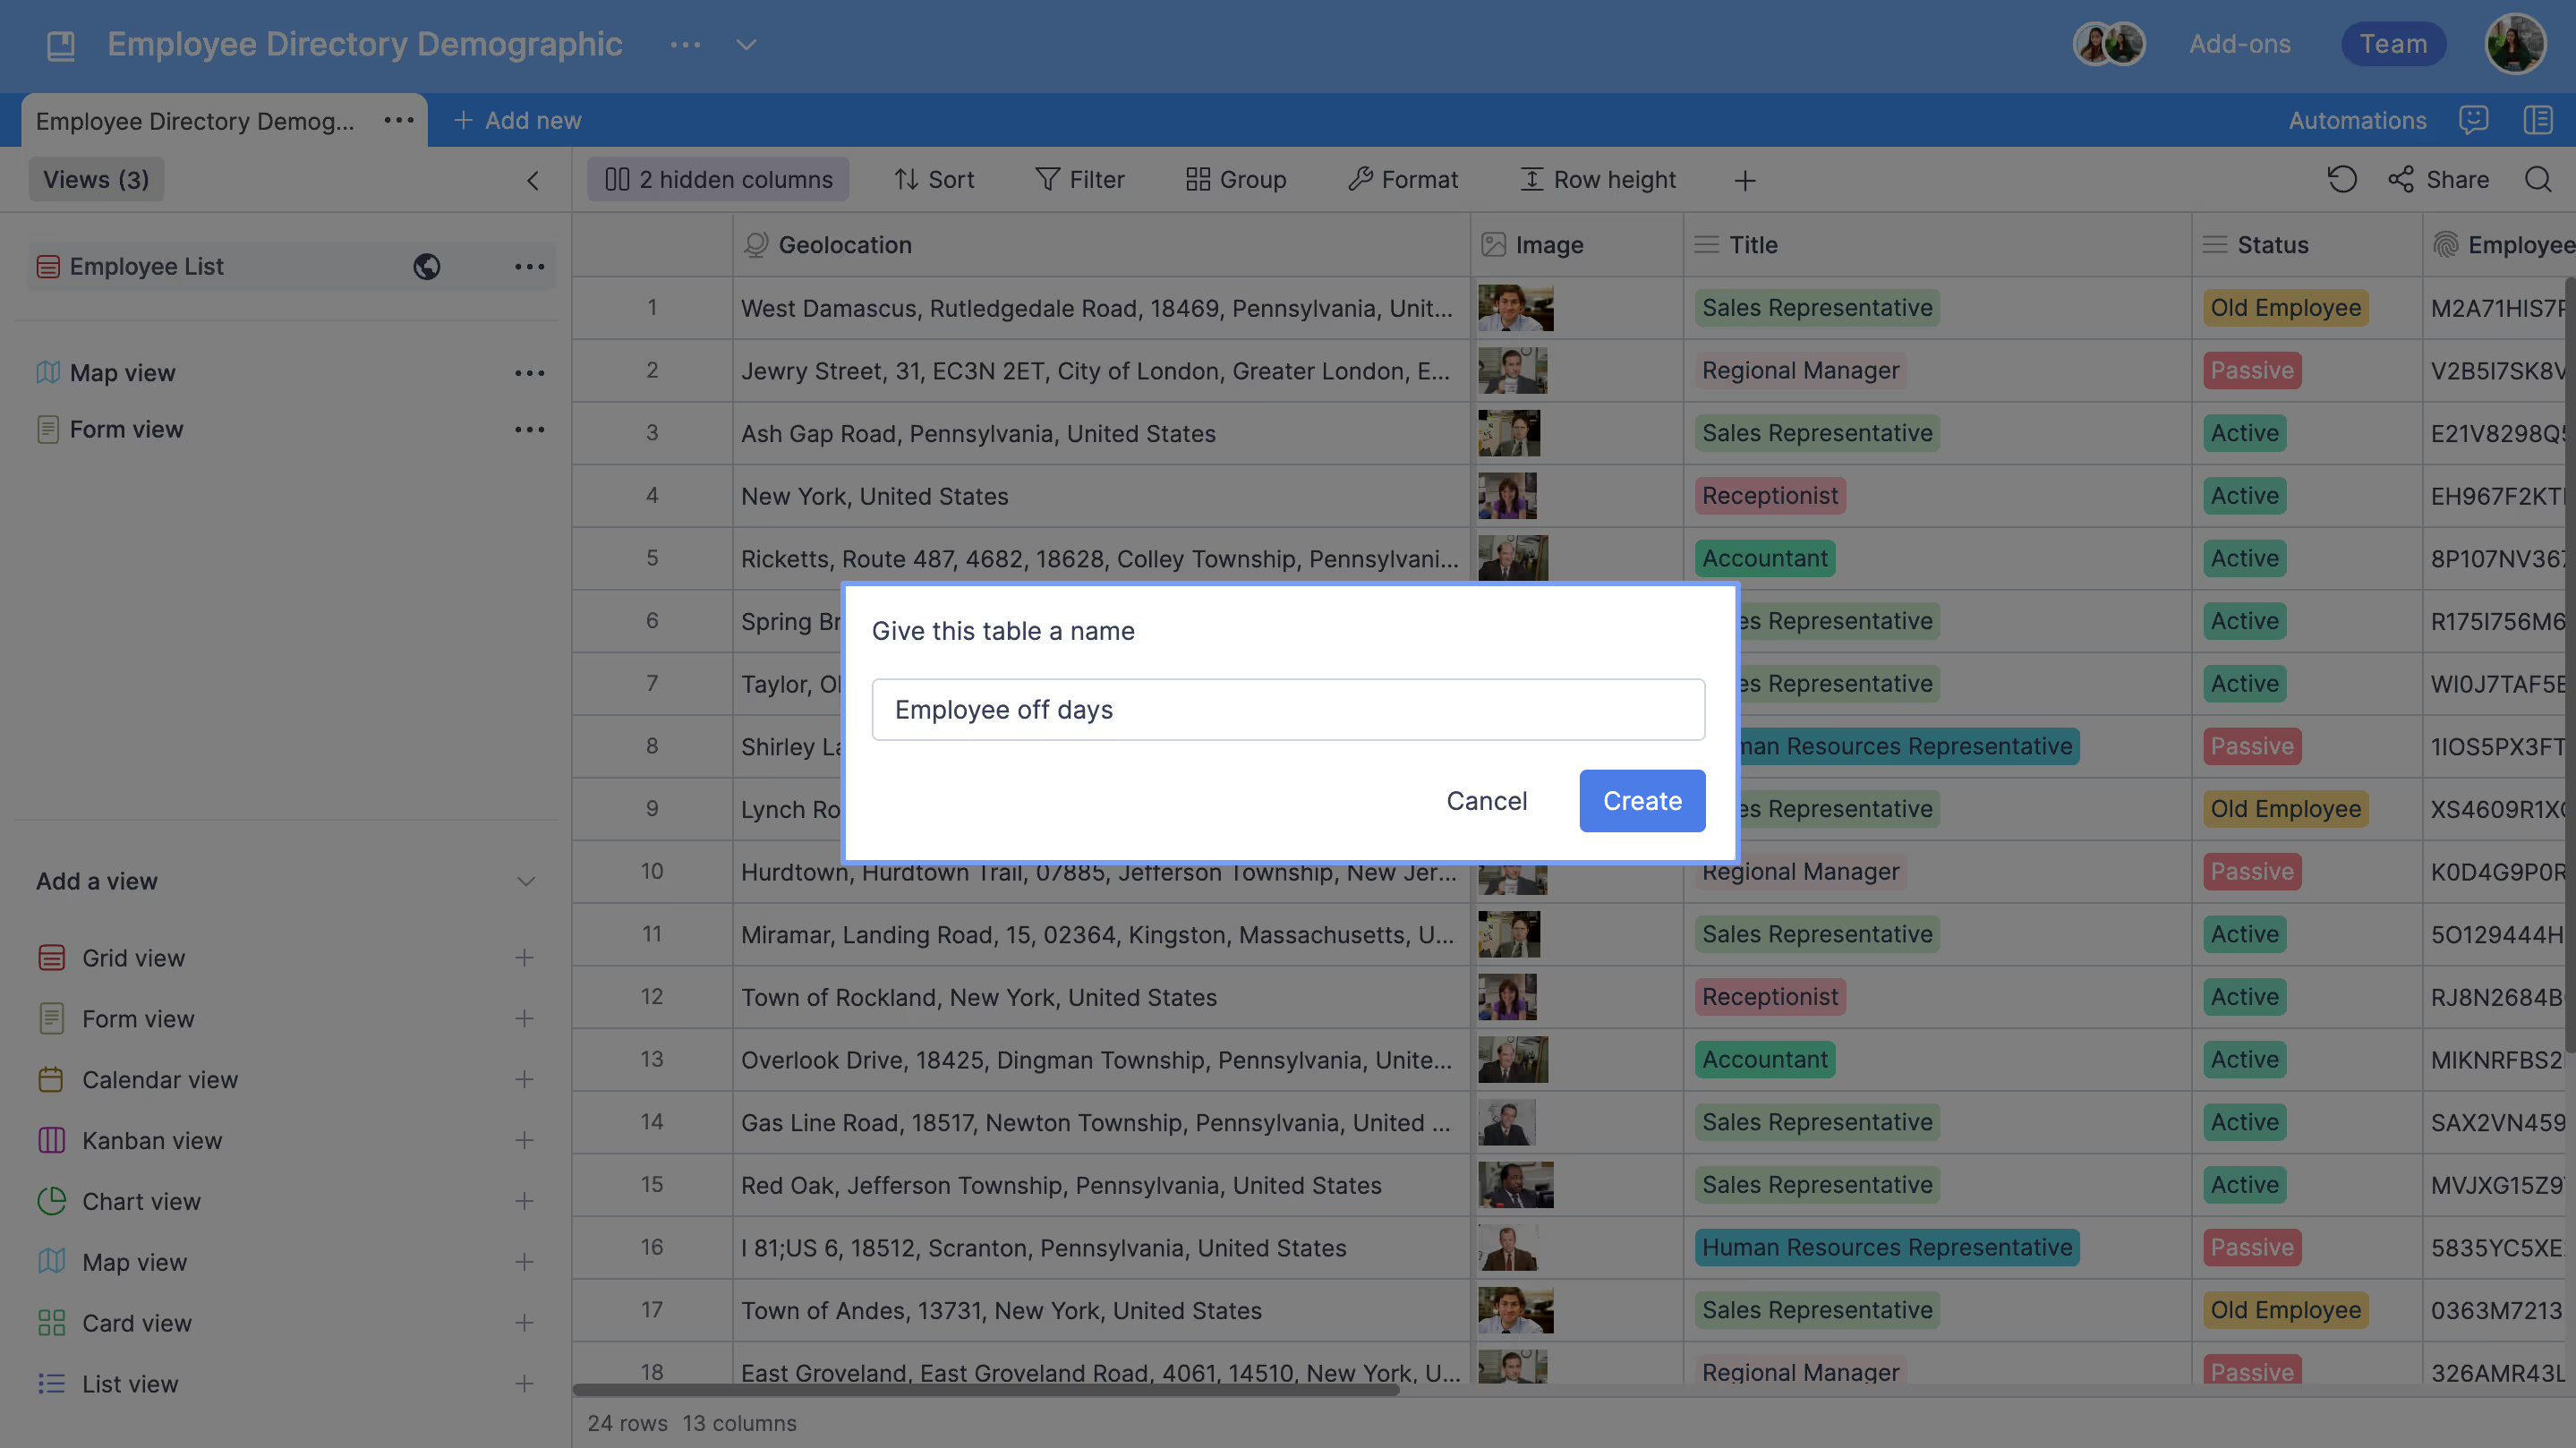
Naming new tables via pop-up
When creating a new Retable table within your project, we automatically display a naming pop-up so that you can quickly name your table.
If you're curious about the previous product updates check them out below! 👇🏻
more
Related Resources
Create your smart data management solution
Plan, track, and analyse with your ease. Transform your data with an all-in-one platform, collaborate with your teammates.
Try for free!
.avif)
.avif)
.png)

.avif)