.avif)

Workspace collaboration in Retable allows you to invite colleagues to your workspace, granting them the ability to view or edit projects as per their assigned roles. Perfect for team projects, this functionality ensures seamless collaboration and streamlined workflow management. Let’s walk through the process of inviting users and defining their access levels in your workspace. 🌟
Table of contents
What is workspace?
Workspaces are big folders where you can organize, manage, and collaborate on various projects and spreadsheets. They serve as a central hub for your team, allowing members to work together seamlessly by sharing access to different projects within the workspace. Users within a workspace can have different roles, such as owner, editor, or viewer, each with specific permissions to view, edit, or manage the workspace and its contents. This structured environment ensures efficient workflow management and enhanced project visibility for all team members.
Inviting users to your workspace
You can easily collaborate with your colleagues by adding them to your workspace as collaborators. You should remember that if you invite a user to your workspace as a collaborator, they will have access to all projects in this workspace.
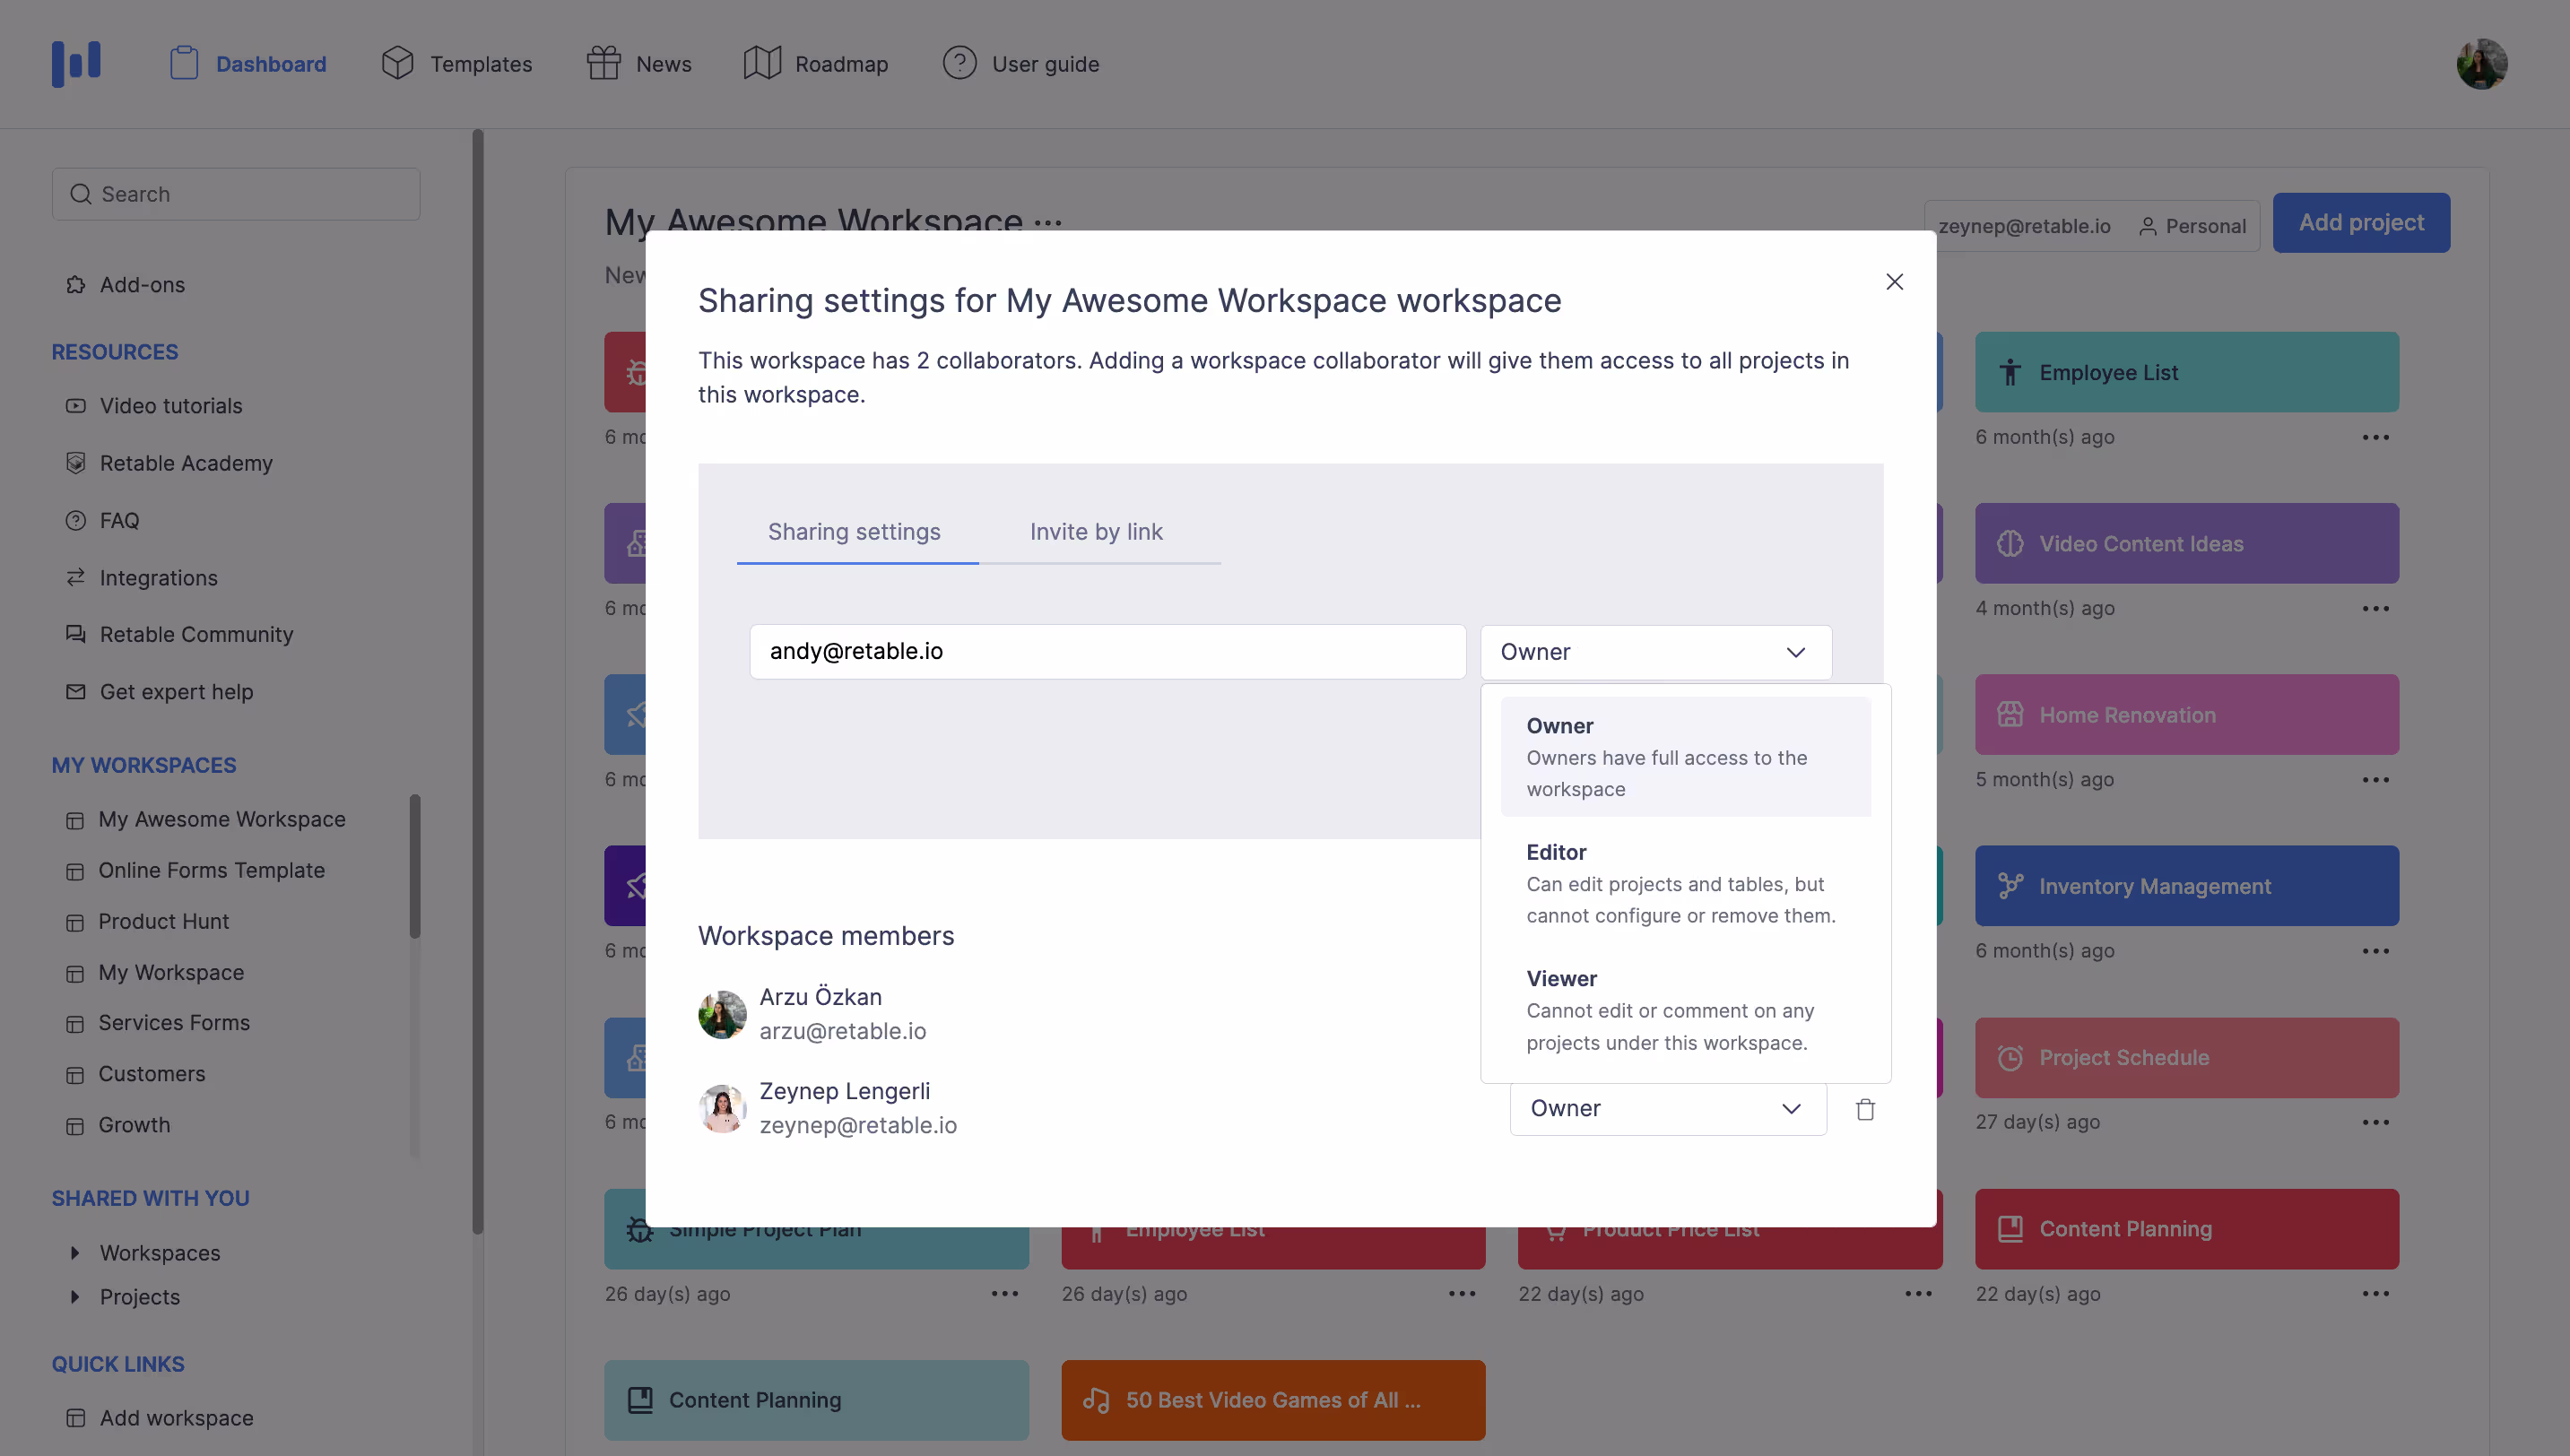
- Locate the workspace you want to share and click on the "three dots" near the workspace name to access the sharing settings.
- Within the pop-up screen, you can see all users currently shared in the "Workspace Members" section.
- Enter the email addresses of the individuals you want to invite, separating multiple addresses with commas.
- For each new invitee, select an appropriate role
- Click the "Invite" button to send out your invitations. The invited users will appear under "Workspace Members" once they accept the invite.
Roles & permissions
When sharing your Retable workspaces with your colleagues, you can manage their access levels to your projects by choosing which roles they will have.
- Owner: Has full control over the workspace, including the ability to share it with others. They can add projects, delete projects, and modify data and tables within related projects.
- Editor: Can make changes to the workspace but cannot manage its sharing settings. They can manage data in all projects, add new columns, rows, views, and tables, and add new projects. They cannot delete any views, tables, or projects, or change names of the workspace, projects, and tables.
- Viewer: Can only view the workspace without making any changes. They can view the workspace, projects, and details of the projects with tables and views included.
Managing workspace members
- Check the current list of people who have access to your workspace in the "Workspace Members" section.
- If you need to revoke access, simply click on the cross next to the user’s name to remove them from the workspace.
Unlock a new level of collaborative efficiency with Retable by signing up for free today and diving into the Retable Academy! Access a wealth of resources, including tutorials, guides, and tips, all designed to help you master Retable's powerful features and elevate your data management expertise. 🚀
more
Related Resources
.avif)
.avif)
.avif)
Create your smart data management solution
Plan, track, and analyse with your ease. Transform your data with an all-in-one platform, collaborate with your teammates.
Try for free!