Automation in Retable means setting up intuitive trigger-action sequences, reducing repetitive tasks, and ensuring your projects run smoothly. Let’s explore how to harness the full potential of automation in your Retable projects. 🌟
Table of contents
Setting up automations
Retable’s automation feature lets you create custom trigger-action sequences, automating repetitive tasks and enhancing data management. It's about setting conditions (triggers) that, once met, automatically initiate predefined actions.

How to set up automations:
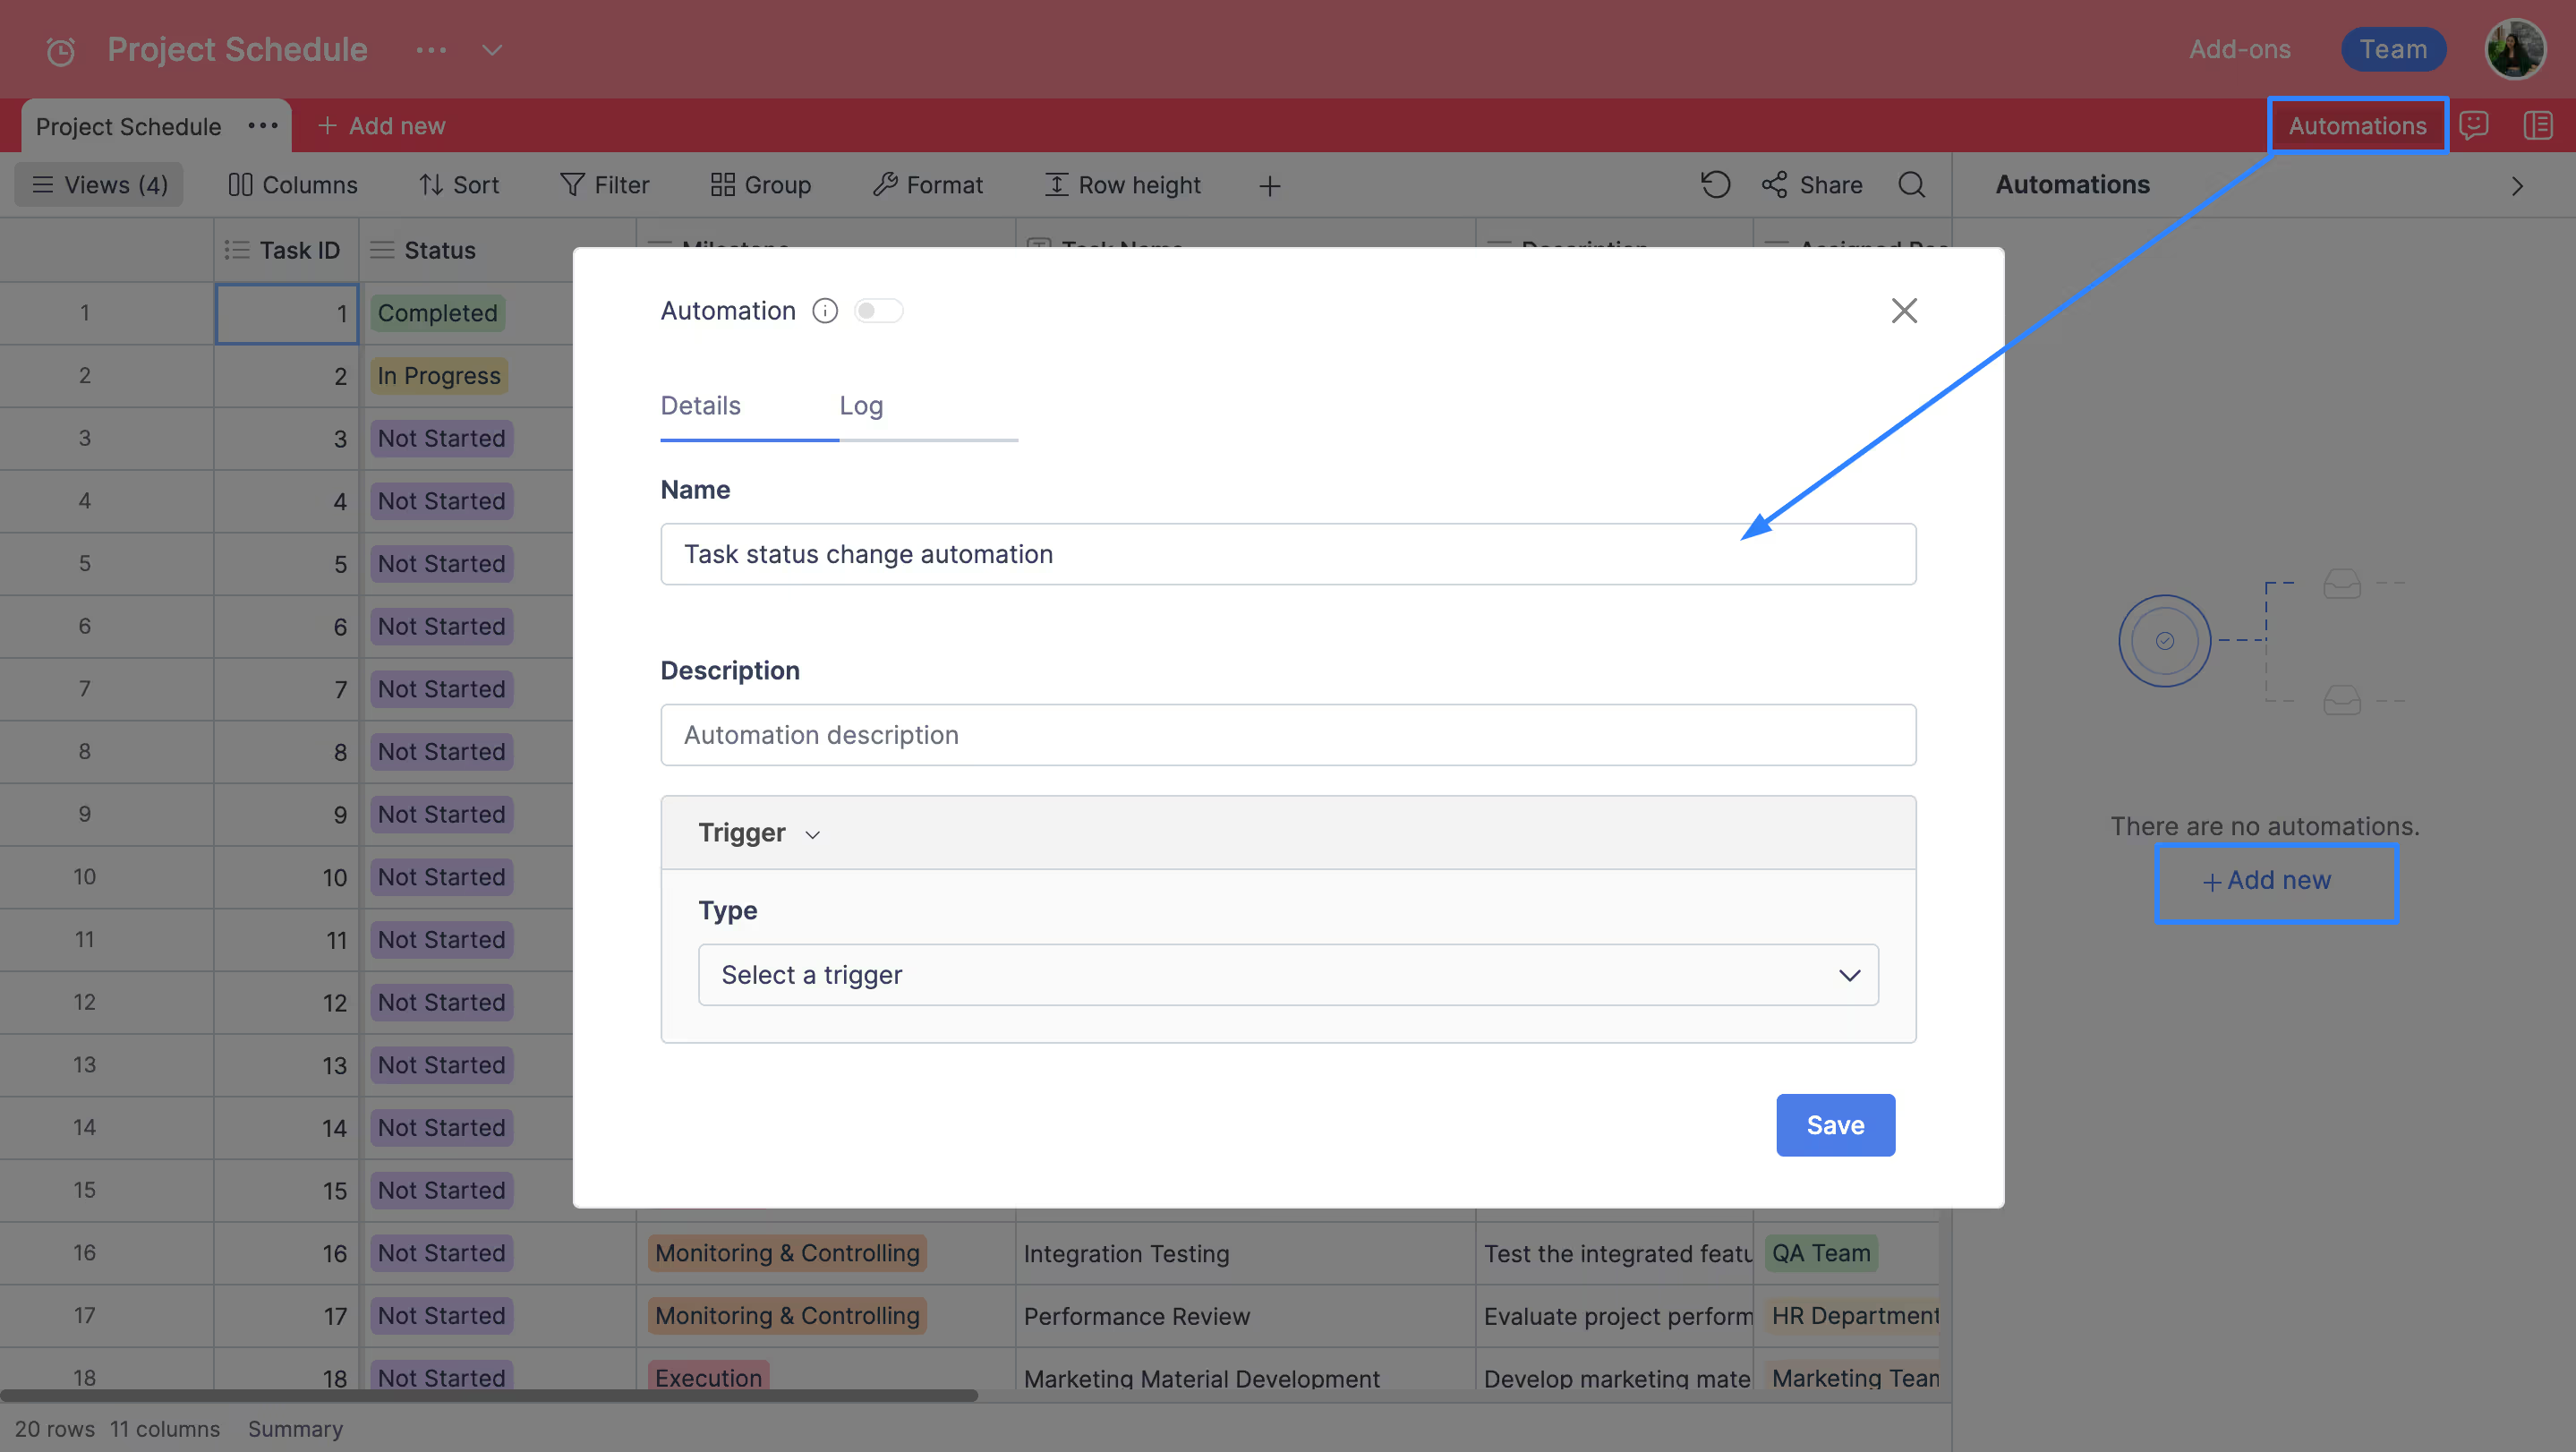
- Navigate to your Retable dashboard and open the project you want to automate.
- Click the "Automation" icon at the top-right of your project.
- Click on the “Add New” button to initiate a new automation setup.
- Enter a descriptive name for your automation to easily identify its purpose later on.
Triggers
Triggers are conditions you set to initiate an automation. Each trigger caters to different automation needs, from scheduling tasks to responding to real-time data changes.

Choosing Triggers:
- At a scheduled time: Set it to activate periodically at specific intervals such as hourly, daily, and weekly.
- When a row is added: Triggers the automation whenever a new row is added to your table.
- When a row is deleted: Activates when a row is removed from your table.
- When a cell is updated: Responds to changes made in specific cells.
- When a form is submitted: Initiates when a new submission is received via a connected Retable form.
Actions
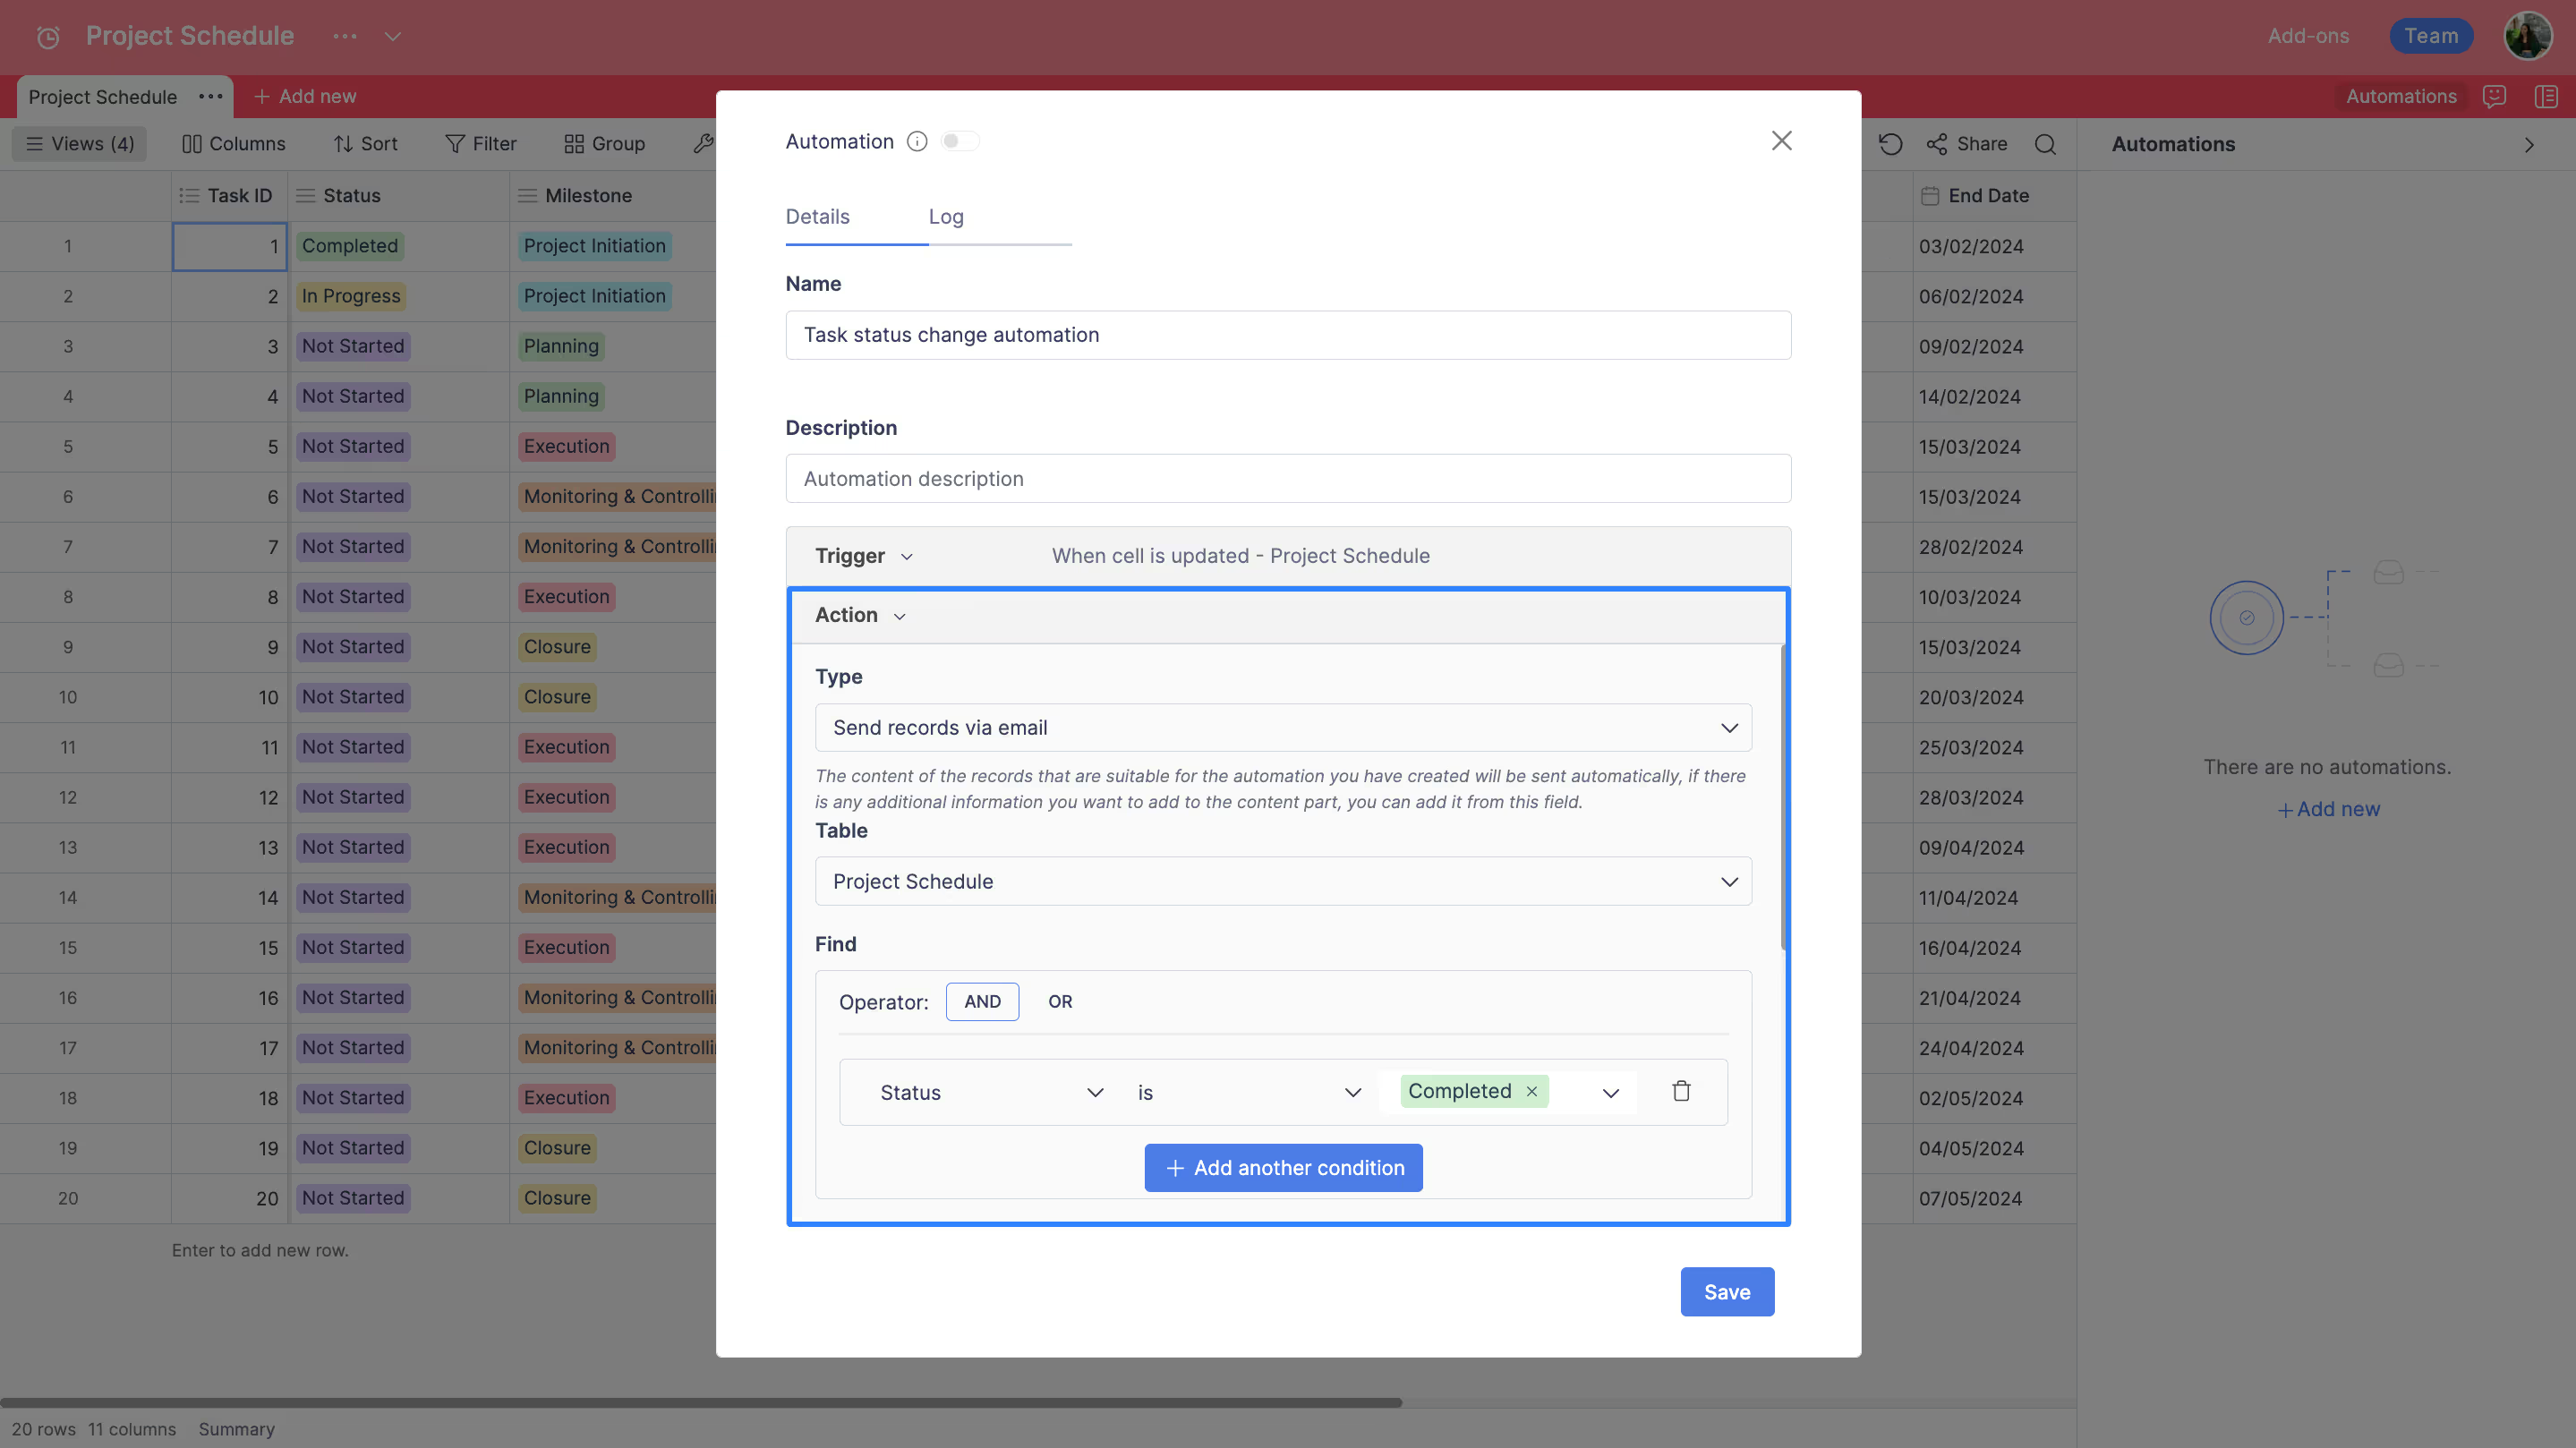
Actions are the tasks executed once the trigger conditions are met. Common actions include 'Send an email,' sending records via email, and calling webhooks, enabling seamless integration with other systems and ensuring timely notifications or data transfers.

Selecting actions:
- Send an email: Configures an email to be sent to designated recipients.
- Send records via email: Automatically email records that meet certain criteria.
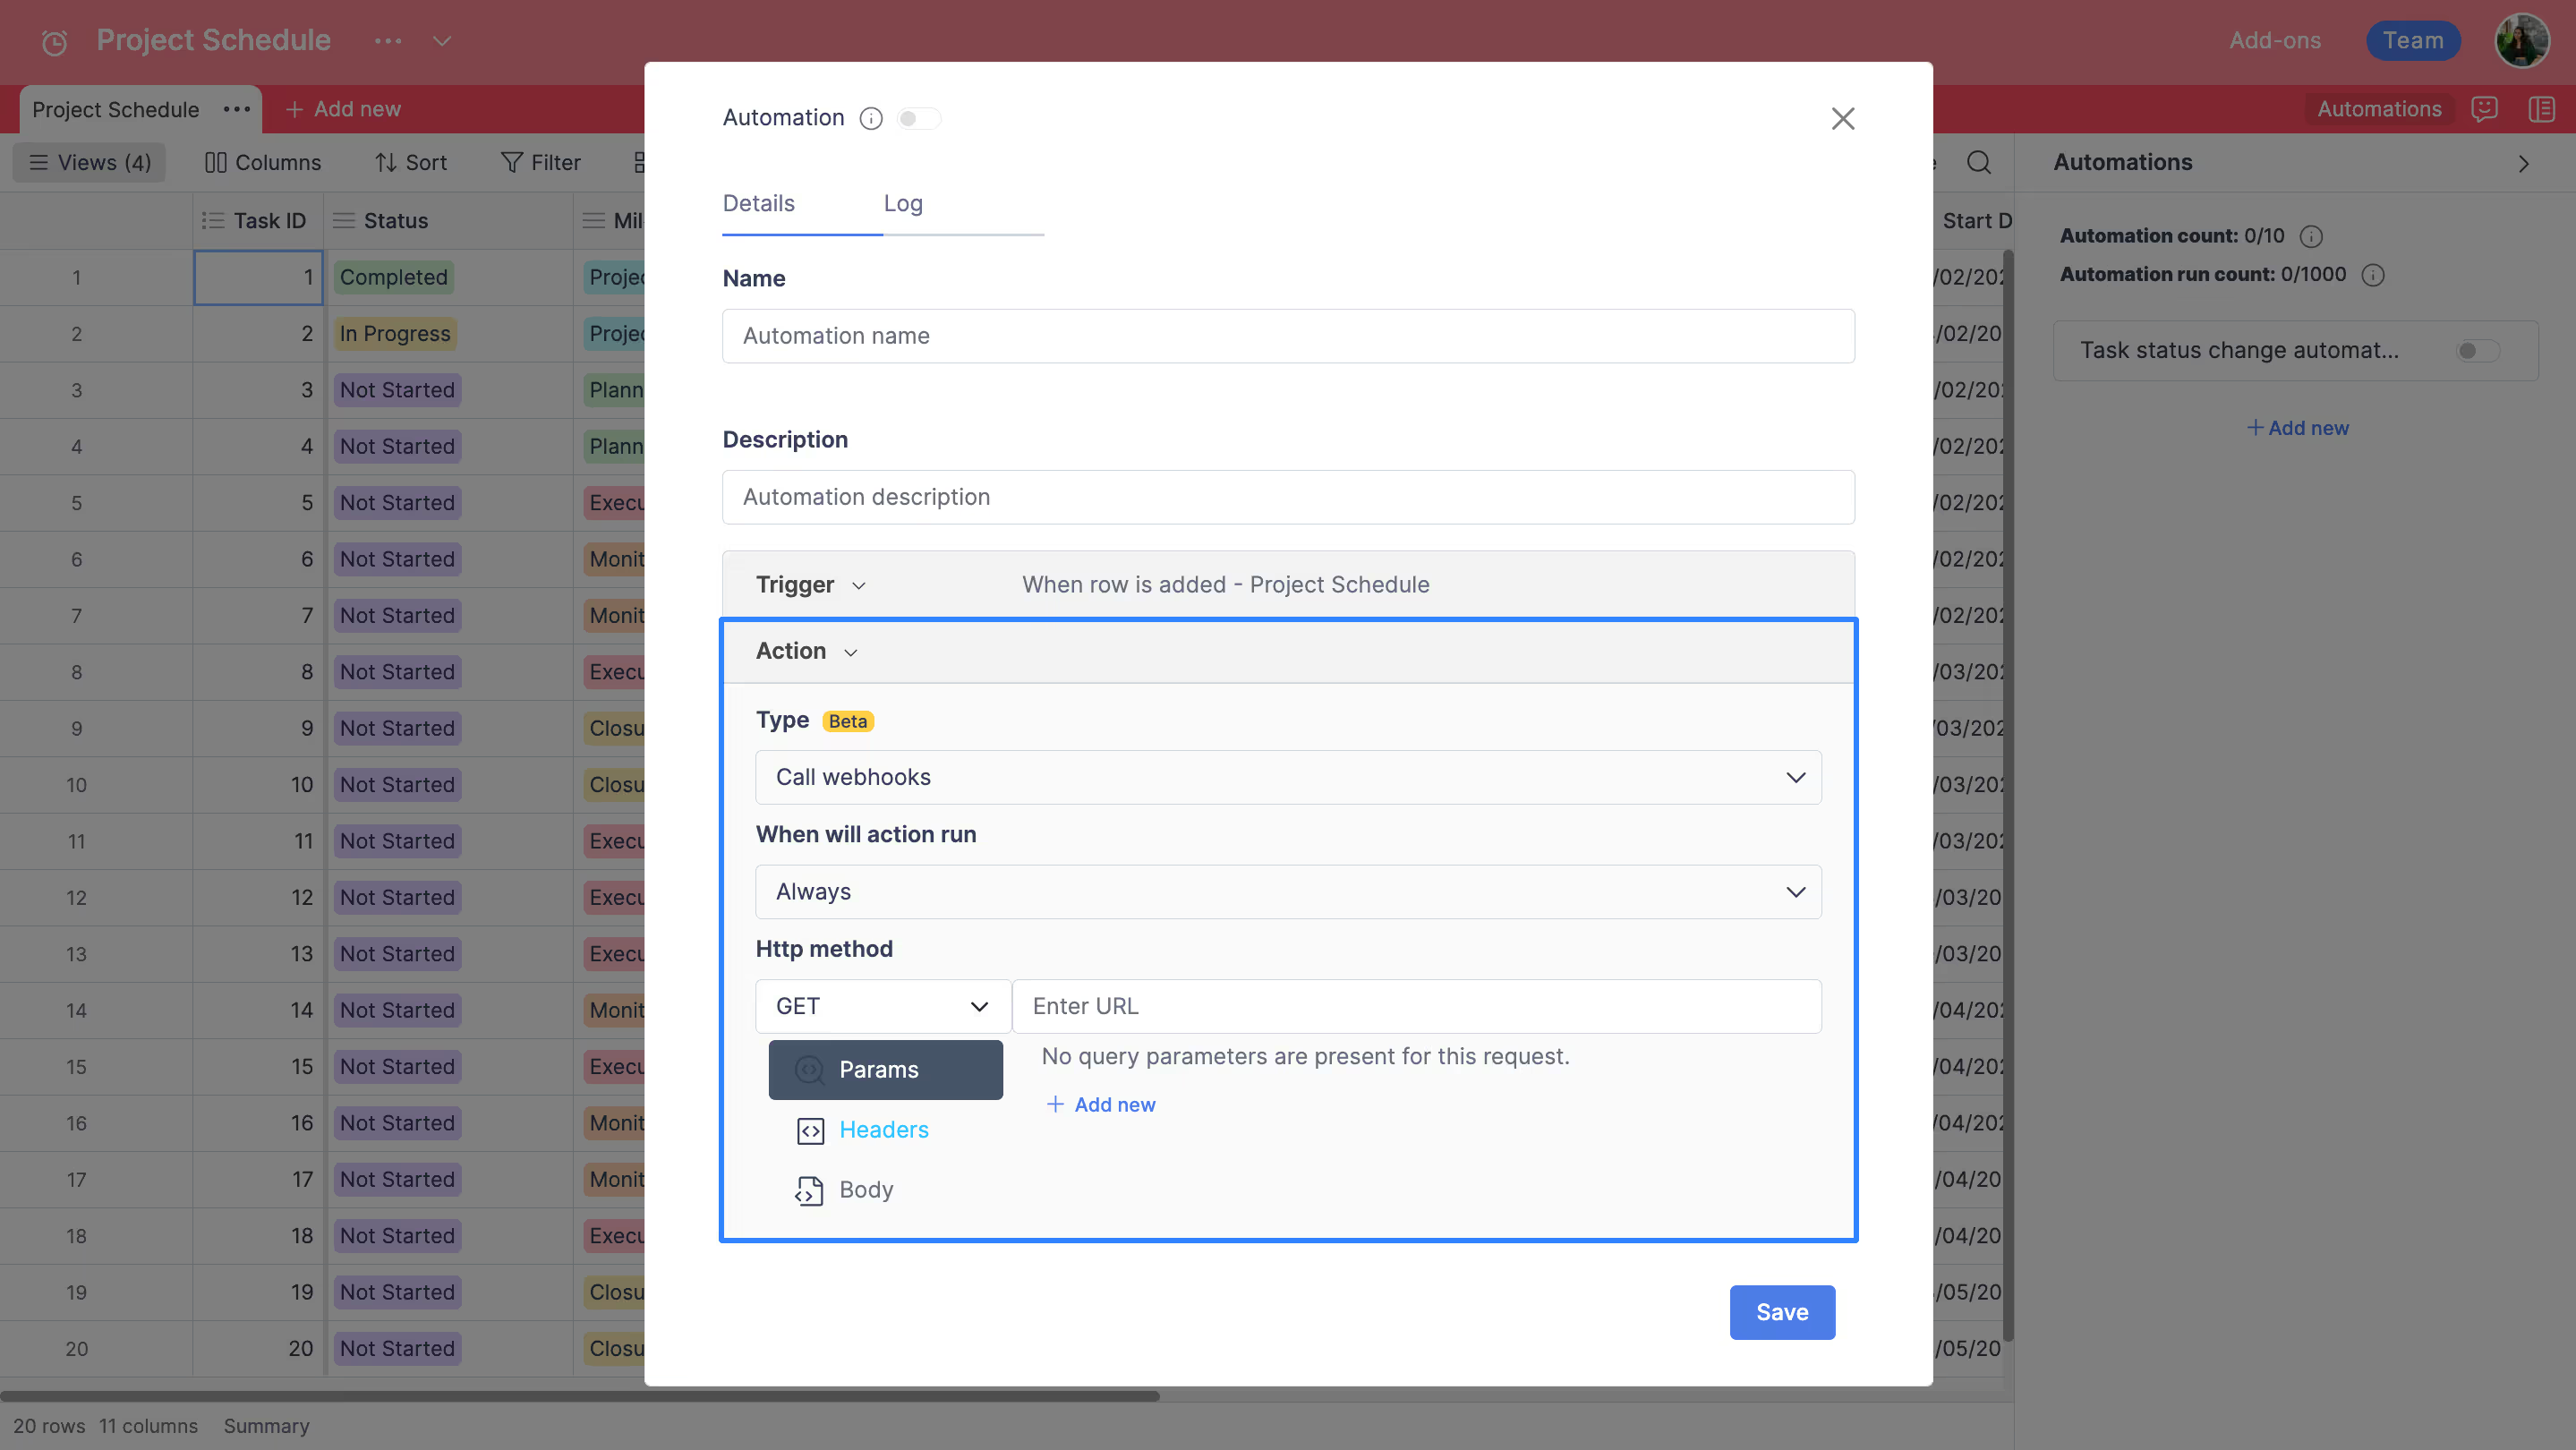
- Call webhooks: Set up a webhook to interact with external applications or services.
Customizing actions:
- For email-related actions, specify the recipients, subject, and content.
- For webhooks, enter the request URL, select the HTTP method, and define any necessary headers or parameters.
Using webhooks
Webhooks in Retable provide real-time data exchange between your Retable projects and external services. They're set up to trigger HTTP requests in response to specified events in your tables, facilitating instantaneous data synchronization and external application interactions.

Setting up webhooks:
- Choose the HTTP method (GET, POST, PUT, DELETE) that matches the requirement of the service you’re integrating with.
- Input the callback URL where the data should be sent. This URL is provided by the external service or application you’re integrating with.
- Define any required parameters that need to be appended to the request URL.
- Add necessary HTTP headers. Headers might include content-type, authentication tokens, or other key-value pairs required by the receiving API.
- For methods like POST or PUT, input the payload you want to send. Often this will be in JSON format, including the data you wish to transmit to the external service.
- Review all settings to ensure they are correct.
- Save the automation to activate it. The webhook will now run according to the defined trigger and settings.
Tips for creating effective automation
Automations can be leveraged for various purposes, such as scheduling reminders, updating team members, or integrating with external platforms. By automating these processes, you ensure that your project stays up-to-date and responsive to changes, without manual intervention.
Automation best practices:
- Regularly check the automation logs to understand their impact and ensure they’re running as intended.
- Be mindful of the automation run counts, especially if you're on a plan with limited automation executions per month.
- Experiment with different automation combinations to fully automate repetitive tasks within your project, maximizing efficiency.
- Always ensure the security of your webhooks, especially when sending sensitive data. Use secure URLs (HTTPS) and authentication headers as needed.
Embracing automation within Retable unlocks a new level of efficiency and precision in managing your projects. From simple notifications to complex integrations, the power of automation transforms routine tasks into automated workflows, saving time and reducing errors. Start implementing these automations to experience a smarter, more streamlined way of working. 🚀
Elevate your Retable experience by starting for free today and checking out the Retable Academy! Explore a wealth of resources, including tutorials, guides, and tips, all designed to help you master Retable's powerful features and enhance your data management skills.
more
Related Resources
Create your smart data management solution
Plan, track, and analyse with your ease. Transform your data with an all-in-one platform, collaborate with your teammates.
Try for free!
.avif)
.avif)
.avif)
.avif)
.avif)