.avif)
.avif)
In today's fast-paced business environment, effective data management is essential for success. Retable offers a powerful platform that combines the flexibility of databases with the simplicity of spreadsheets, making data management a breeze. In this guide, we'll walk you through creating and managing workspaces, projects, and tables in Retable, so you can maximize your productivity and streamline your workflow. 🌟
Table of contents
- Creating workspaces: Your collaborative command center
- Managing projects: Bringing your tasks to life
- Setting up tables: The heart of your data
- Conclusion
Creating workspaces: Your collaborative command center
Workspaces in Retable are like digital rooms where you can cluster related projects and tables, ensuring a streamlined workflow and easy collaboration. Here's how to get started:
Creating workspaces
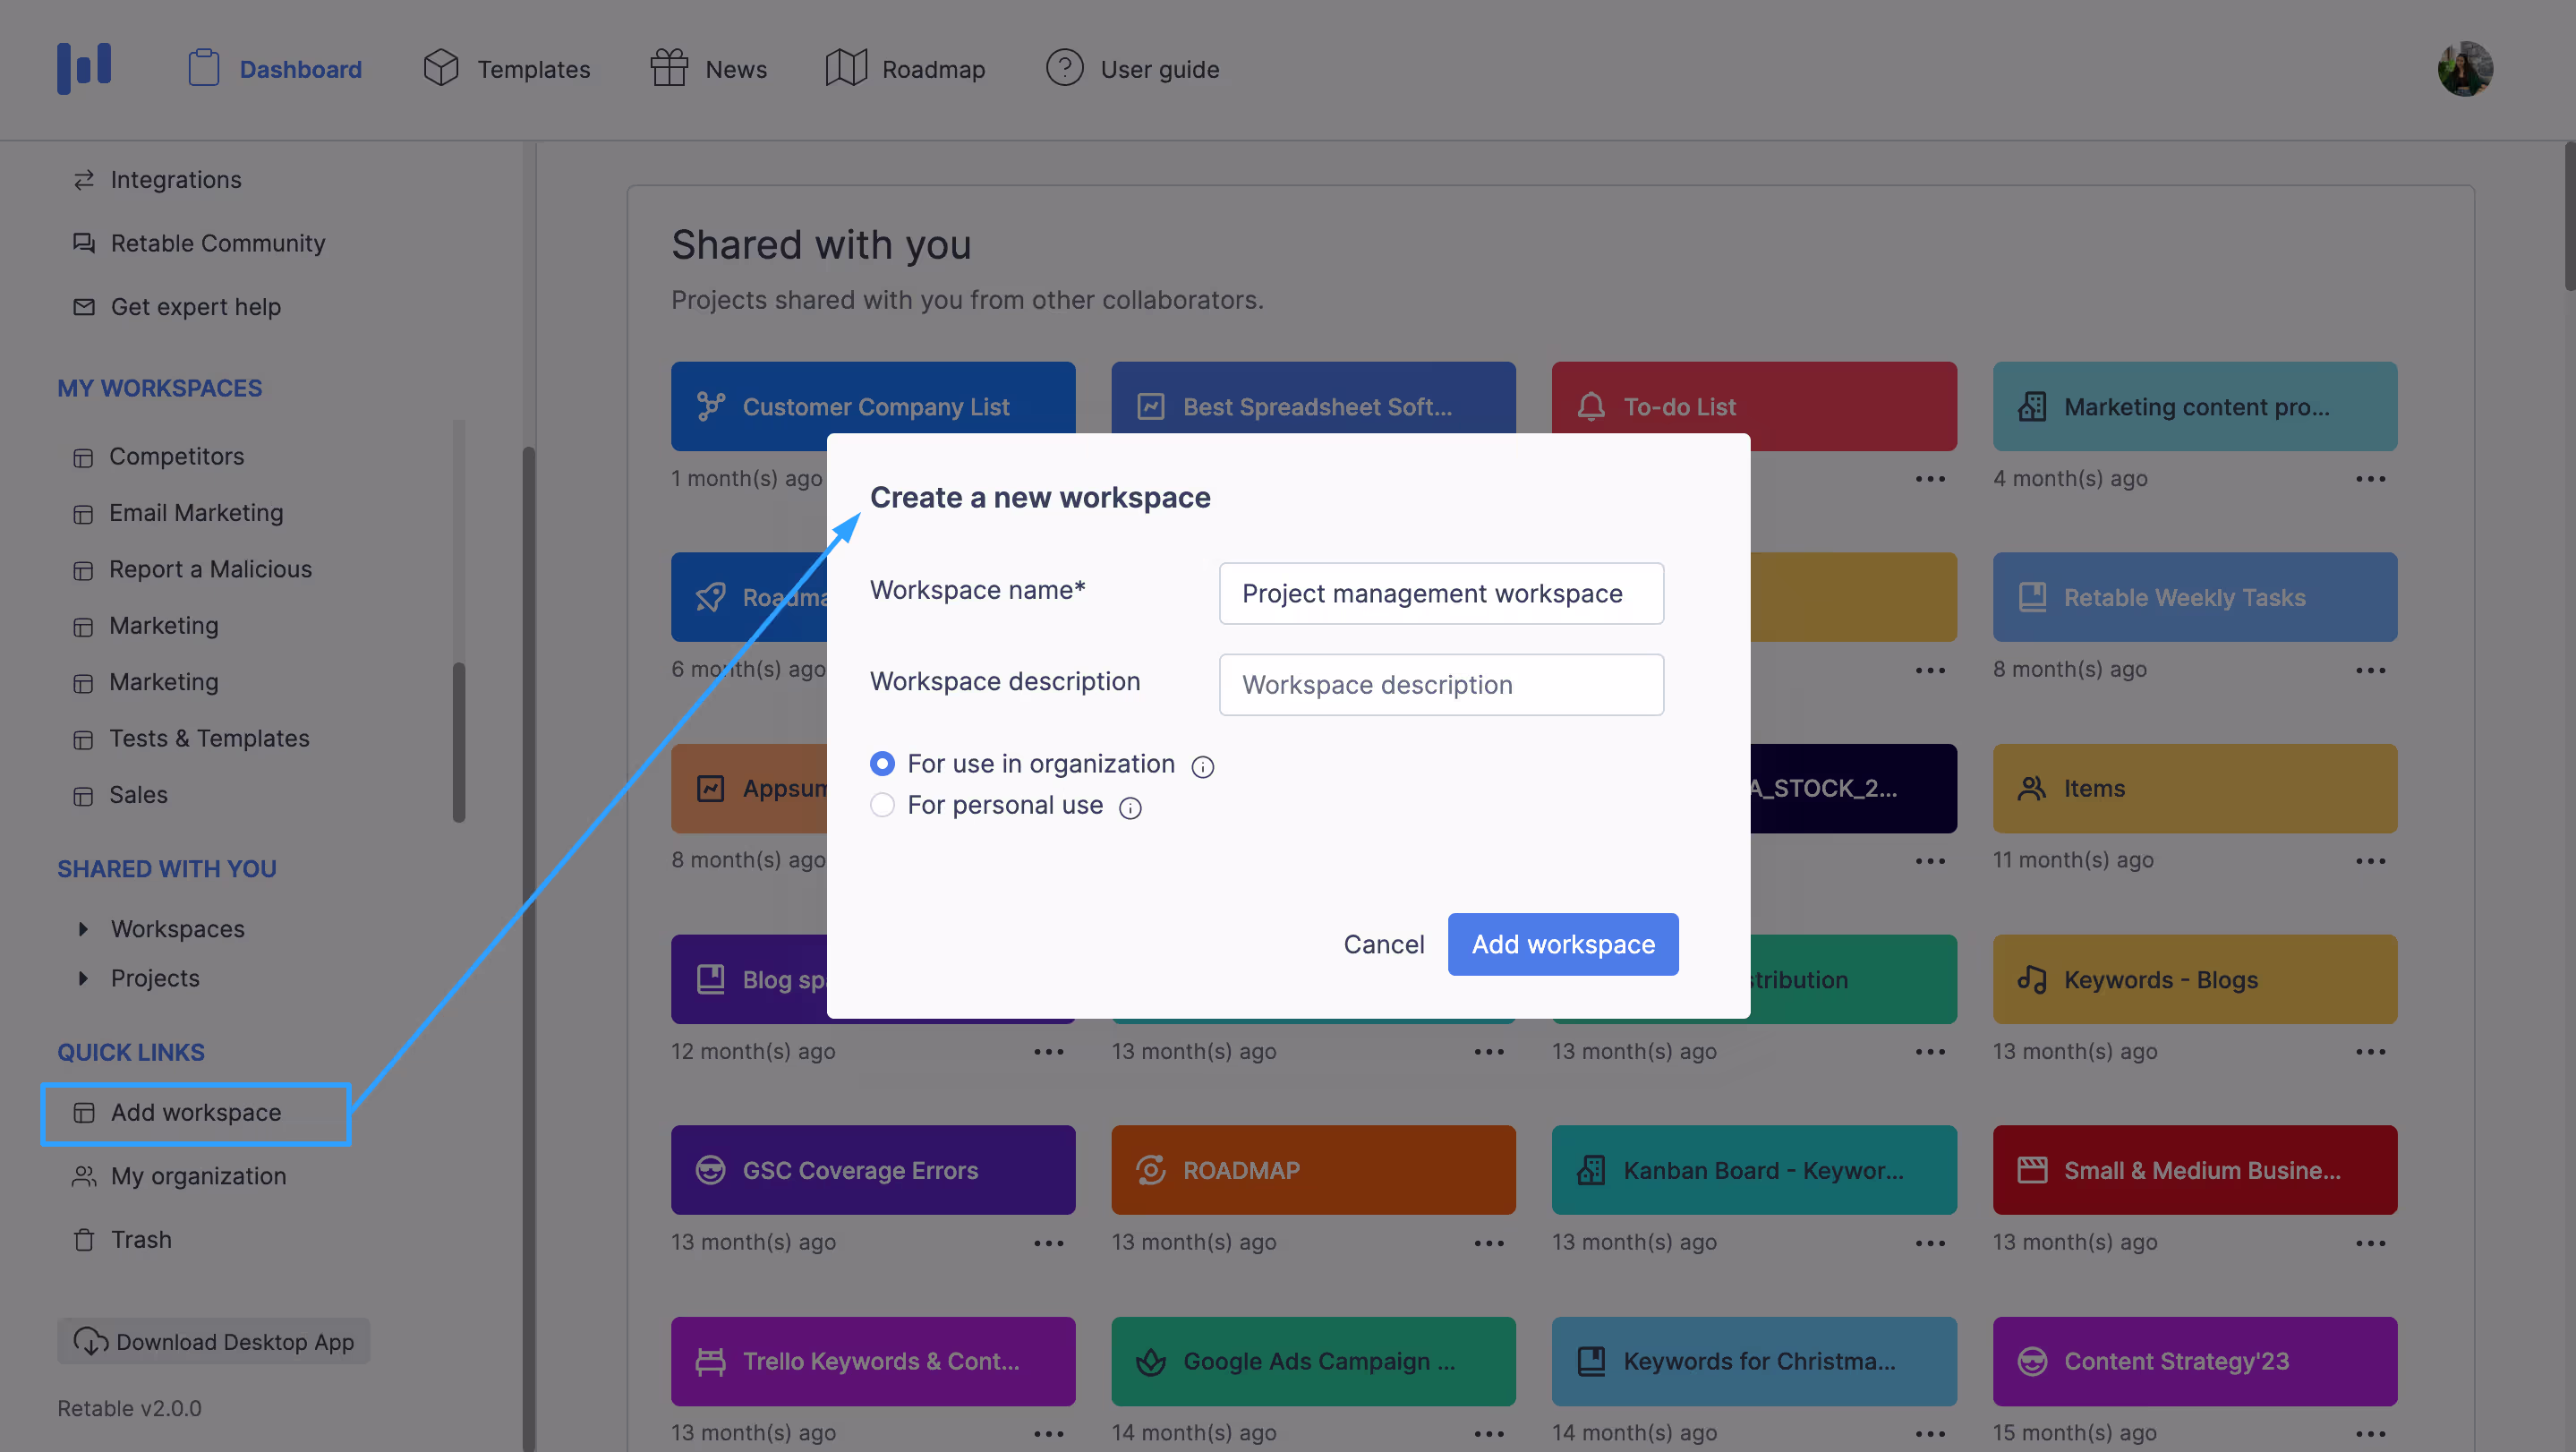
- Click on the “Add workspace” button.
- Enter a name for your workspace in the workspace name field (this is a required step).
- Choose the workspace's purpose: “For use in organization” or “For personal use.”
- Click on “Add workspace” to finalize the creation.
You can create as many workspaces as you like, categorizing your projects within different workspaces and sharing them with your team. 🗂️
Renaming a workspace
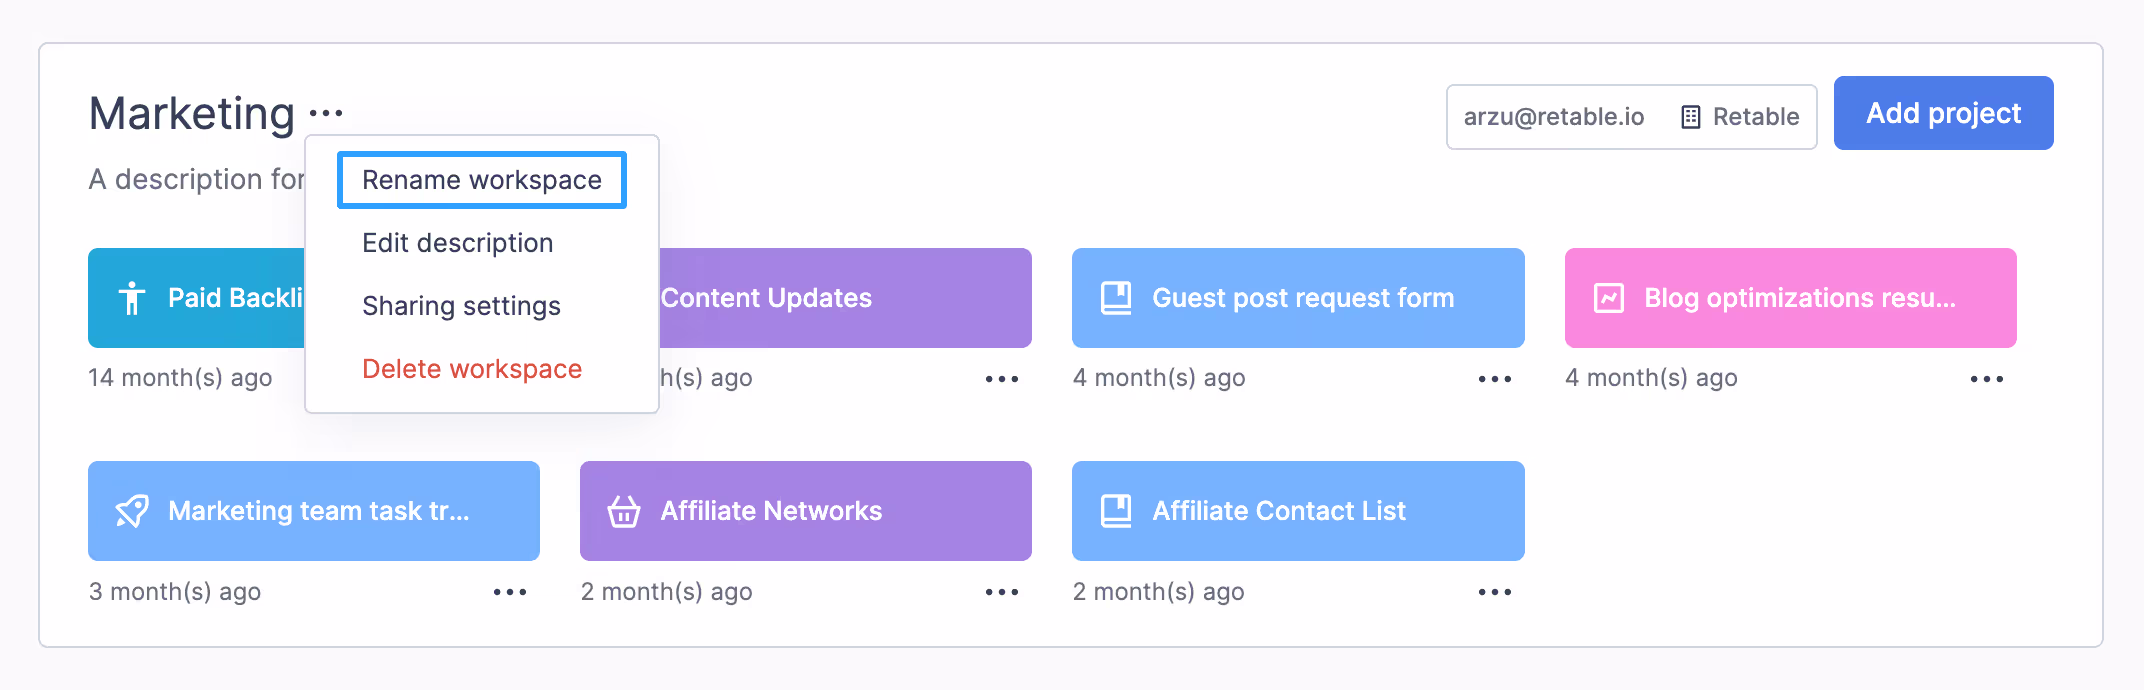
- Locate the workspace you wish to rename.
- Click the three dots next to the workspace name.
- Select “Rename Workspace” and enter the new name.
Editing workspace description

- Click the three dots next to the desired workspace.
- Choose “Edit description.”
- Modify the workspace name or its description and save changes.
Sharing a workspace
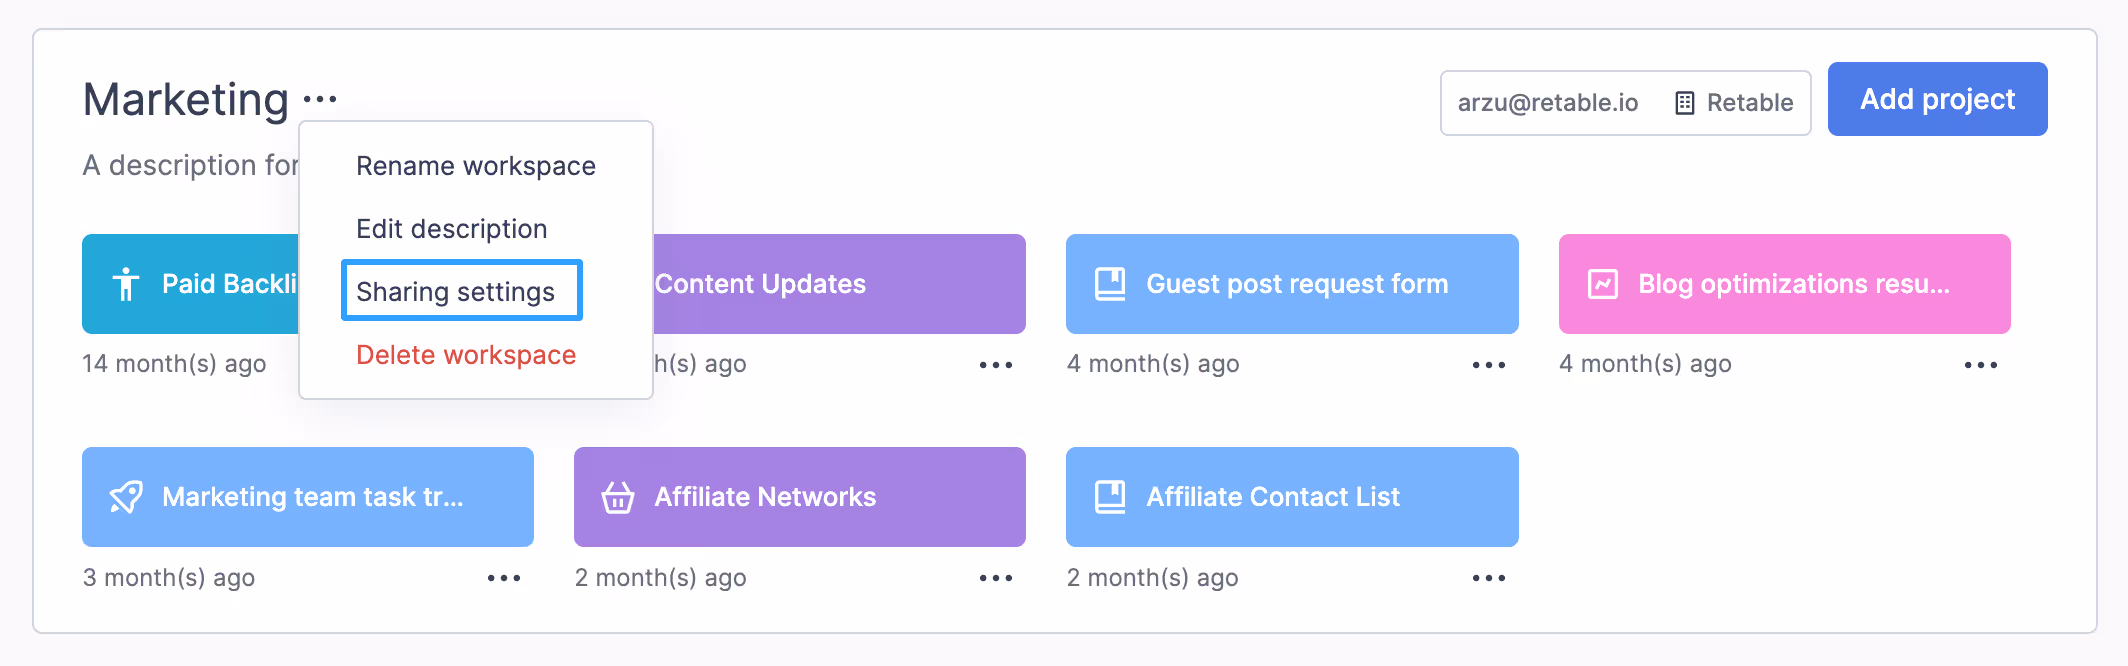
- Go to the workspace settings by clicking the three dots.
- Select “Sharing settings.”
- View all workspace members and invite new ones by typing their email addresses, assigning roles (Owner, Editor, Viewer), and clicking “Invite.”
Deleting a workspace
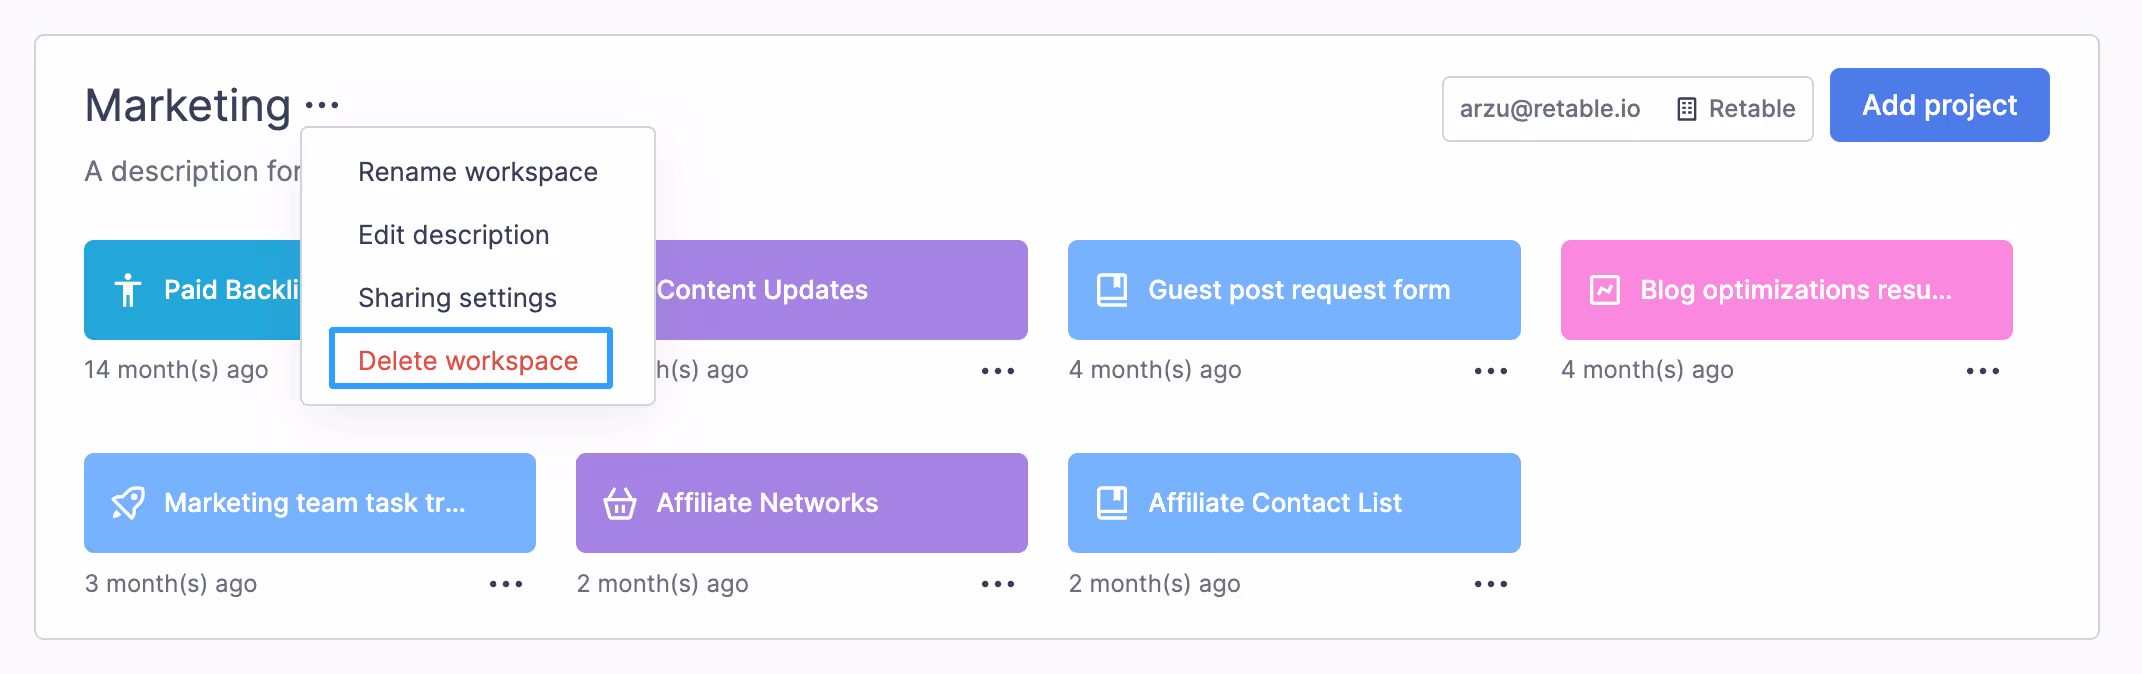
- Click the three dots next to the workspace you intend to delete.
- Choose “Delete workspace” and confirm the deletion in the pop-up window.
- You can also restore the deleted workspace from the project trash bin.
Managing projects: Bringing your tasks to life
Projects in Retable are where your tasks come to life. Whether starting from scratch, importing from another source, or using templates, Retable makes it easy to manage and customize your projects.
Creating a new project
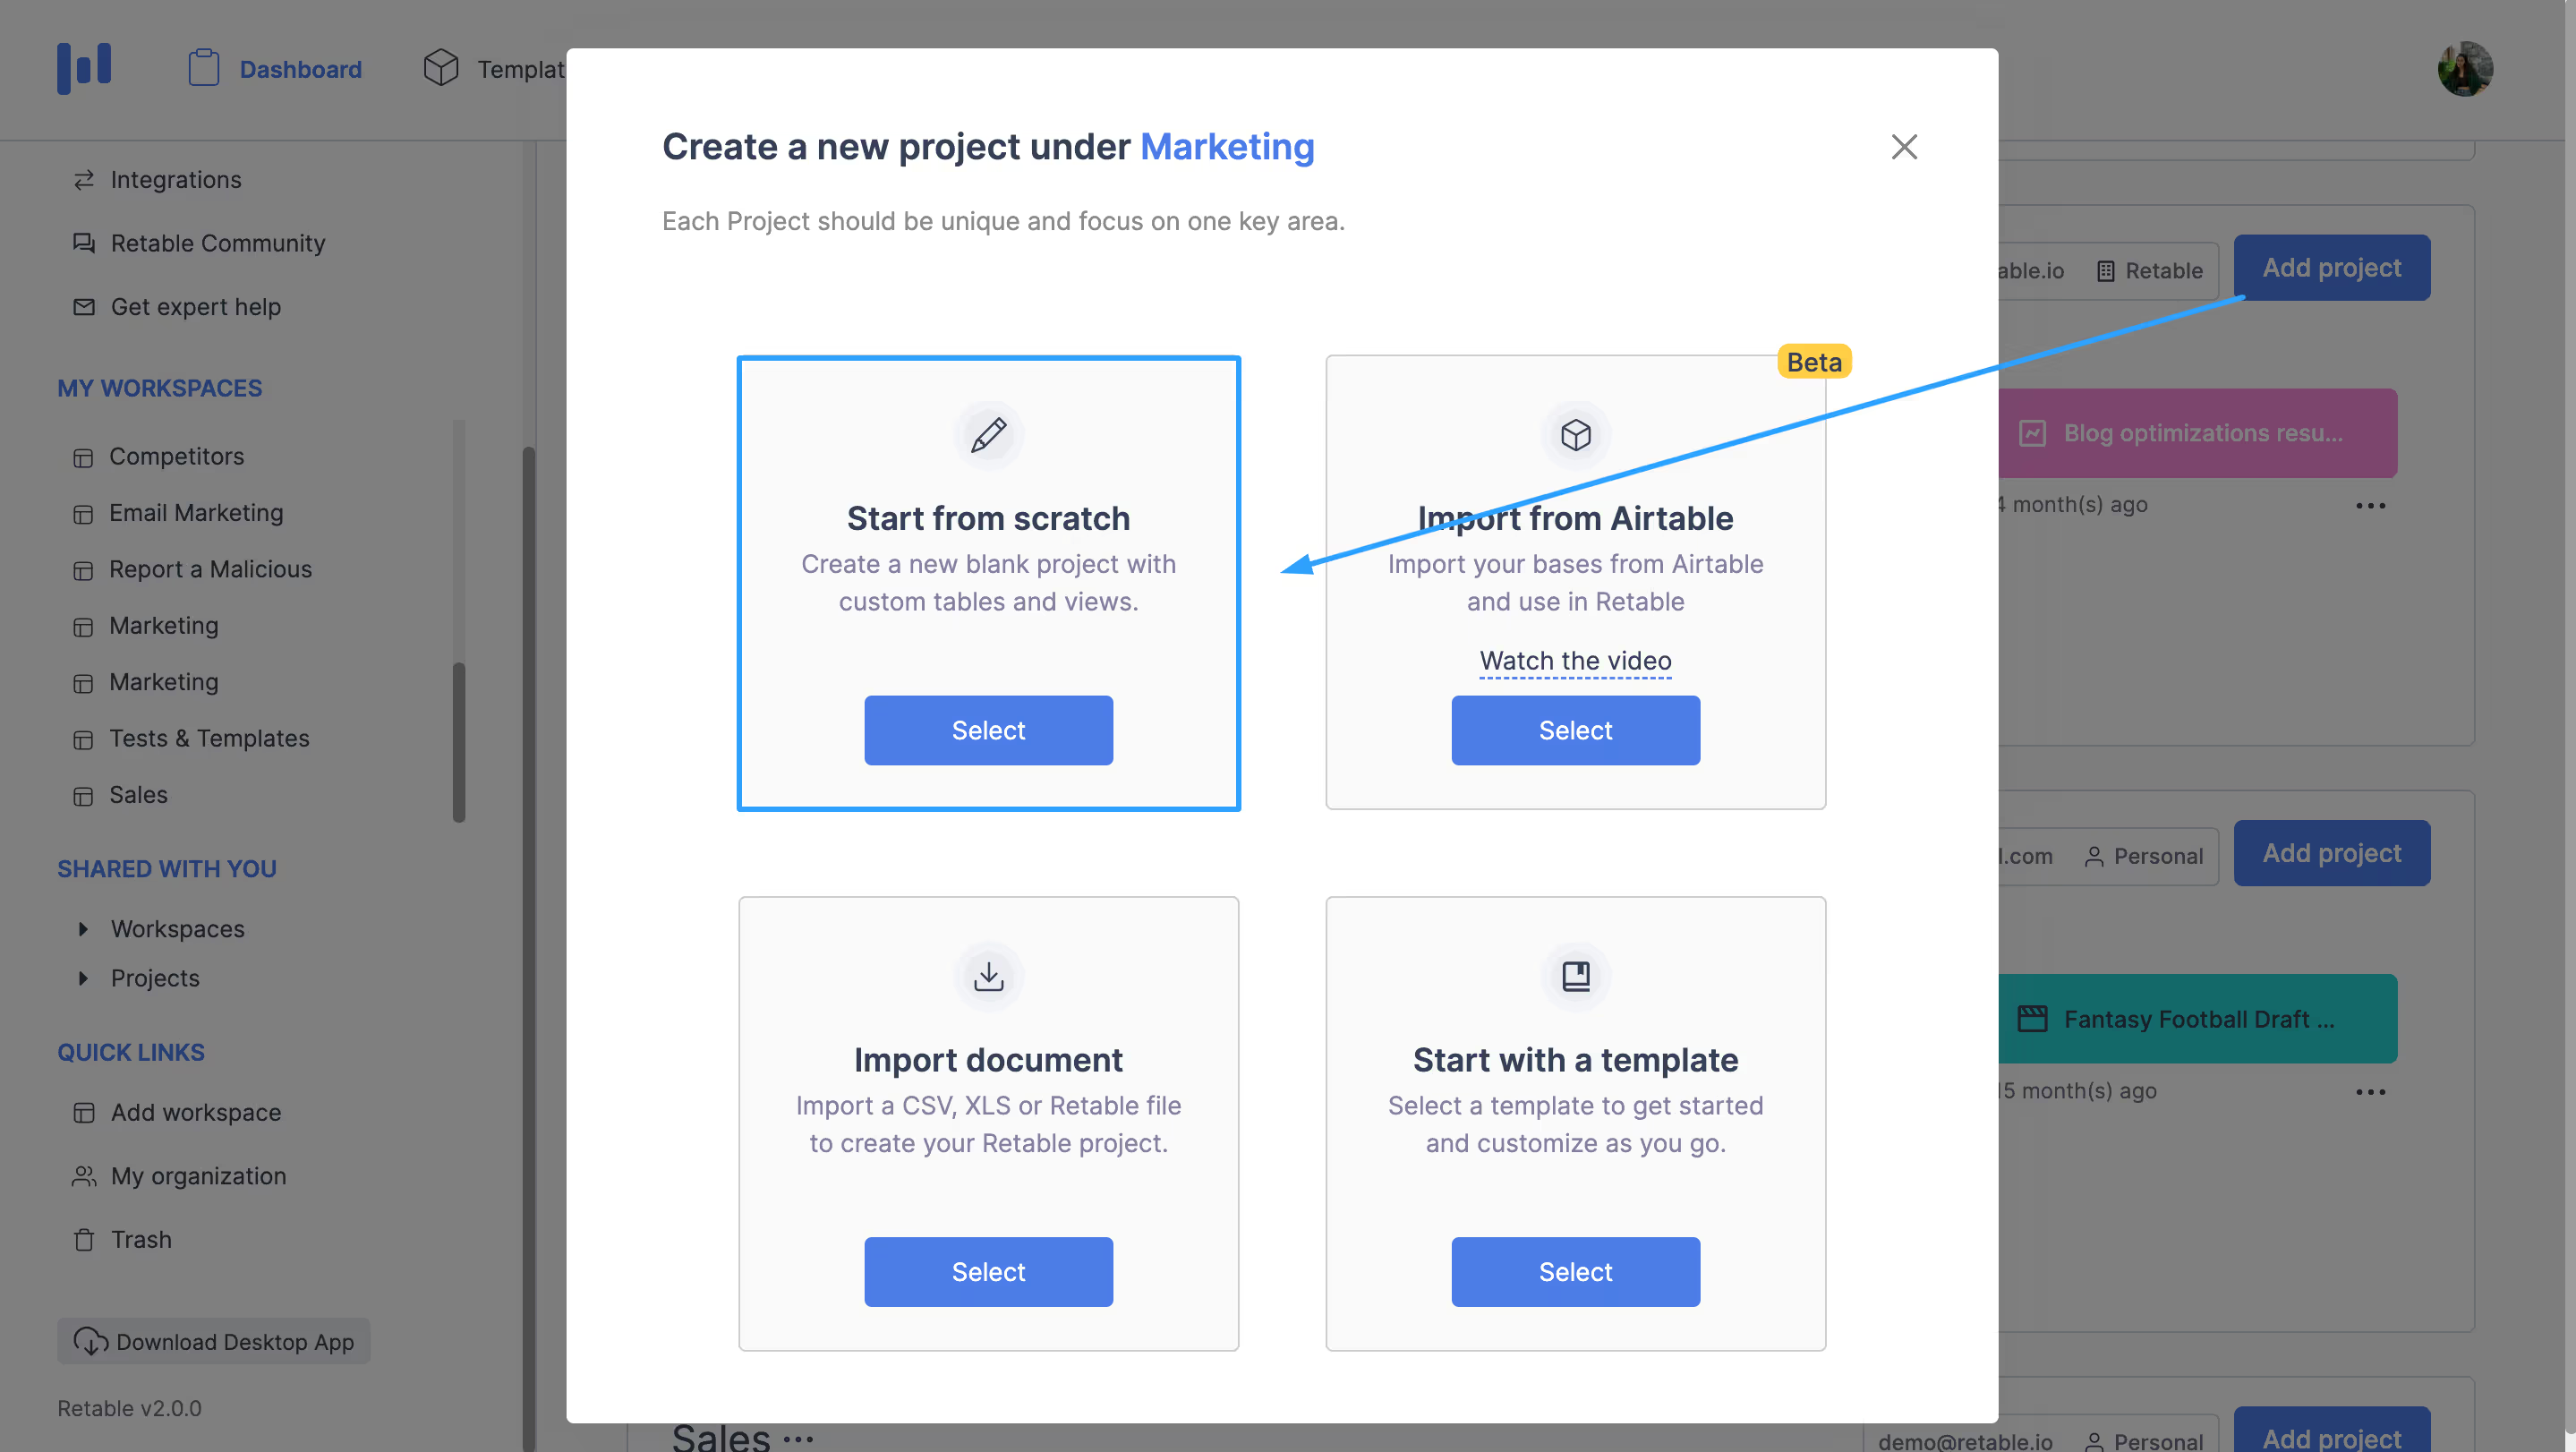
- Click on “Start from scratch.”
- Enter the project name, choose a color, and select an icon to customize your project.
- Click on "Create" to establish your new project.
Editing and managing projects
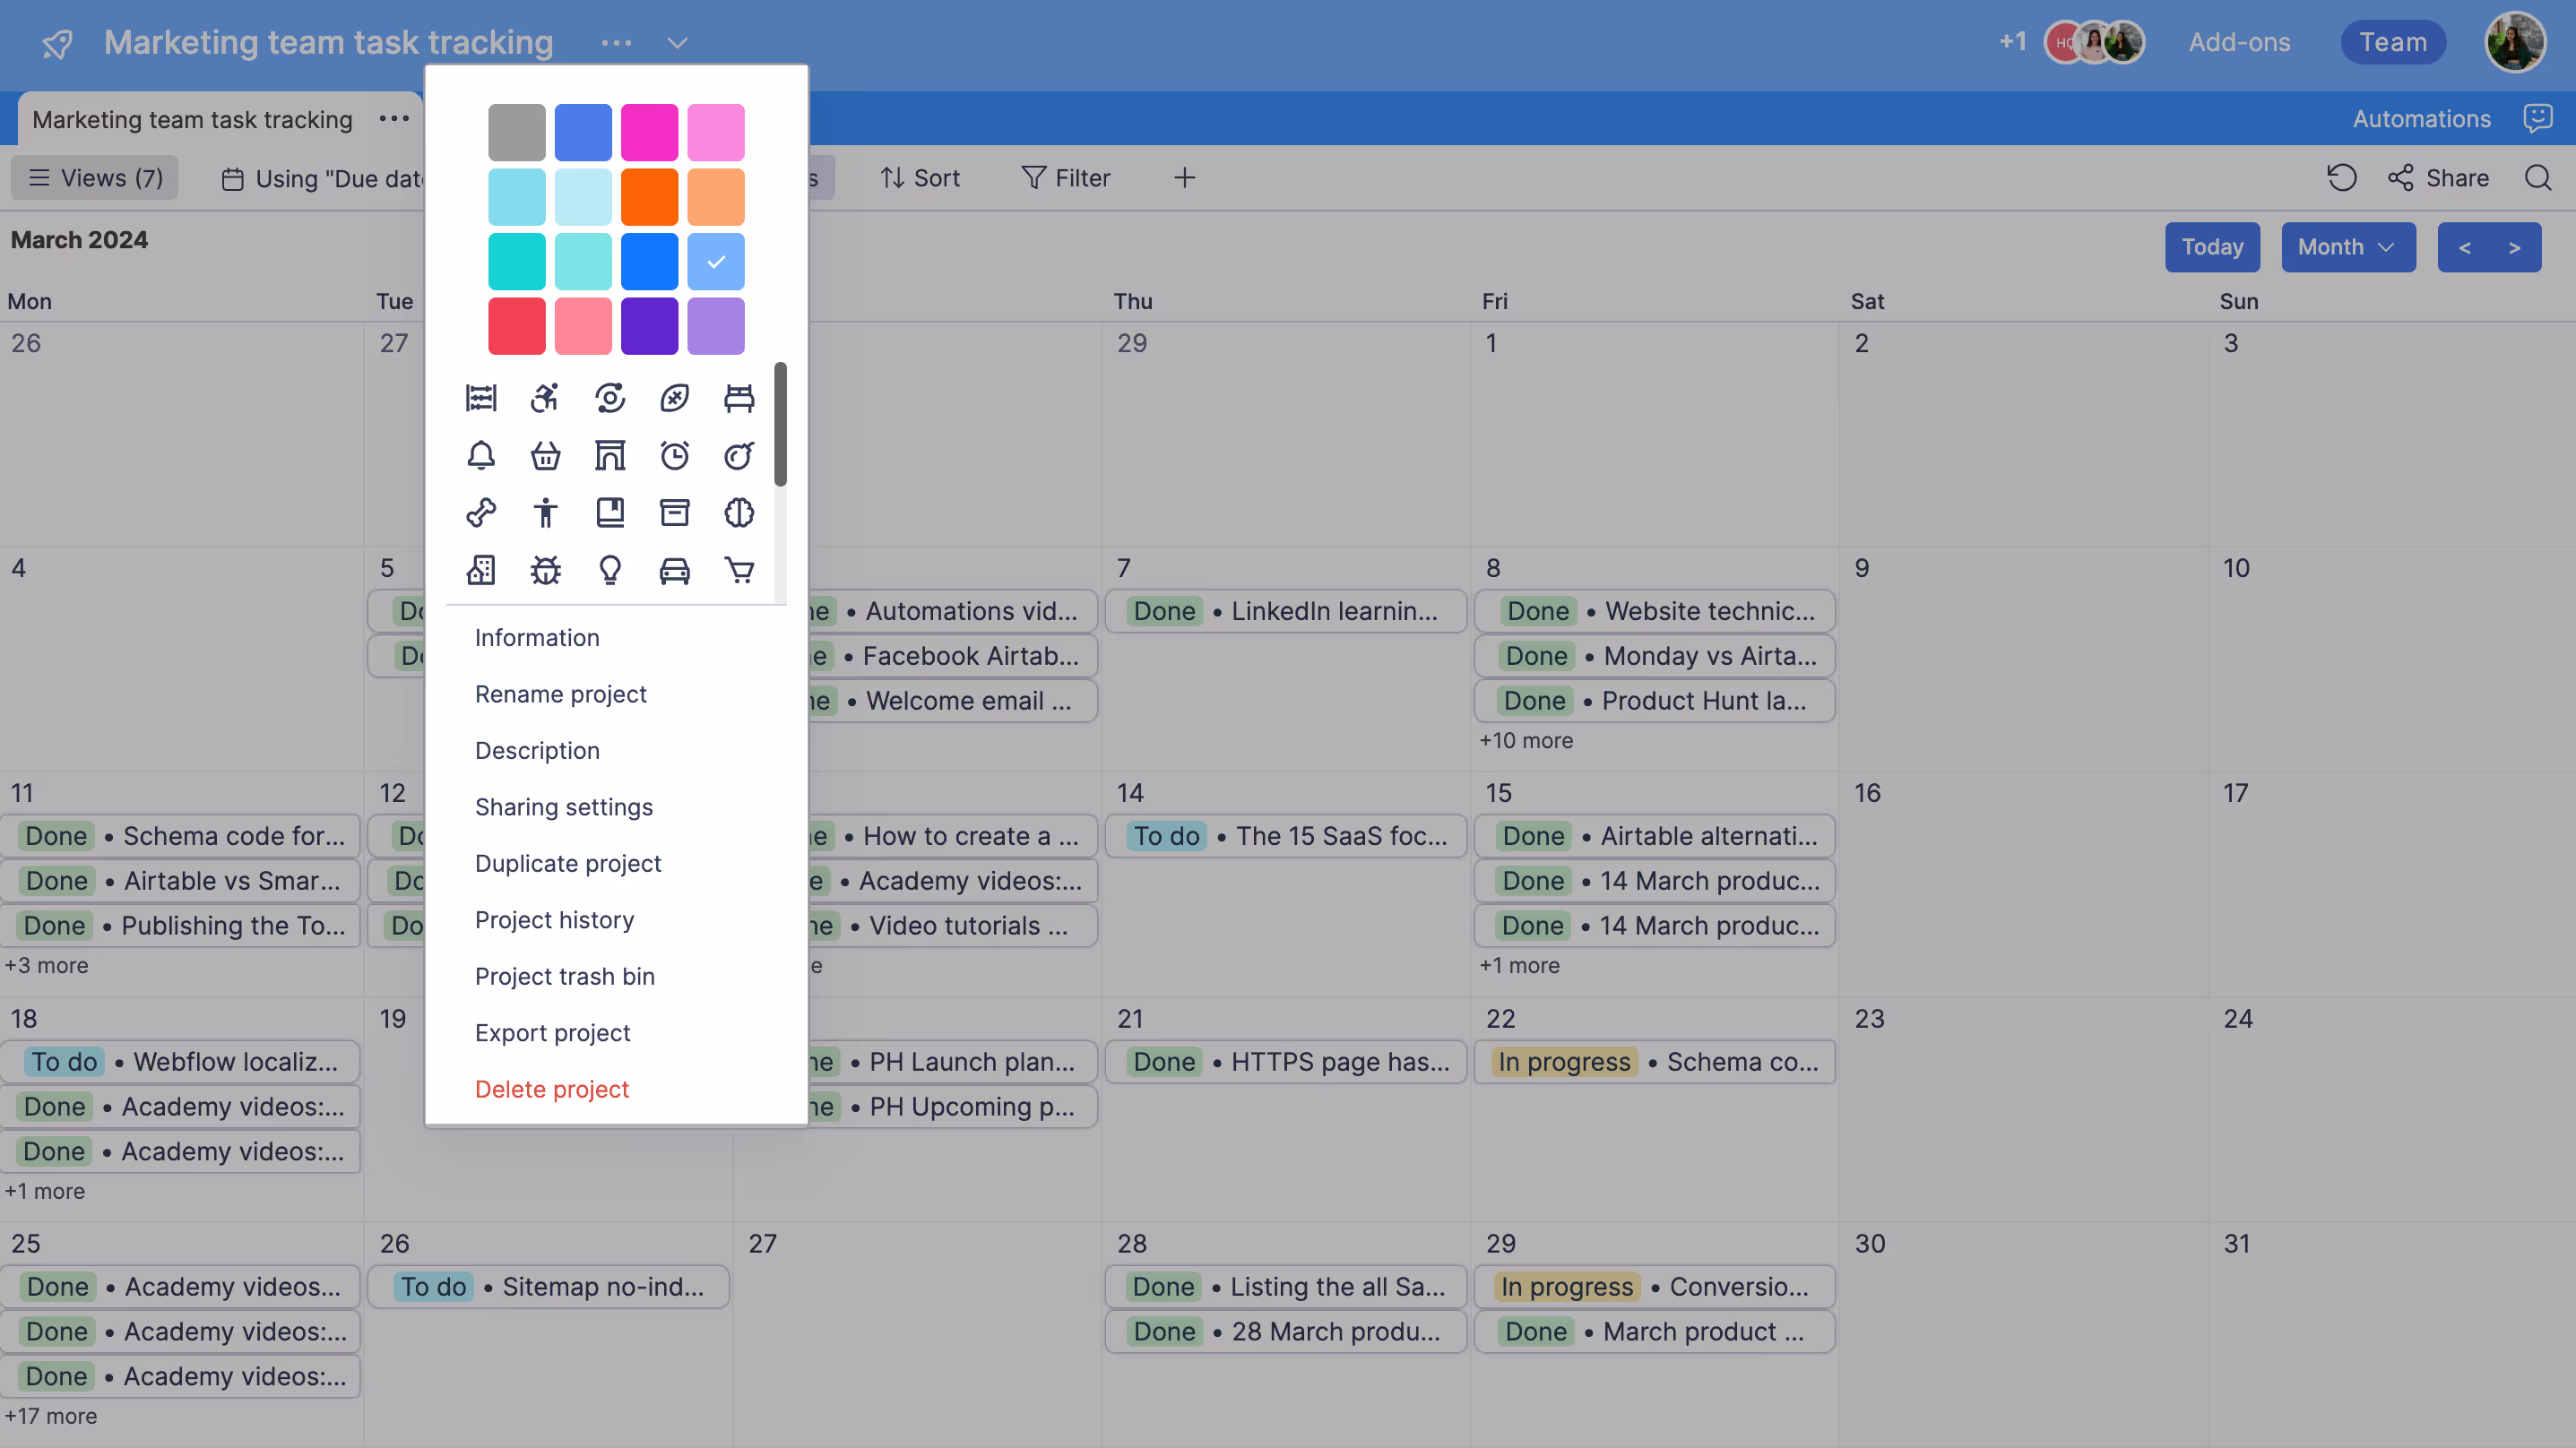
- Access project settings by clicking the three dots next to the project name.
- Here, you can edit the project’s details, rename it, modify its description, or change sharing settings.
Deleting a project
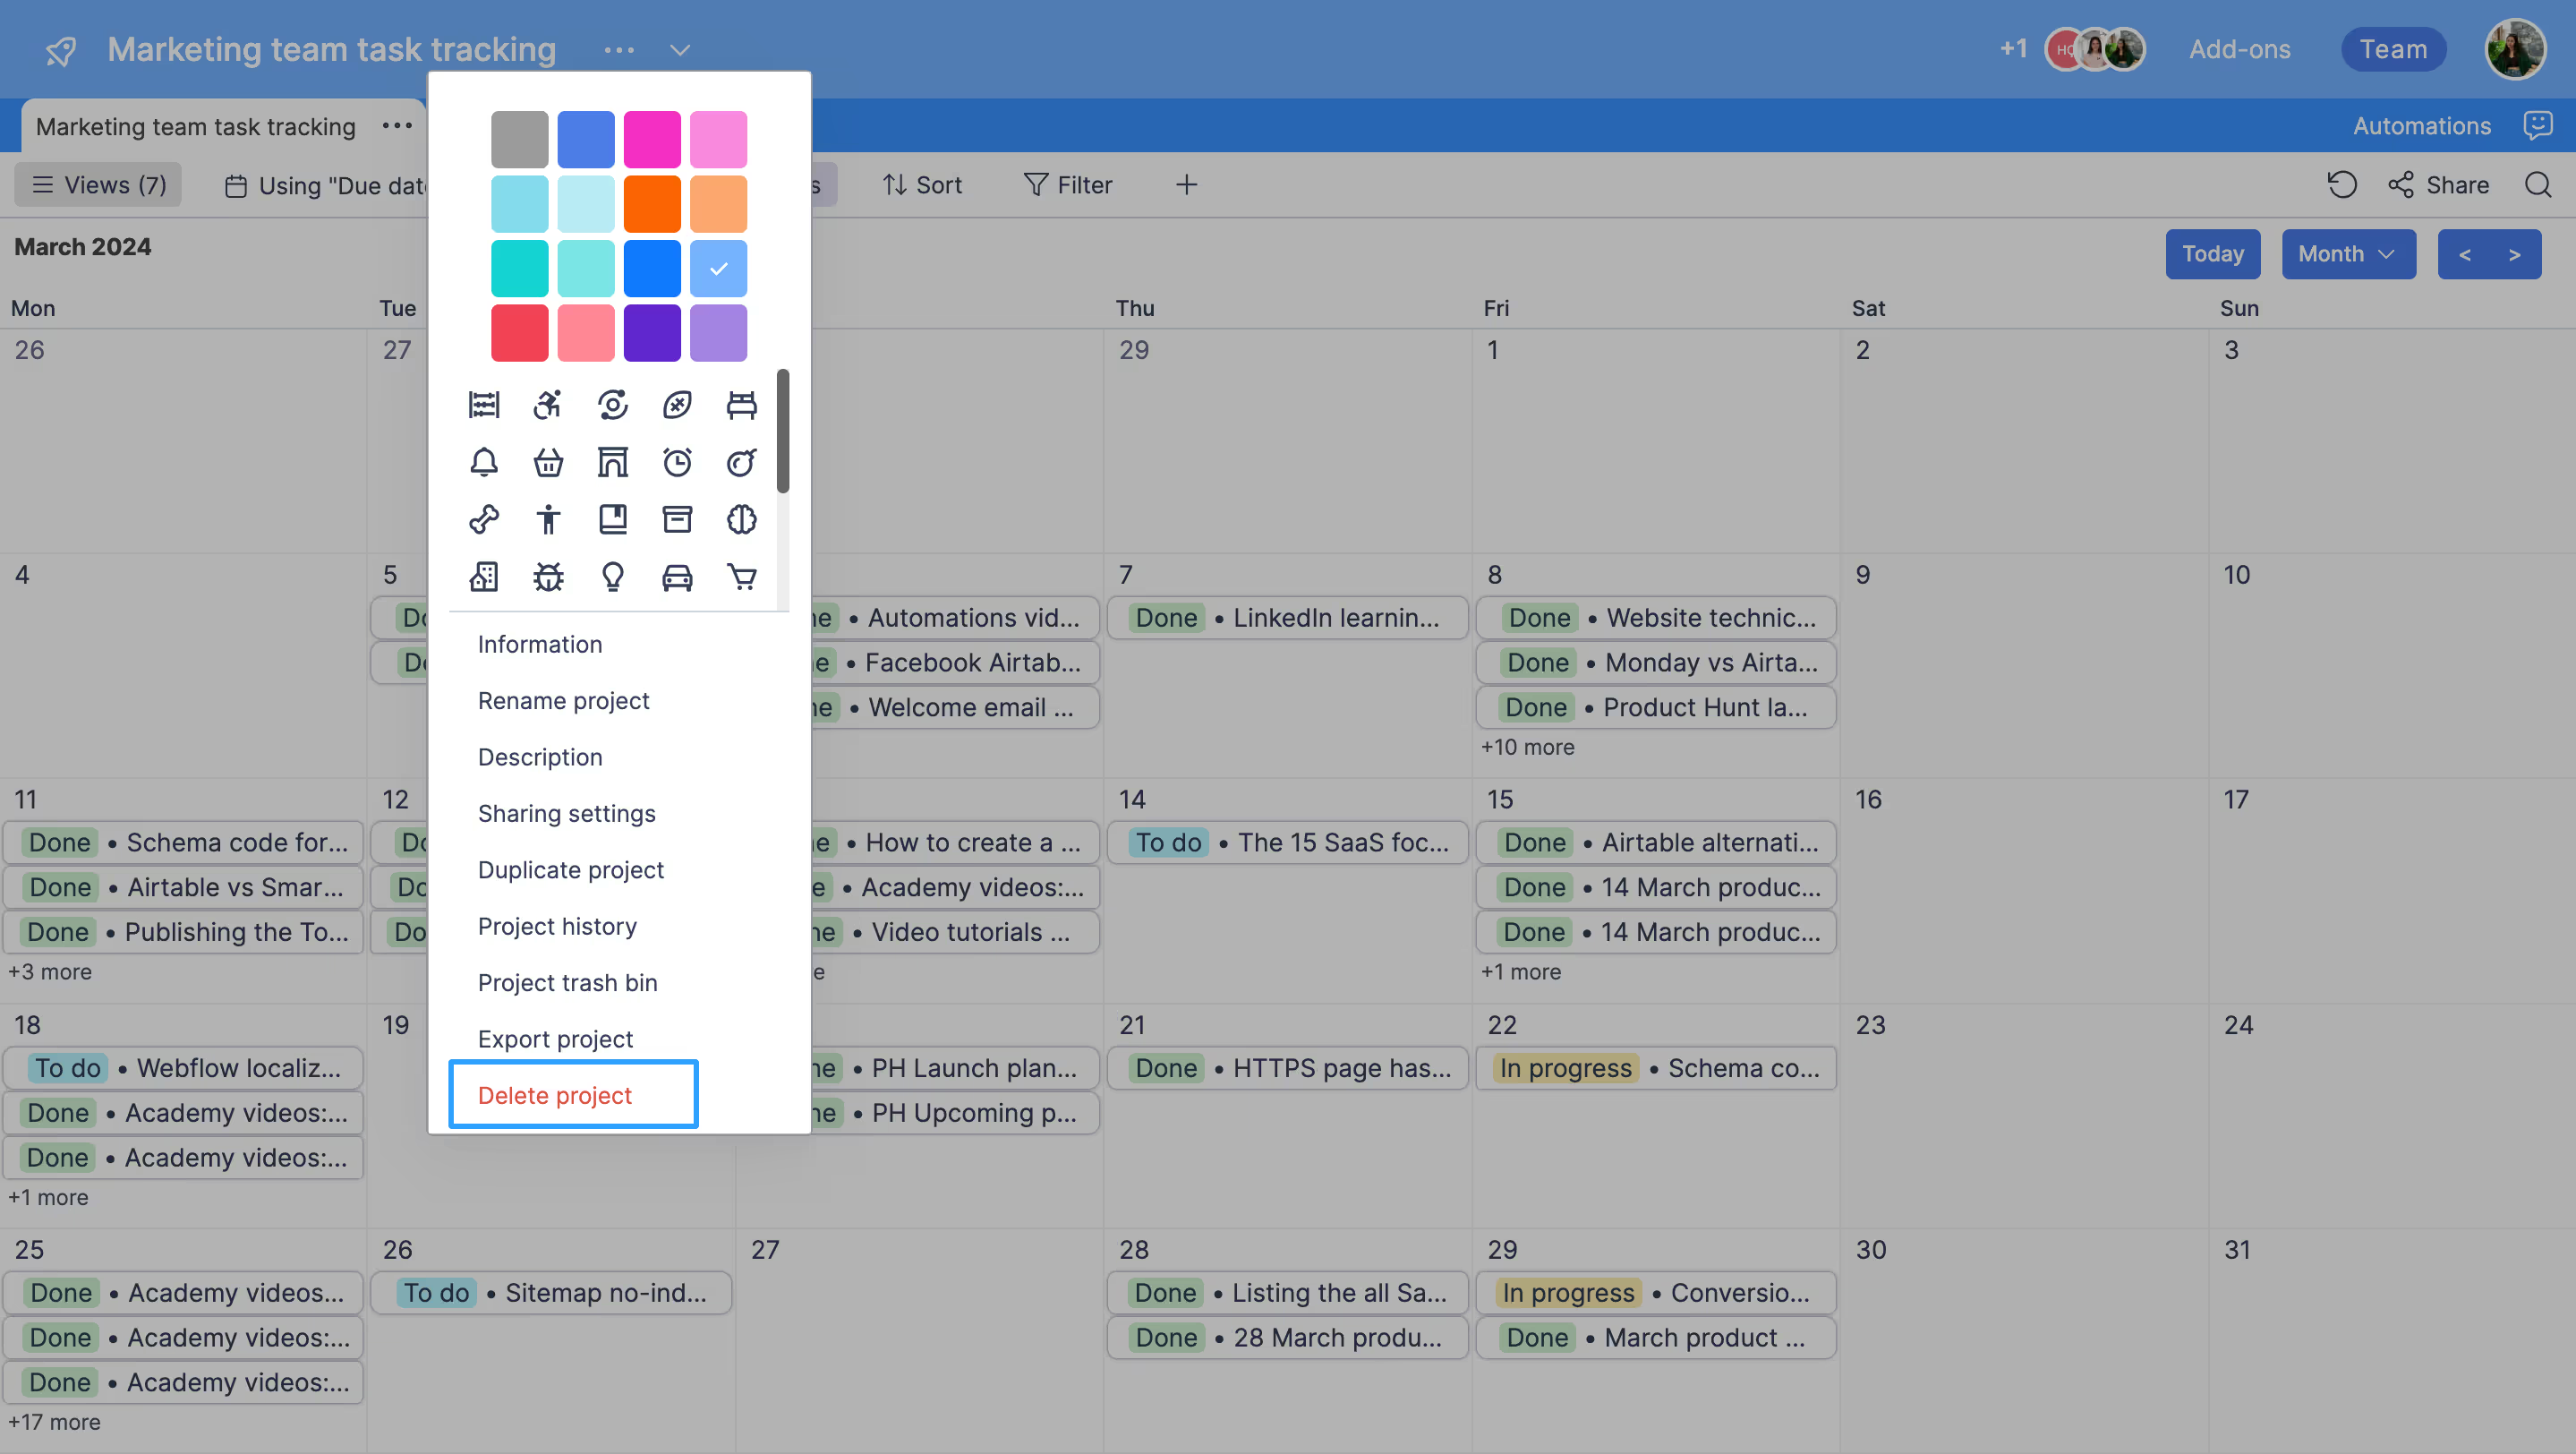
- Within the project's options, select “Delete Project” and confirm your choice to remove the project permanently.
- After deleting the project, you can always restore it from the project trash bin.
Setting up tables: The heart of your data
Tables in Retable are where your data lives. You can create new tables, import data, or even lock tables for controlled editing, ensuring your data is manageable and accessible.
Adding a new table
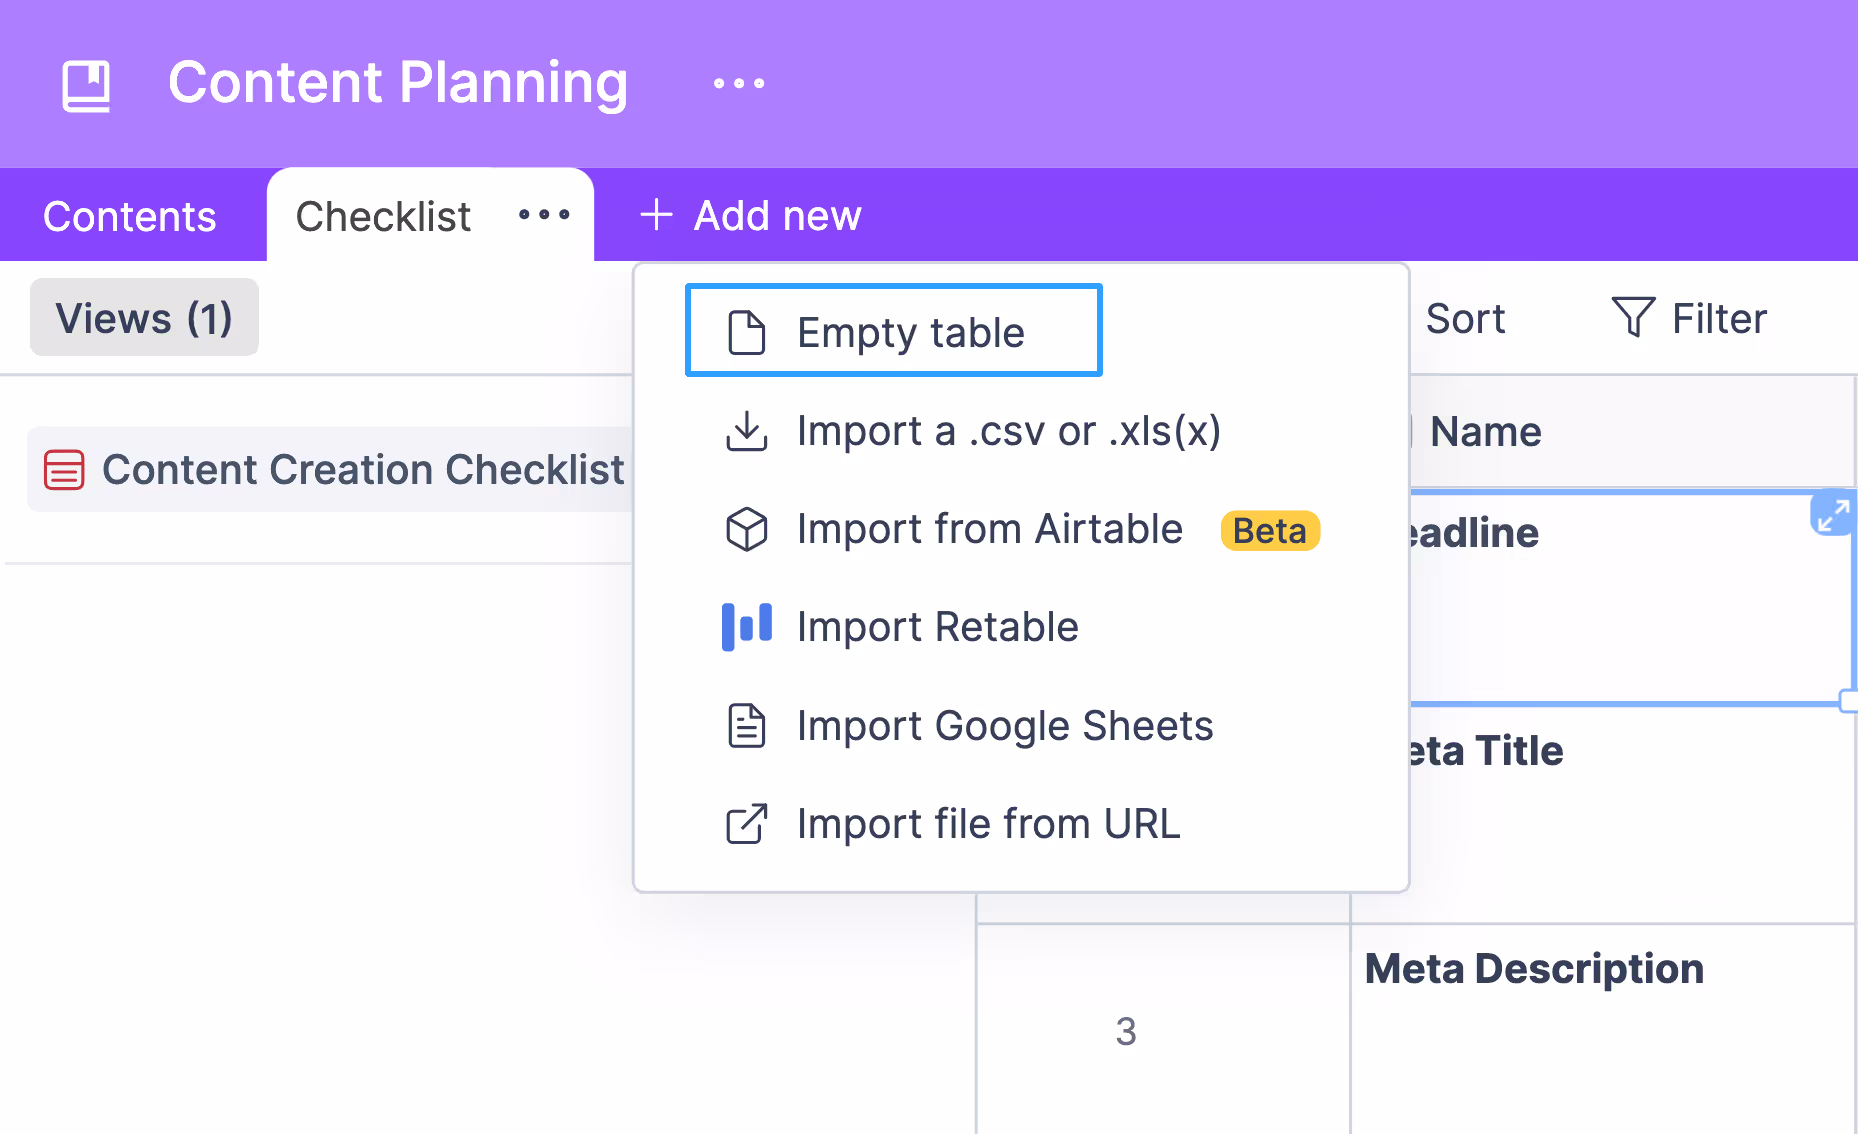
- Choose “Add new” and select “Empty table.”
- Name your table and confirm by clicking "Create."
Importing tables
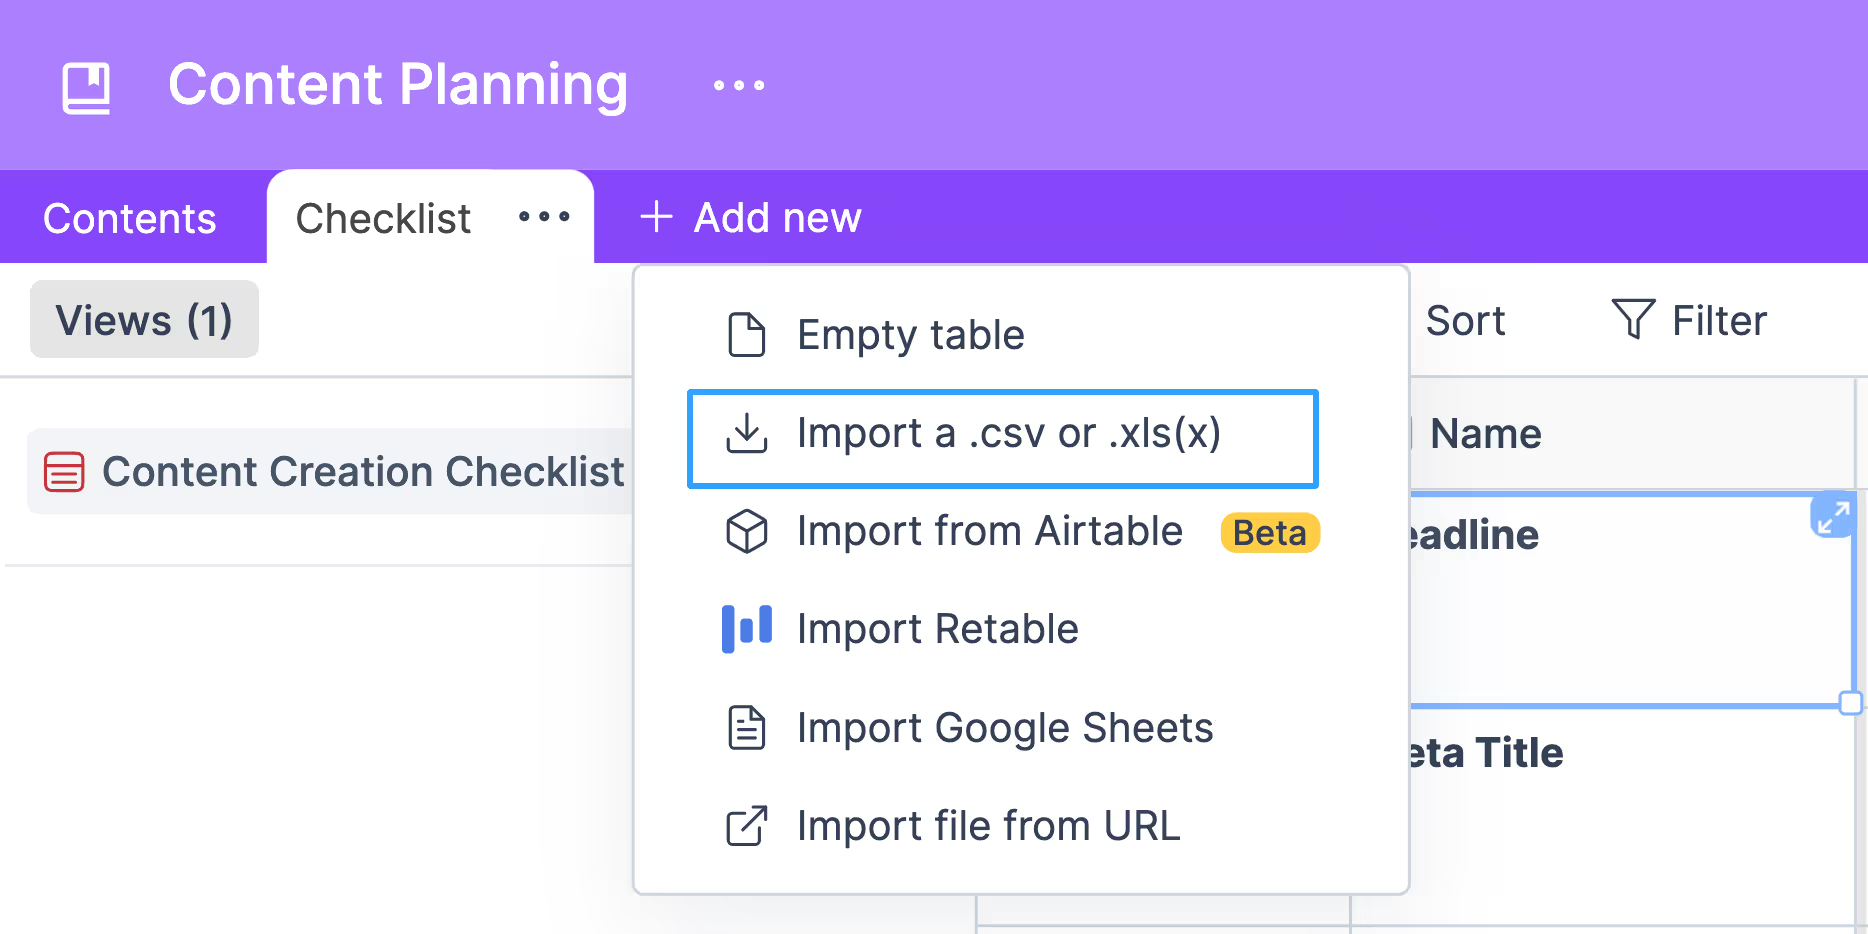
- Click on “Import a .csv or .xls(x)” to import files.
- Follow the prompts to upload and integrate your data into Retable.
Managing tables
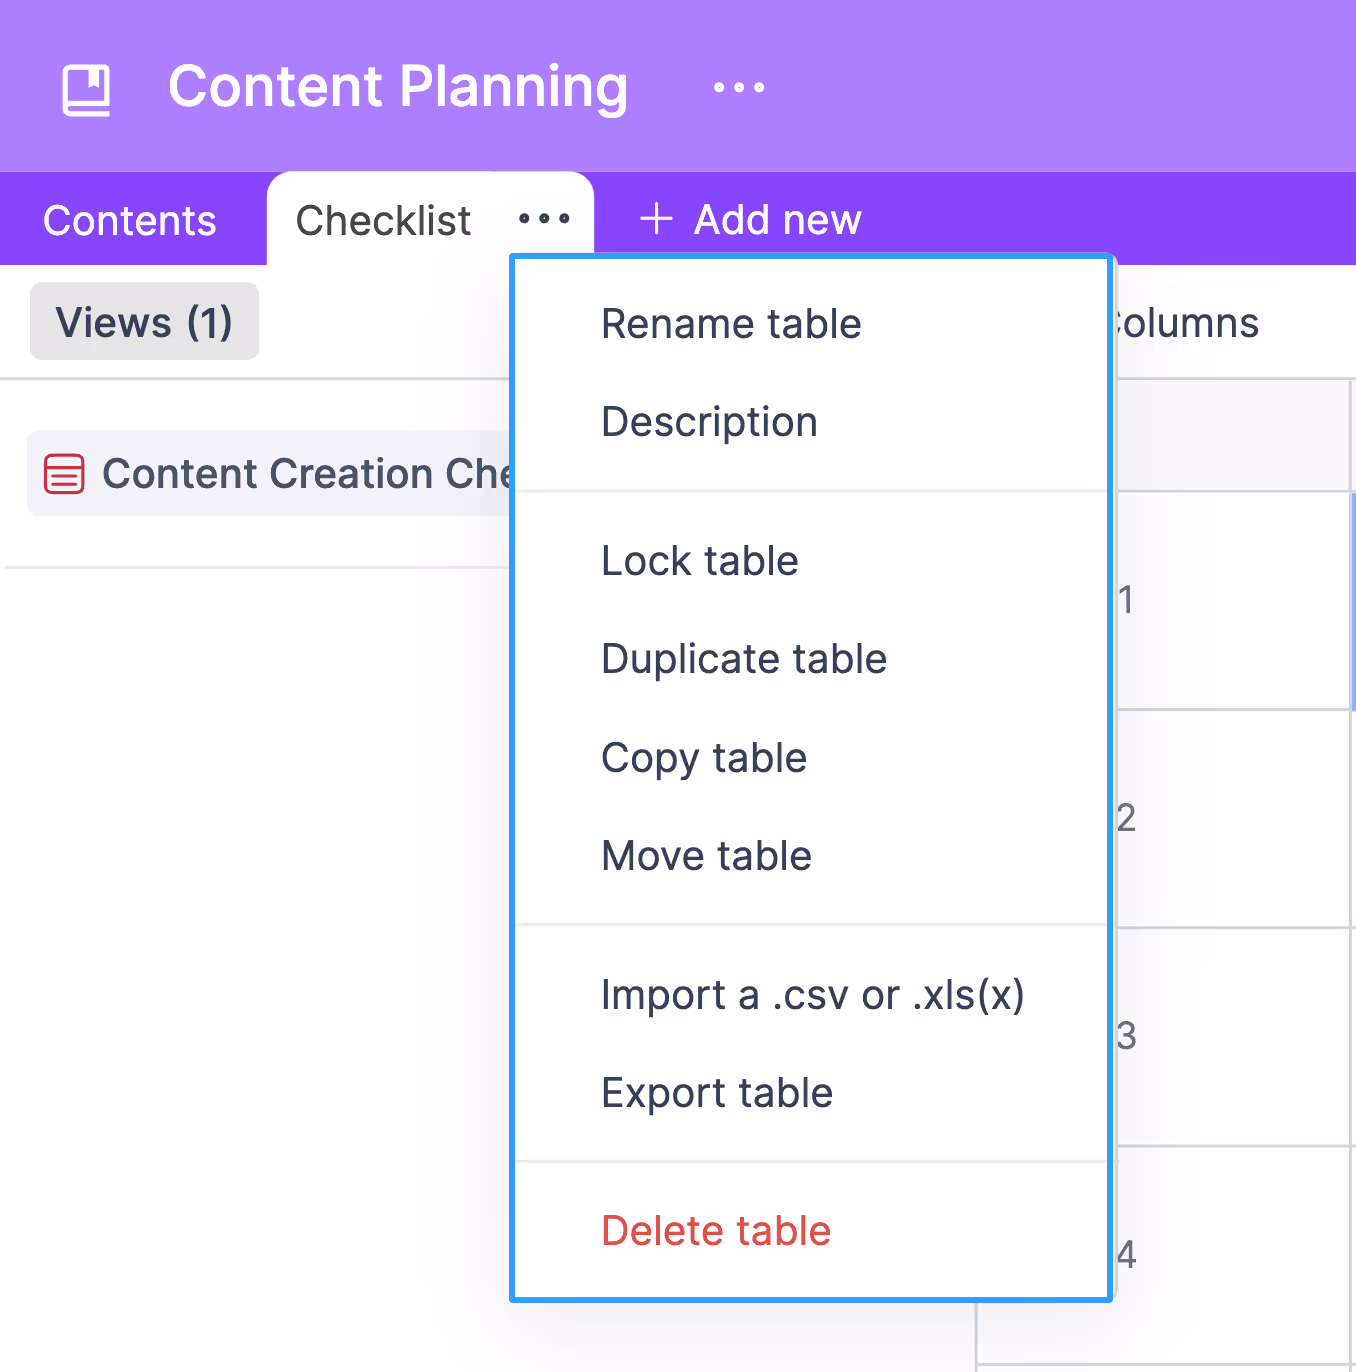
- Use the options next to each table to rename, duplicate, move, or delete it.
- Lock tables for editing or unlock them as needed.
Exporting tables
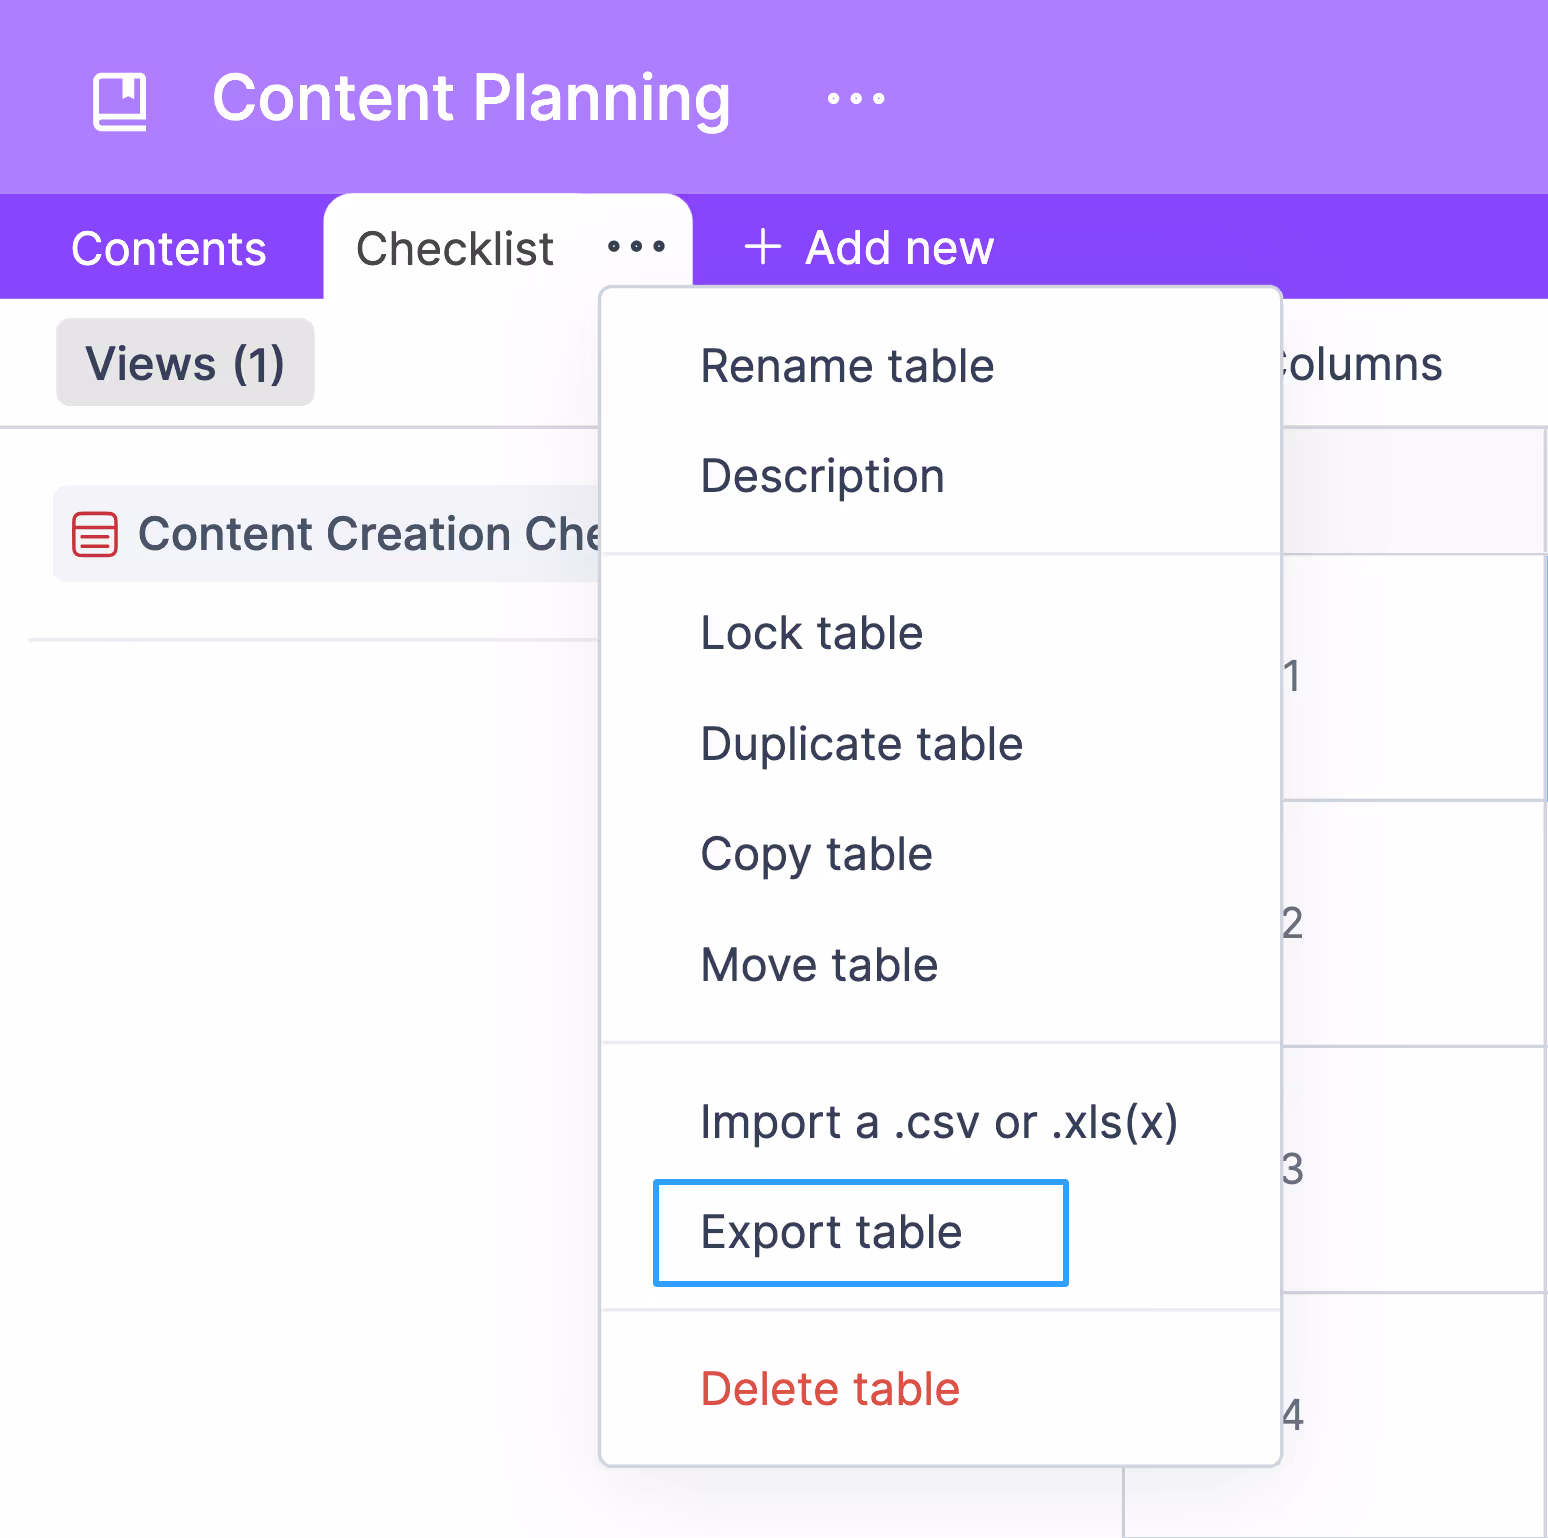
- Select “Export table” from the table options.
- Choose your export format and download the table to your device.
Conclusion
Mastering Workspaces, Projects, and Tables in Retable unlocks a world of efficiency and collaboration for your team. With these tools, you can seamlessly organize, share, and manage your data, all while customizing the platform to fit your project’s unique needs. Dive in, explore, and transform the way you work with Retable. 🌟
Maximize your Retable experience by starting for free today! Explore the Retable Academy for a wealth of helpful resources to enhance your journey.
more
Related Resources
.avif)
.avif)
.avif)
Create your smart data management solution
Plan, track, and analyse with your ease. Transform your data with an all-in-one platform, collaborate with your teammates.
Try for free!