Managing your data efficiently is crucial, and Retable offers essential features to help you do just that. In this blog post, we'll guide you through creating, editing, deleting, and expanding records in Retable. Let's dive in! 🚀
Table of contents
- Creating new rows
- Managing and editing rows
- Dragging and dropping rows
- Row detail view
- Customizing row sizes
Creating new rows
In Retable, a "row" refers to a horizontal line of cells in a table. Each row typically contains a record or a unit of data, with each cell in the row representing a specific attribute or field of that record.
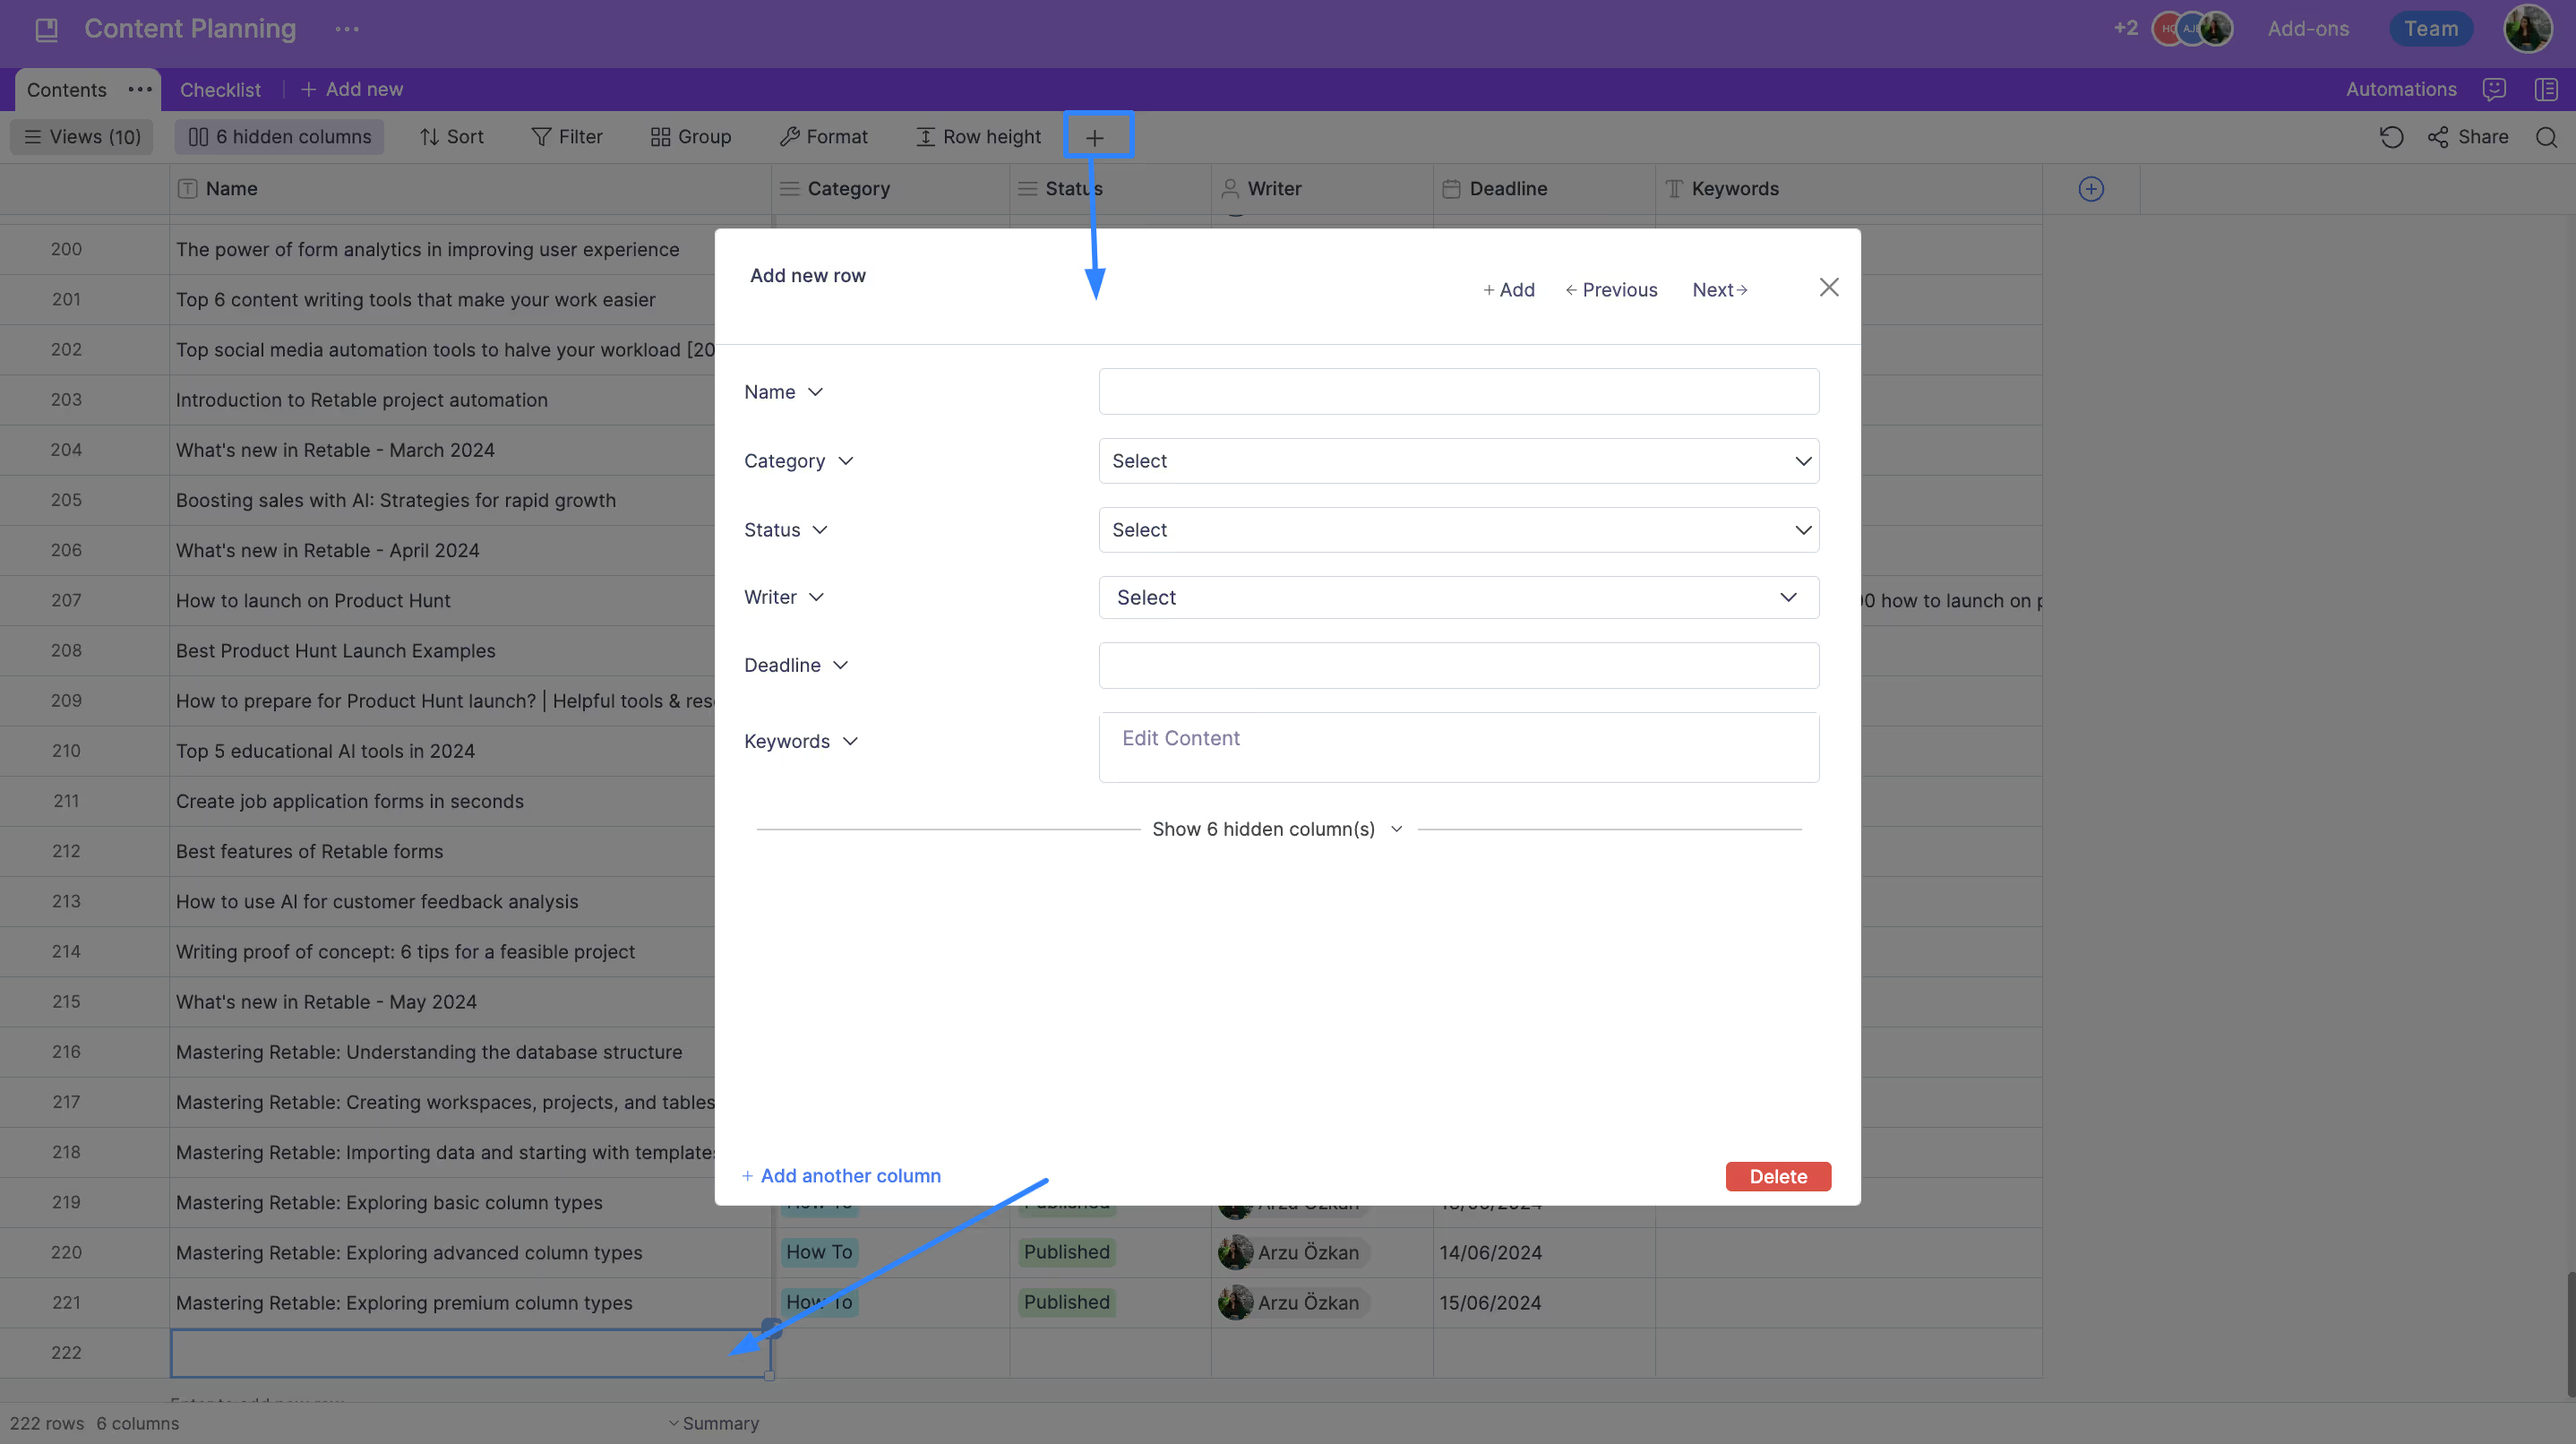
Adding new rows in Retable is simple and intuitive, allowing you to quickly expand your dataset with relevant information.

How to create new rows:
- Click on the "Add Row" button at the bottom of your table or use the shortcut to insert a new row.
- Fill in the required fields with your data. Each row represents a unique entry in your dataset, and you can customize the fields to suit your needs.
Understanding the structure and functionality of rows is crucial for efficient data management. Each row consists of multiple fields that can be customized to store different types of data, such as text, numbers, dates, and more. You can modify the columns to fit your data requirements, ensuring that each row contains the necessary information.
Managing and editing rows
Retable provides various tools to manage and edit your rows, making it easy to keep your data up-to-date and accurate.
Editing existing data:
- Click on any cell to edit the data directly. Retable supports inline editing for quick updates.

- For more detailed edits, open the row detail view by clicking on the expand icon. This allows you to see all fields in a vertical layout, making it easier to manage complex data.
Dragging and dropping rows
Reordering rows is a breeze with Retable's drag-and-drop functionality, helping you organize your data as needed.

Reordering rows:
- Click and hold the drag handle on the left side of the row, then move it to the desired position.
- This feature is especially useful for prioritizing tasks or organizing data in a specific order.
Row detail view
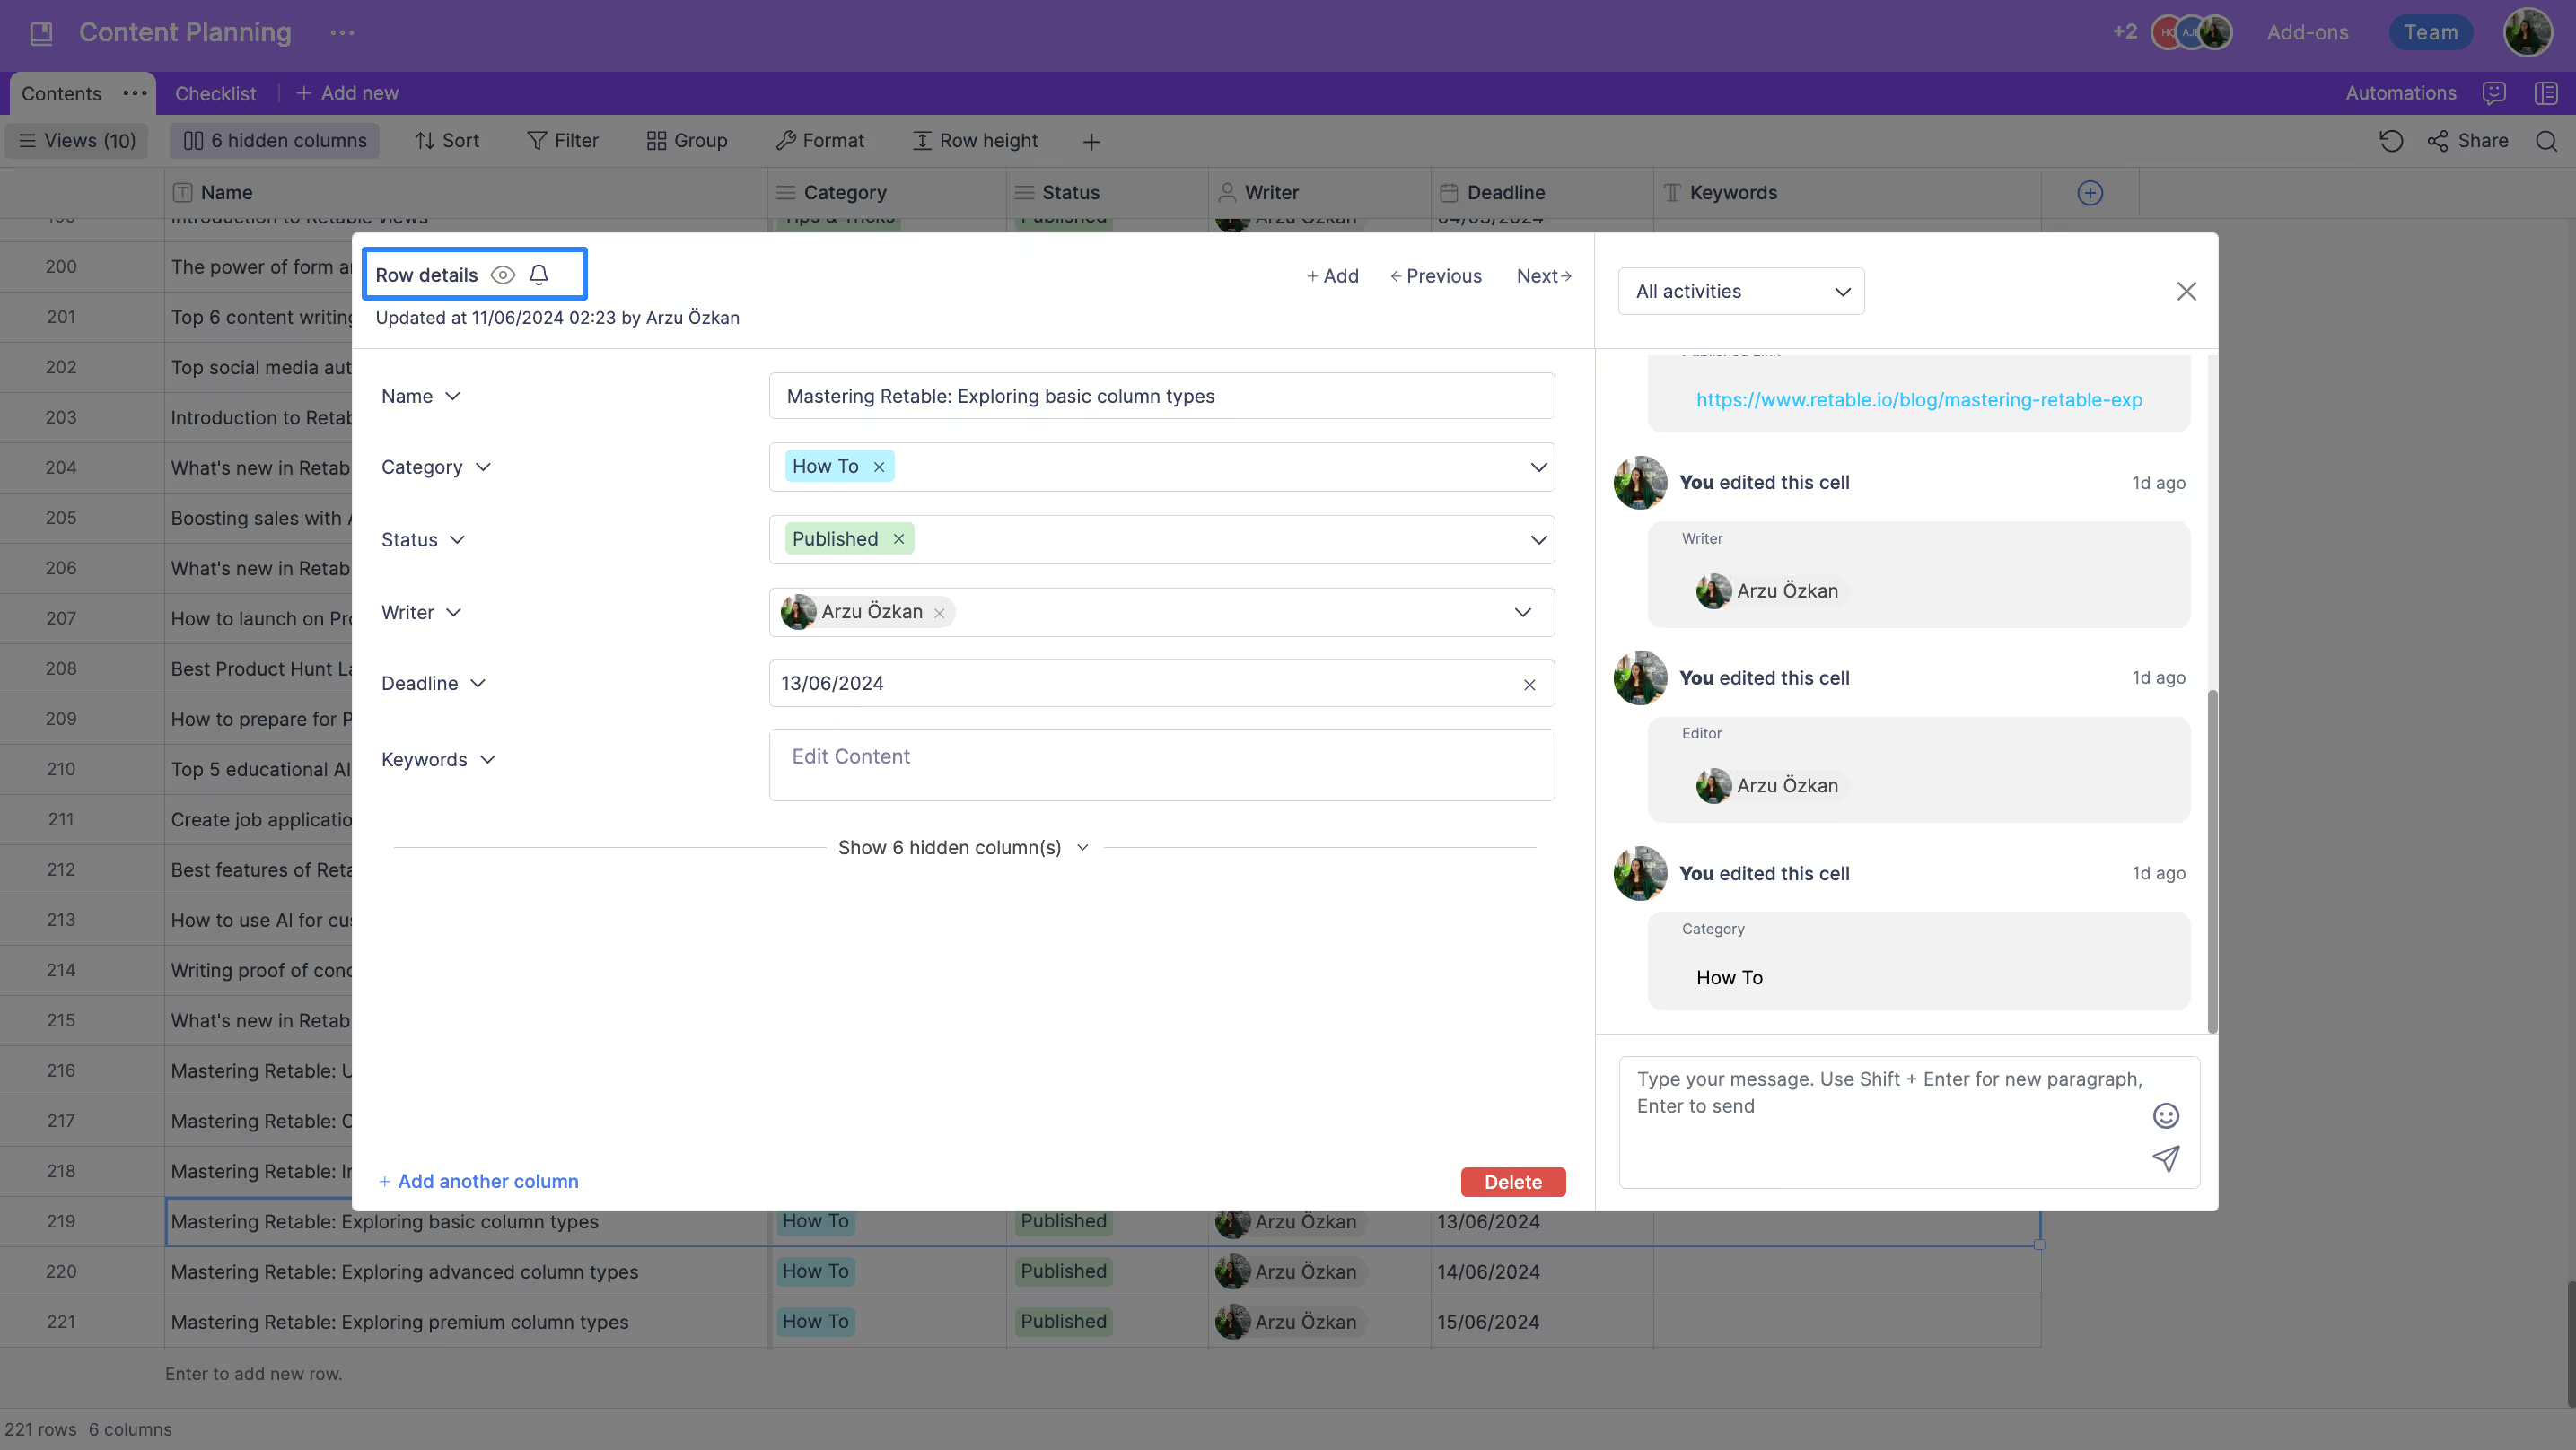
The row detail view offers an expanded perspective of your data, allowing you to see all the information in a vertical format.
Accessing row details:
.avif)
- Click on the expand icon on the right side of your table to open the row detail view.
- This view is displayed in the top right corner and provides a comprehensive look at all the fields in the row, making it easier to review and edit data.
Customizing row sizes
Adjusting the size of rows helps you focus on the most important data and improves readability.
Adjusting row height:
.avif)
- Customize the height of the rows by clicking the row height option. Select between short, medium, and tall.
- This feature allows you to optimize the view of your table, ensuring that critical information is easily accessible.
By mastering these features, you can efficiently manage your data in Retable. Whether you are adding, editing, deleting, or expanding rows, Retable provides the tools you need to keep your datasets accurate and well-organized. Take advantage of these functionalities to streamline your data management tasks and enhance your productivity in Retable. 🌟
To get the most out of Retable, start using it for free today and check out the Retable Academy, where you'll find a wealth of helpful resources. Explore tutorials, guides, and tips crafted to help you harness Retable's powerful features and improve your data management skills.
more
Related Resources
Create your smart data management solution
Plan, track, and analyse with your ease. Transform your data with an all-in-one platform, collaborate with your teammates.
Try for free!
.avif)

.avif)
.avif)
.avif)