.avif)

Enhance team collaboration within Retable by utilizing flexible invitation options to streamline your team-building process. Whether you prefer the traditional method of sending invites via email or the swift 'invite by link' feature, Retable equips you with the tools to quickly integrate new members into your organization, fostering a cohesive and collaborative environment. 🌟
Table of contents
Adding members to the organization
Users you invite to your Retable organization can benefit from all of Retable's premium features for free. Inviting your colleagues to your organization allows you to easily collaborate with them on your Retable projects and workspaces.
Invite by email
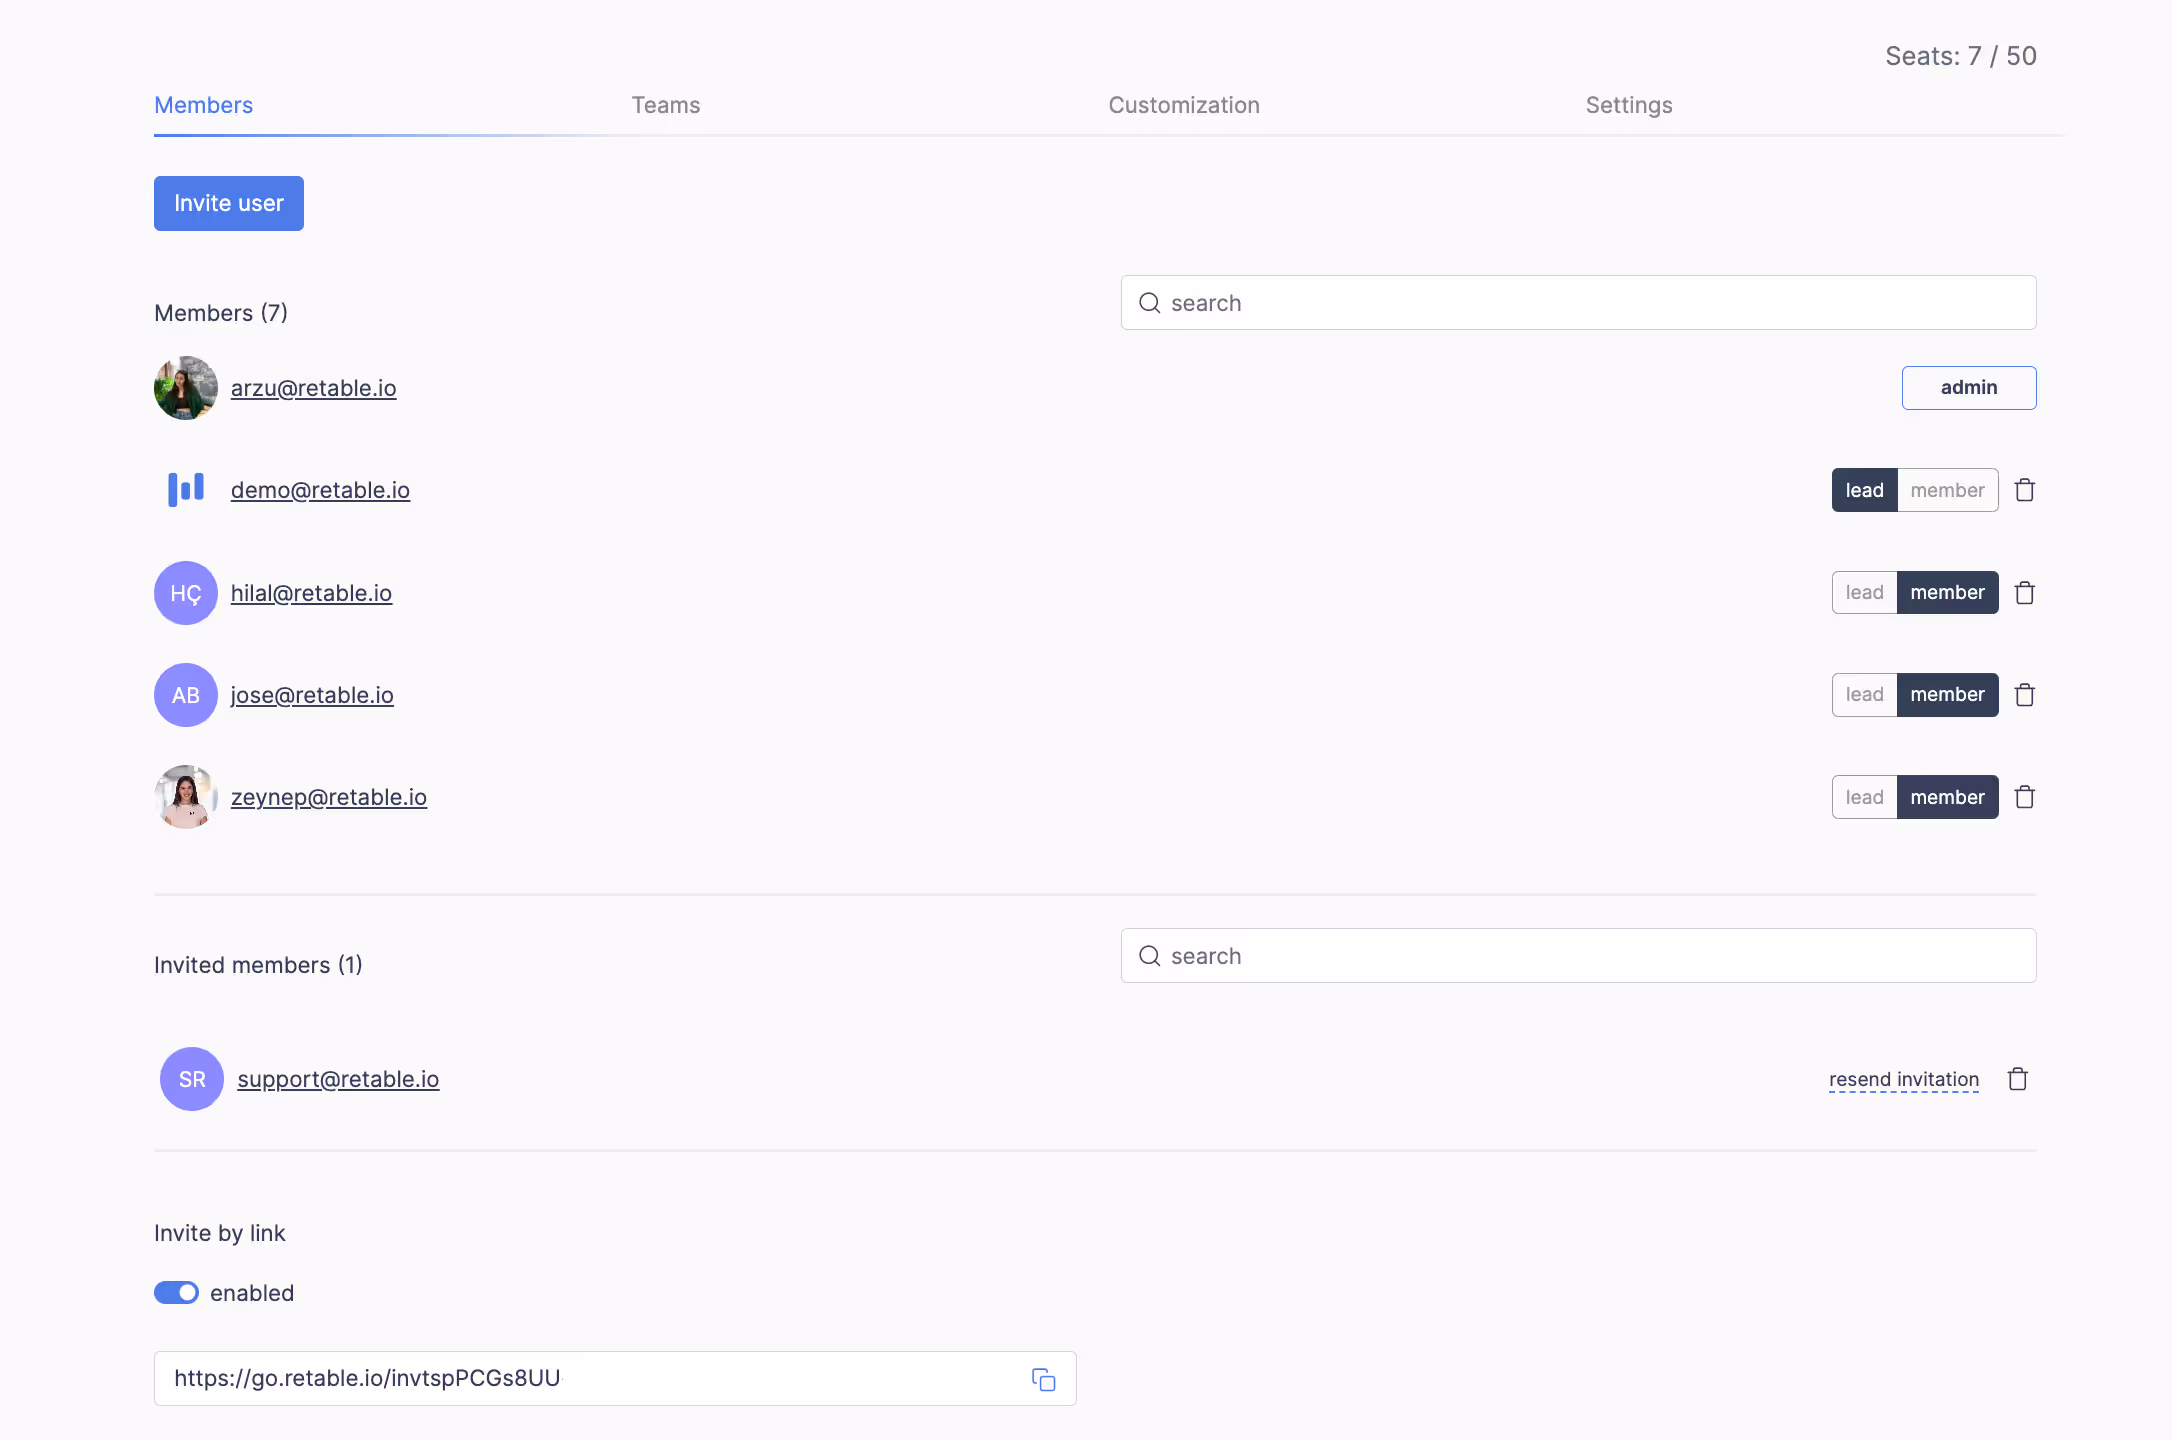
- Open your organization dashboard
- Click on the "Members" tab
- Click thee "Invite user" button
- Enter the email addresses of the individuals you wish to invite your organization.
- Select the role of the user you want to invite and click the "invite" button.
- Retable will send an email to the user you have invited. Users who click the confirmation link in the email can join your organization.
Invite by link
- Open your organization dashboard
- Click on the "Members" tab
- Enable the activation toggle in the "Invite by link" field at the bottom of the Members tab.
- Retable will generate a unique, shareable link for you. This method allows you to bypass individual email entries and is convenient for inviting multiple people simultaneously.
Choose between direct email invitations for a personal touch or the invite link for convenience, especially when dealing with large groups. The invite link is particularly effective for quickly onboarding a significant number of team members without the need for individual email addresses.
Both methods are designed to integrate seamlessly with your workflow, ensuring a smooth transition and immediate collaboration for new team members.
Adding members to the team
You can efficiently manage user access by adding users to teams within your organization. To do this, add the user to your organization first, and then include them in the desired teams. A user can participate in multiple teams without limitation. Additionally, you can assign team leads who will have the authority to manage other users within their respective teams.
The primary benefit of creating teams within your Retable organization is the streamlined sharing of workspaces. By organizing users into teams, you can share workspaces directly with teams rather than individual users. This means that when a user leaves a team, they will automatically lose access to the associated workspaces, eliminating the need for manual adjustments.
How to add members to the teams
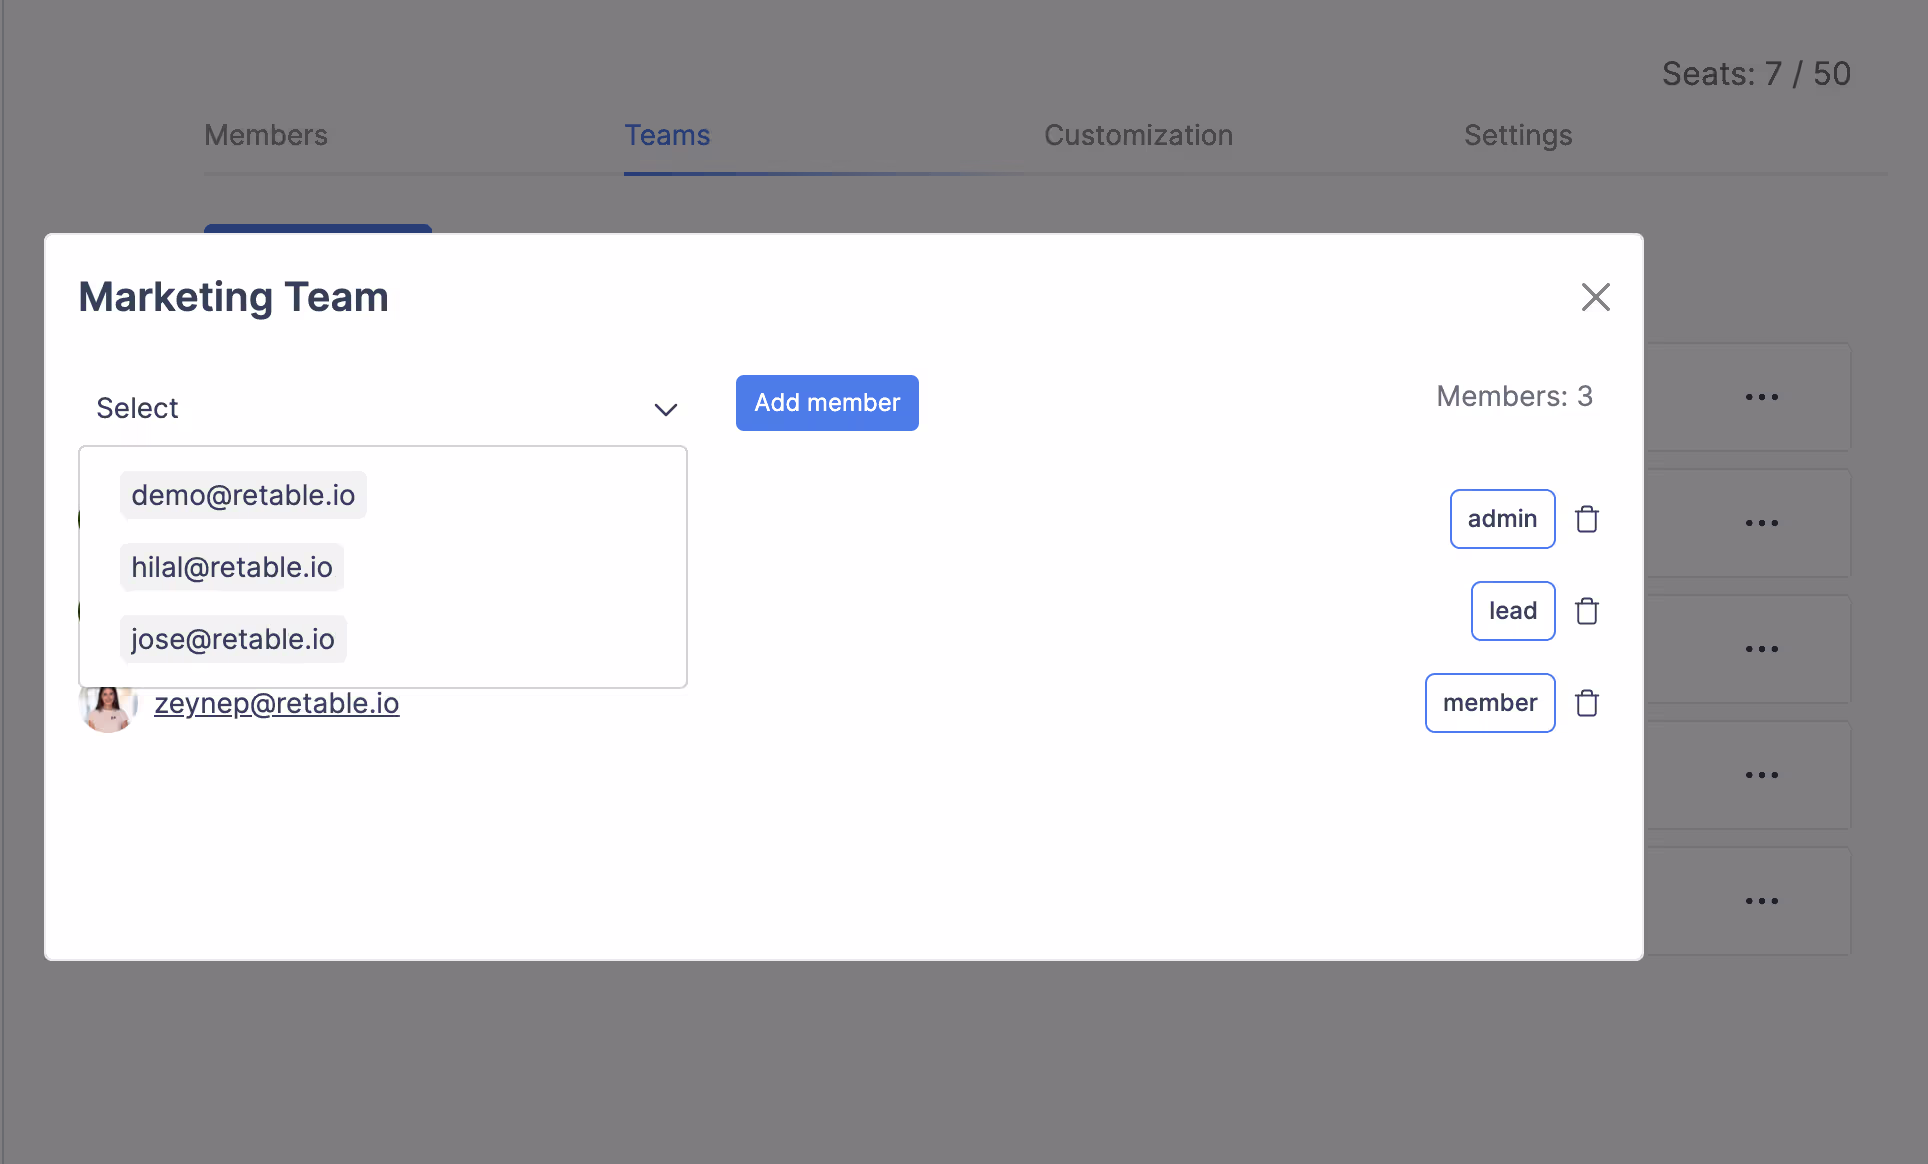
- Open your organization dashboard
- Click on the "Teams" tab
- If you don't have a team, start by creating a team. If you already have a team, click on the name of your existing team
- Click on your team's name
- A pop-up window will appear, displaying the current members of your team
- At the top of this pop-up, you'll see a select menu. Click on it and choose the user you want to add from the list of users in your organization
- After selecting the user, click the "Add Member" button to finalize the addition
Sharing a workspace with a team
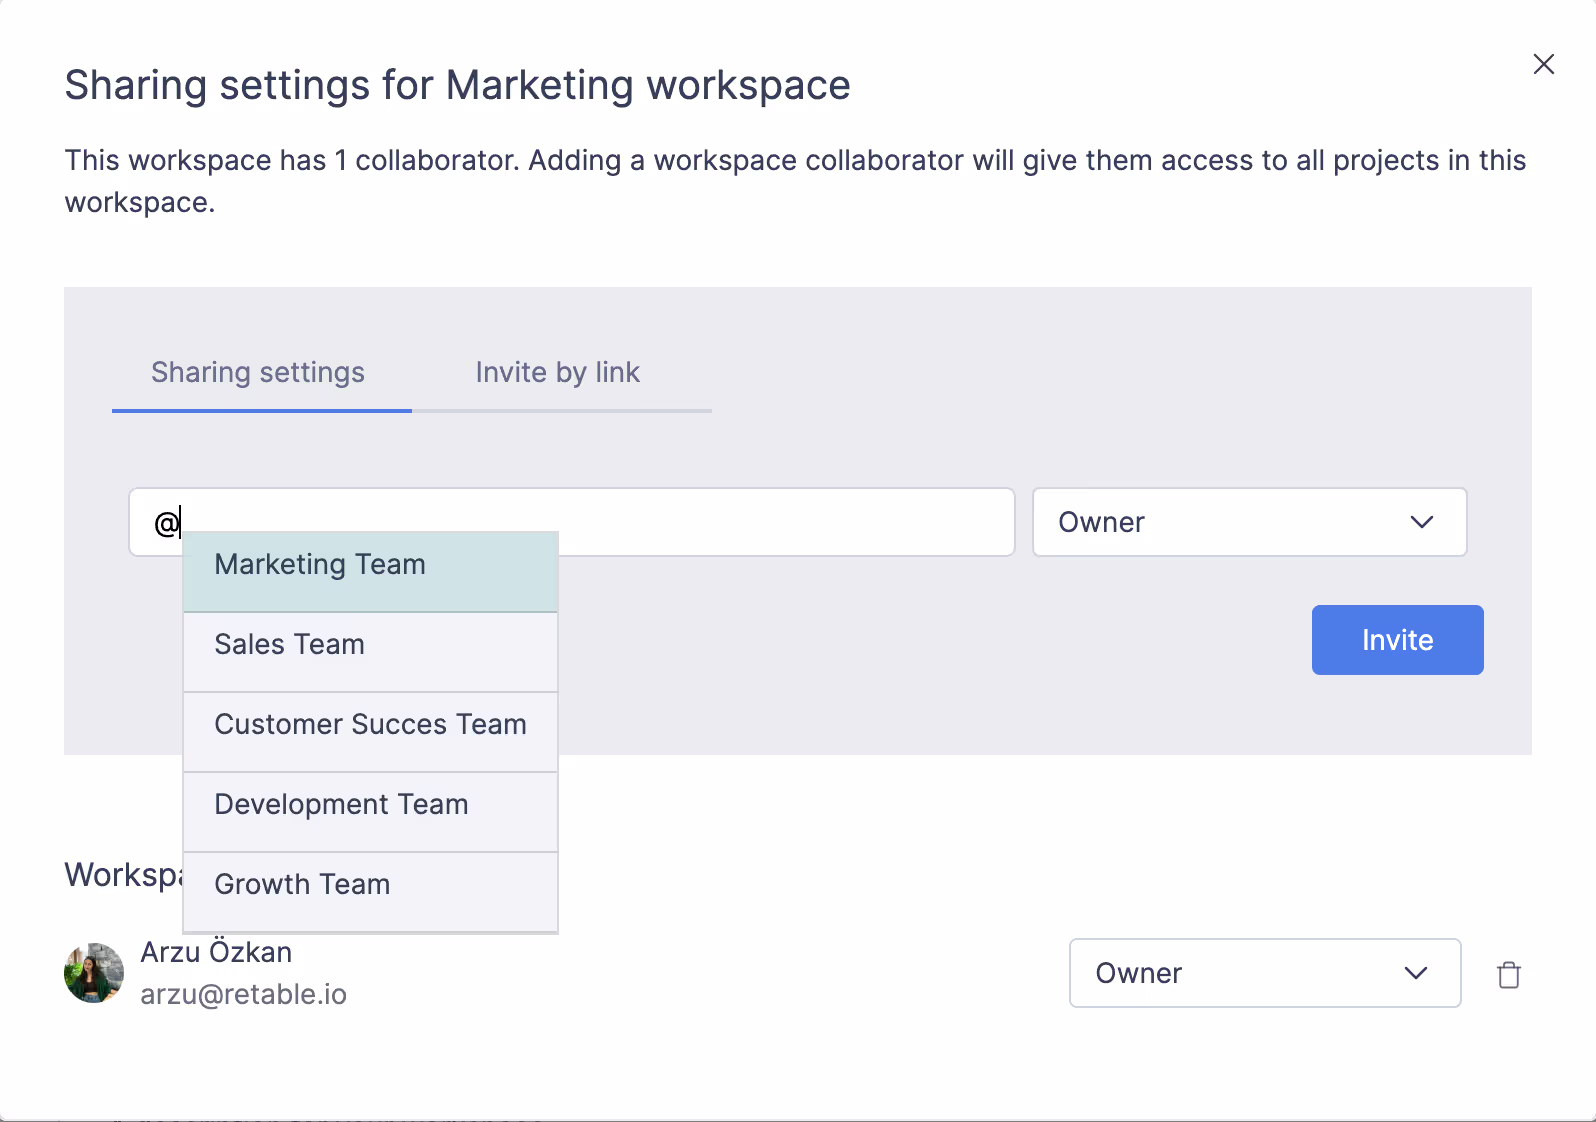
- Navigate to the workspace you want to share.
- Click on the sharing settings option, usually found in the workspace menu.
- In the sharing screen, enter the @teamname tag to share the workspace with all members of that team. This automatically grants access to all users in the specified team.
- Assign specific roles to the team within the workspace. Roles can include Admin, Editor and Viewer.
- If you need to change access or roles later, simply update the sharing settings and adjust the team roles as needed.
- When members join or leave the team, their access to the workspace will automatically update based on their team membership.
By utilizing these features, you can ensure that your team is well-organized and that collaboration flows smoothly. The ability to quickly invite members and manage access through team roles simplifies project management and enhances overall productivity in Retable.
Elevate your collaborative efficiency with Retable! Sign up for free today and dive into the Retable Academy. Discover a wealth of resources, including tutorials, guides, and tips, all crafted to help you harness Retable's robust features and enhance your data management skills. 🚀
more
Related Resources
.avif)
.avif)
.avif)
Create your smart data management solution
Plan, track, and analyse with your ease. Transform your data with an all-in-one platform, collaborate with your teammates.
Try for free!